In the first local model call and the first Azure model call, I sent one question from C# and printed the model’s answer.
Then you ask a follow-up: “Make that cheaper.”
If the next request only contains those three words, the model has no itinerary to revise. The application needs to carry the conversation forward.
This time I wanted to build a small trip planning assistant that keeps earlier messages and follows a clear system prompt. We will build it twice: first with Ollama on your machine, then with a gpt-5-nano deployment in Azure. Both console apps keep their flow visible in Program.cs.
The cloud console app still runs on your computer. Azure hosts the model that it calls; we are not deploying an application server or a website in this exercise.
All the code needed for this version is included below.
Prerequisites
For the local version, have these ready:
- .NET 10 SDK
- Ollama, running locally
For the cloud version, you also need:
- an Azure account with an active subscription
- permission to create an Azure OpenAI resource and deploy a model
- available quota for a chat model in your chosen deployment location
Check the .NET SDK before starting:
dotnet --version
This walkthrough uses .NET 10 and pins the cloud app’s OpenAI package to version 2.10.0. Azure calls incur usage charges, so keep the test conversation short and remove temporary resources when you finish.
Create the two console projects
Create a working folder, then stay in it for the commands throughout this post:
mkdir trip-planner
cd trip-planner

dotnet new console --name TripPlannerLocal --output local/TripPlannerLocal --framework net10.0
dotnet new console --name TripPlannerCloud --output cloud/TripPlannerCloud --framework net10.0

dotnet add cloud/TripPlannerCloud/TripPlannerCloud.csproj package OpenAI --version 2.10.0
The local app uses .NET’s built-in HTTP and JSON support. The cloud app adds the OpenAI client package. You should now have one Program.cs in each project folder.
All dotnet run --project ... commands below start from this trip-planner folder, so you can switch between the apps without changing directories.
What the application remembers
The conversation has three message roles:
| Role | Purpose |
|---|---|
| System | Instructions for how the assistant should respond |
| User | Your request or follow-up |
| Assistant | The model’s previous reply |
When you ask the second question, the app sends the system instruction, the first question, the first answer, and the new question. That is how “make the second day cheaper” gets its meaning.
The history is a list in memory. Both apps send it on every request and append the assistant’s reply afterward. Exiting the process clears the conversation.
I used the same system prompt in both apps. It asks for practical, concise travel suggestions and tells the assistant not to invent live prices or booking availability. Those instructions guide its behavior; they do not give it access to live travel information or guarantee that every suggestion is correct.
Prepare Ollama
If Ollama is not already running through its desktop application or service, start it in another terminal:
ollama serve
Leave that terminal running. If Ollama is already serving requests, you can use the existing instance.
Back in your working terminal, check the installed models:
ollama list
I used the same local model as in the earlier post:
ollama pull gemma4:e2b-it-q4_K_M
You can use another chat model by changing model in the code. Check its support for the think parameter too; this sample disables thinking for the model used in the demonstration.
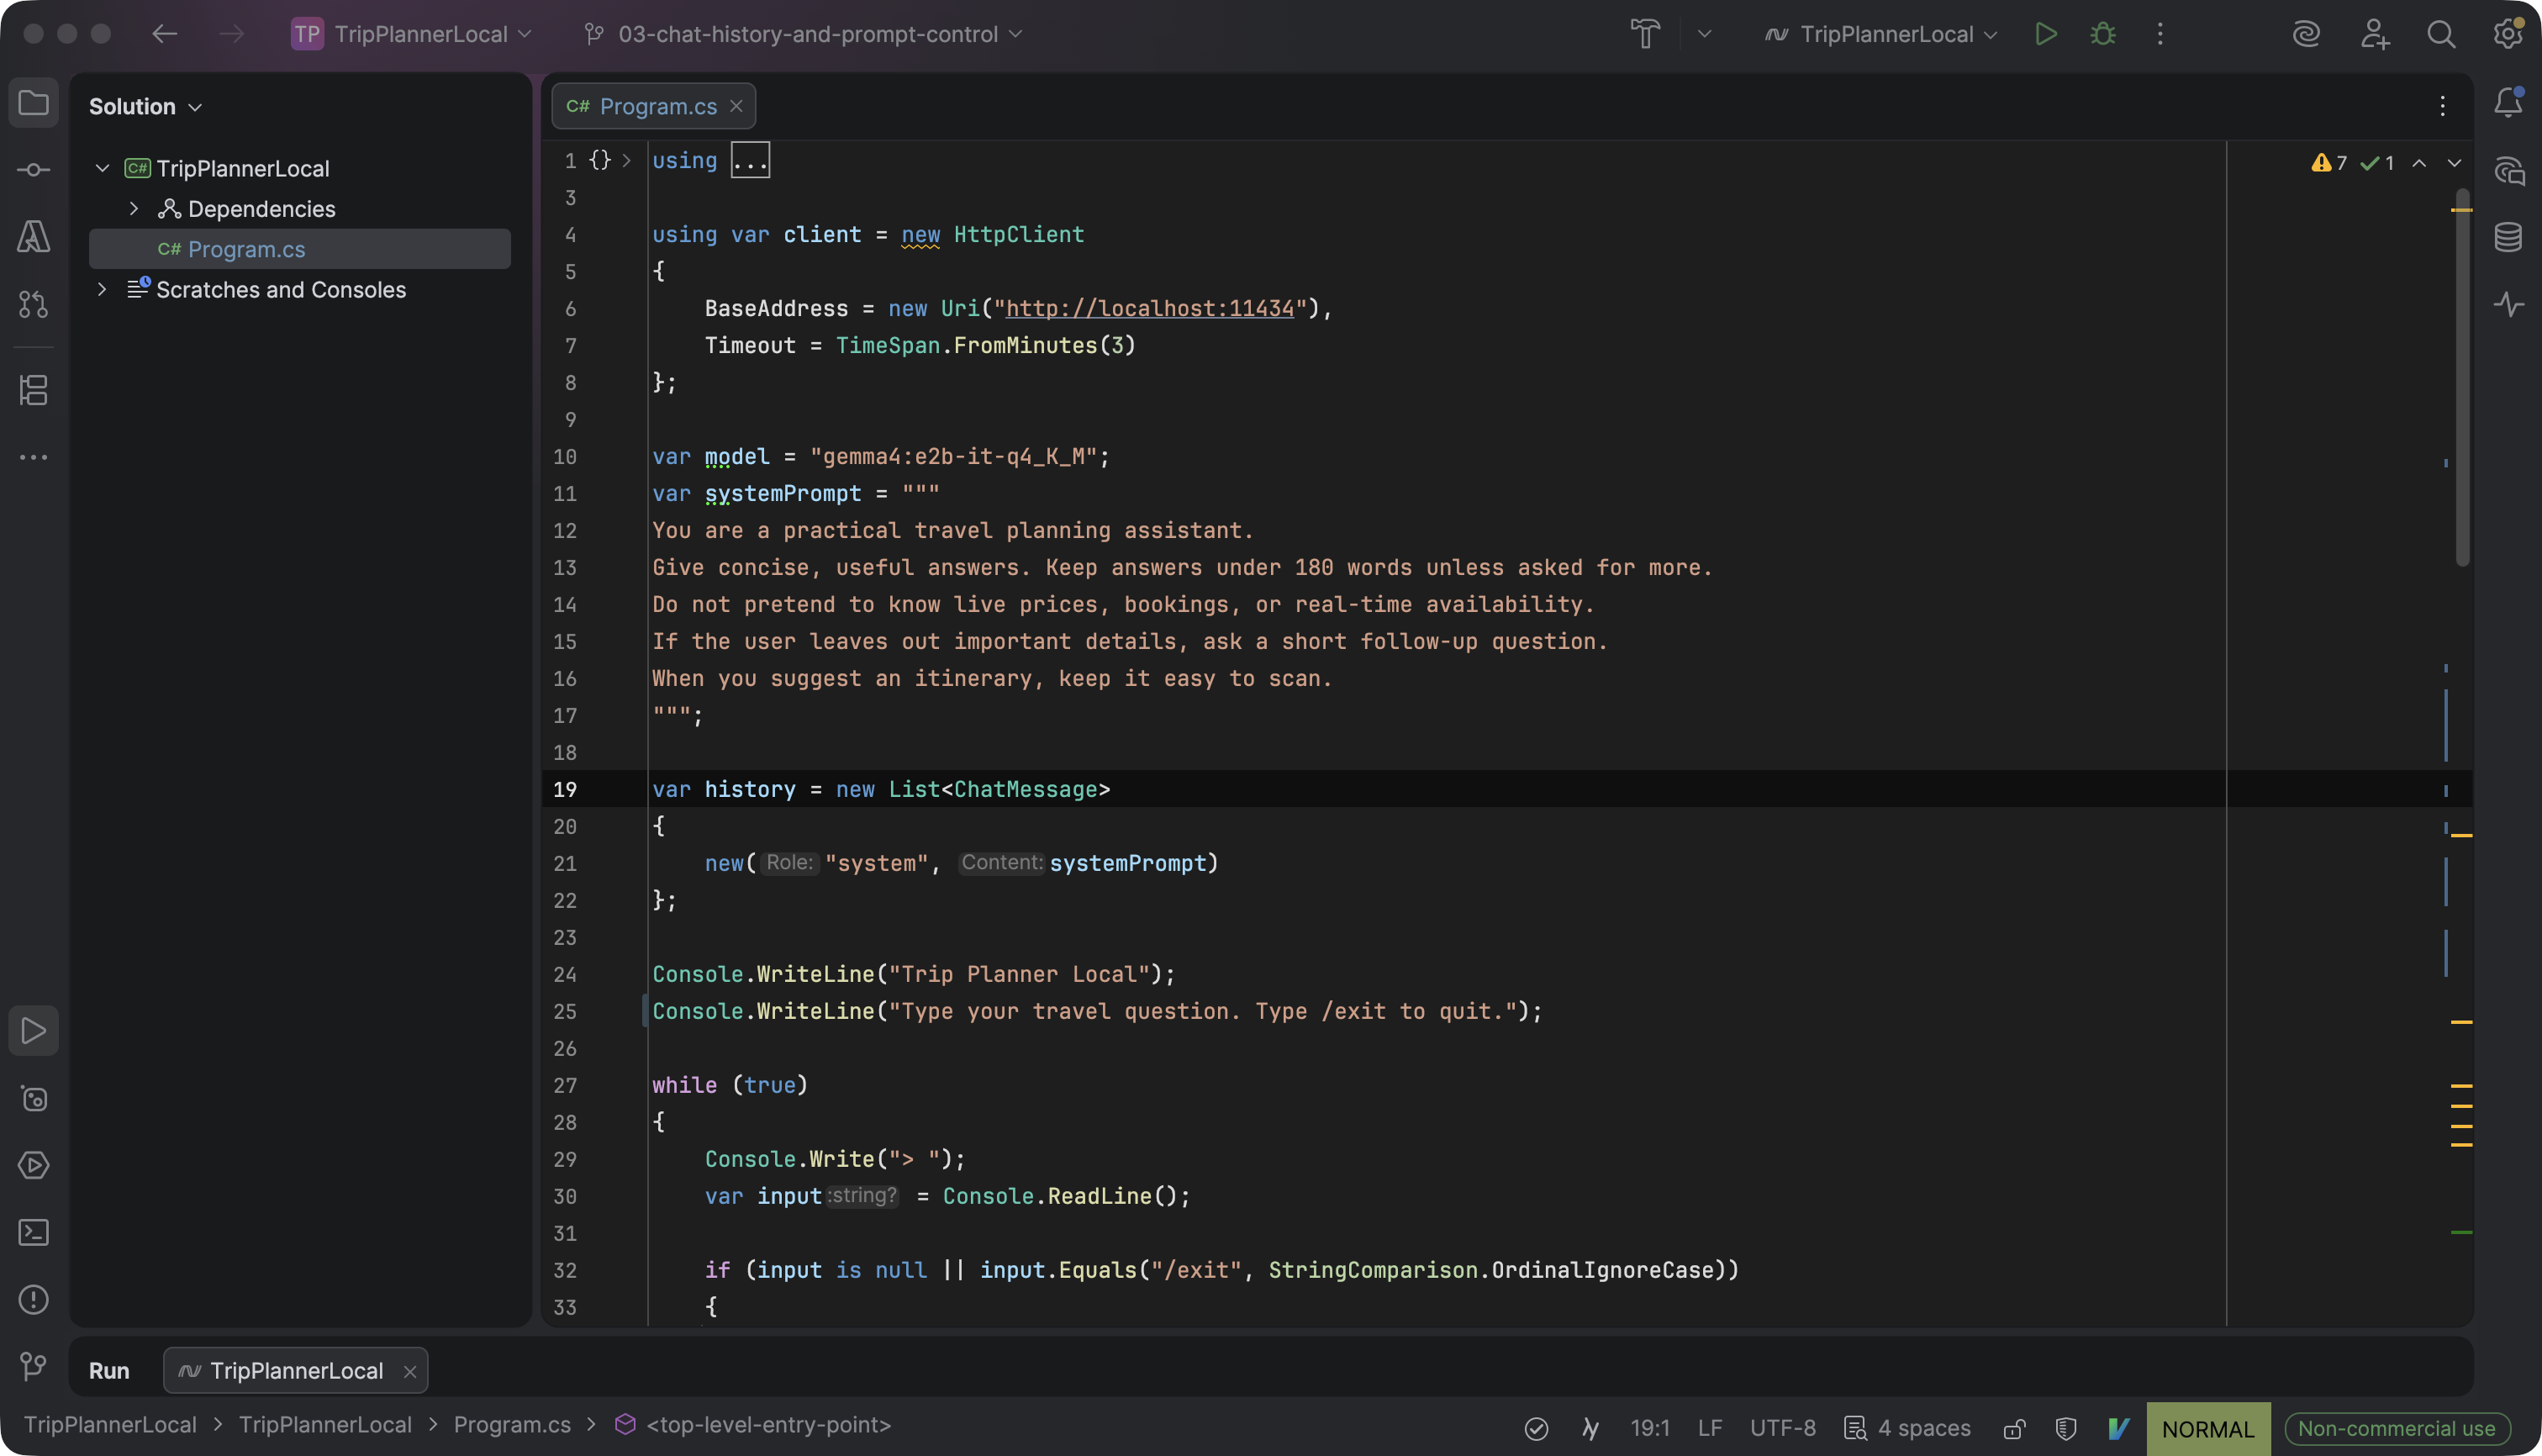
Add the complete local program
Open local/TripPlannerLocal/Program.cs, replace its generated contents with the following code, and save it:
using System.Net.Http.Json;
using System.Text.Json.Serialization;

using var client = new HttpClient
{
    BaseAddress = new Uri("http://localhost:11434"),
    Timeout = TimeSpan.FromMinutes(3)
};

var model = "gemma4:e2b-it-q4_K_M";
var systemPrompt = """
You are a practical travel planning assistant.
Give concise, useful answers. Keep answers under 180 words unless asked for more.
Do not pretend to know live prices, bookings, or real-time availability.
If the user leaves out important details, ask a short follow-up question.
When you suggest an itinerary, keep it easy to scan.
""";

var history = new List<ChatMessage>
{
    new("system", systemPrompt)
};

Console.WriteLine("Trip Planner Local");
Console.WriteLine("Type your travel question. Type /exit to quit.");

while (true)
{
    Console.Write("> ");
    var input = Console.ReadLine();

    if (input is null || input.Equals("/exit", StringComparison.OrdinalIgnoreCase))
    {
        break;
    }

    if (string.IsNullOrWhiteSpace(input))
    {
        continue;
    }

    var userMessage = new ChatMessage("user", input);

    var request = new OllamaRequest
    {
        Model = model,
        Messages = [.. history, userMessage],
        Stream = false,
        Think = false
    };

    using var response = await client.PostAsJsonAsync("/api/chat", request);
    response.EnsureSuccessStatusCode();

    var payload = await response.Content.ReadFromJsonAsync<OllamaResponse>();
    var reply = payload?.Message?.Content?.Trim();

    if (string.IsNullOrWhiteSpace(reply))
    {
        Console.WriteLine("Assistant: No response received. Please try again.");
        continue;
    }

    history.Add(userMessage);
    history.Add(new ChatMessage("assistant", reply));
    Console.WriteLine();
    Console.WriteLine($"Assistant: {reply}");
    Console.WriteLine();
}

record ChatMessage(string Role, string Content);

class OllamaRequest
{
    public required string Model { get; set; }
    public required List<ChatMessage> Messages { get; set; }
    public bool Think { get; set; }
    public bool Stream { get; set; }
}

class OllamaResponse
{
    [JsonPropertyName("message")]
    public ChatMessage? Message { get; set; }
}
The important API change from the first local post is /api/chat. It accepts messages with explicit role and content fields, and the returned answer is in message.content. The Ollama chat API documentation describes that request and response shape.
PostAsJsonAsync sends the request object as JSON. Stream = false gives this small app a complete reply to read, rather than a sequence of streamed chunks.
Each request contains the saved conversation plus the current question. The app adds the new user and assistant messages to its saved history only after it receives a usable reply, so a failed turn does not affect the next request. Errors surface in the console in this small example; the Common issues section covers the usual setup problems.
Run the local conversation
From the trip-planner folder:
dotnet run --project local/TripPlannerLocal/TripPlannerLocal.csproj
At the first > prompt, enter:
Plan a relaxed 3-day trip to Rome for two adults. Focus on walking and affordable food. Keep the answer brief.
Wait for the full answer, then enter:
Make the second day cheaper: stick to outdoor squares in the morning and leave the afternoon completely unplanned.
The useful check is whether the second answer revises the Rome itinerary while retaining the earlier context.
In the local run, the follow-up kept that context and changed day two. The wording will vary between runs; check that the second answer uses the Rome itinerary from the first turn.
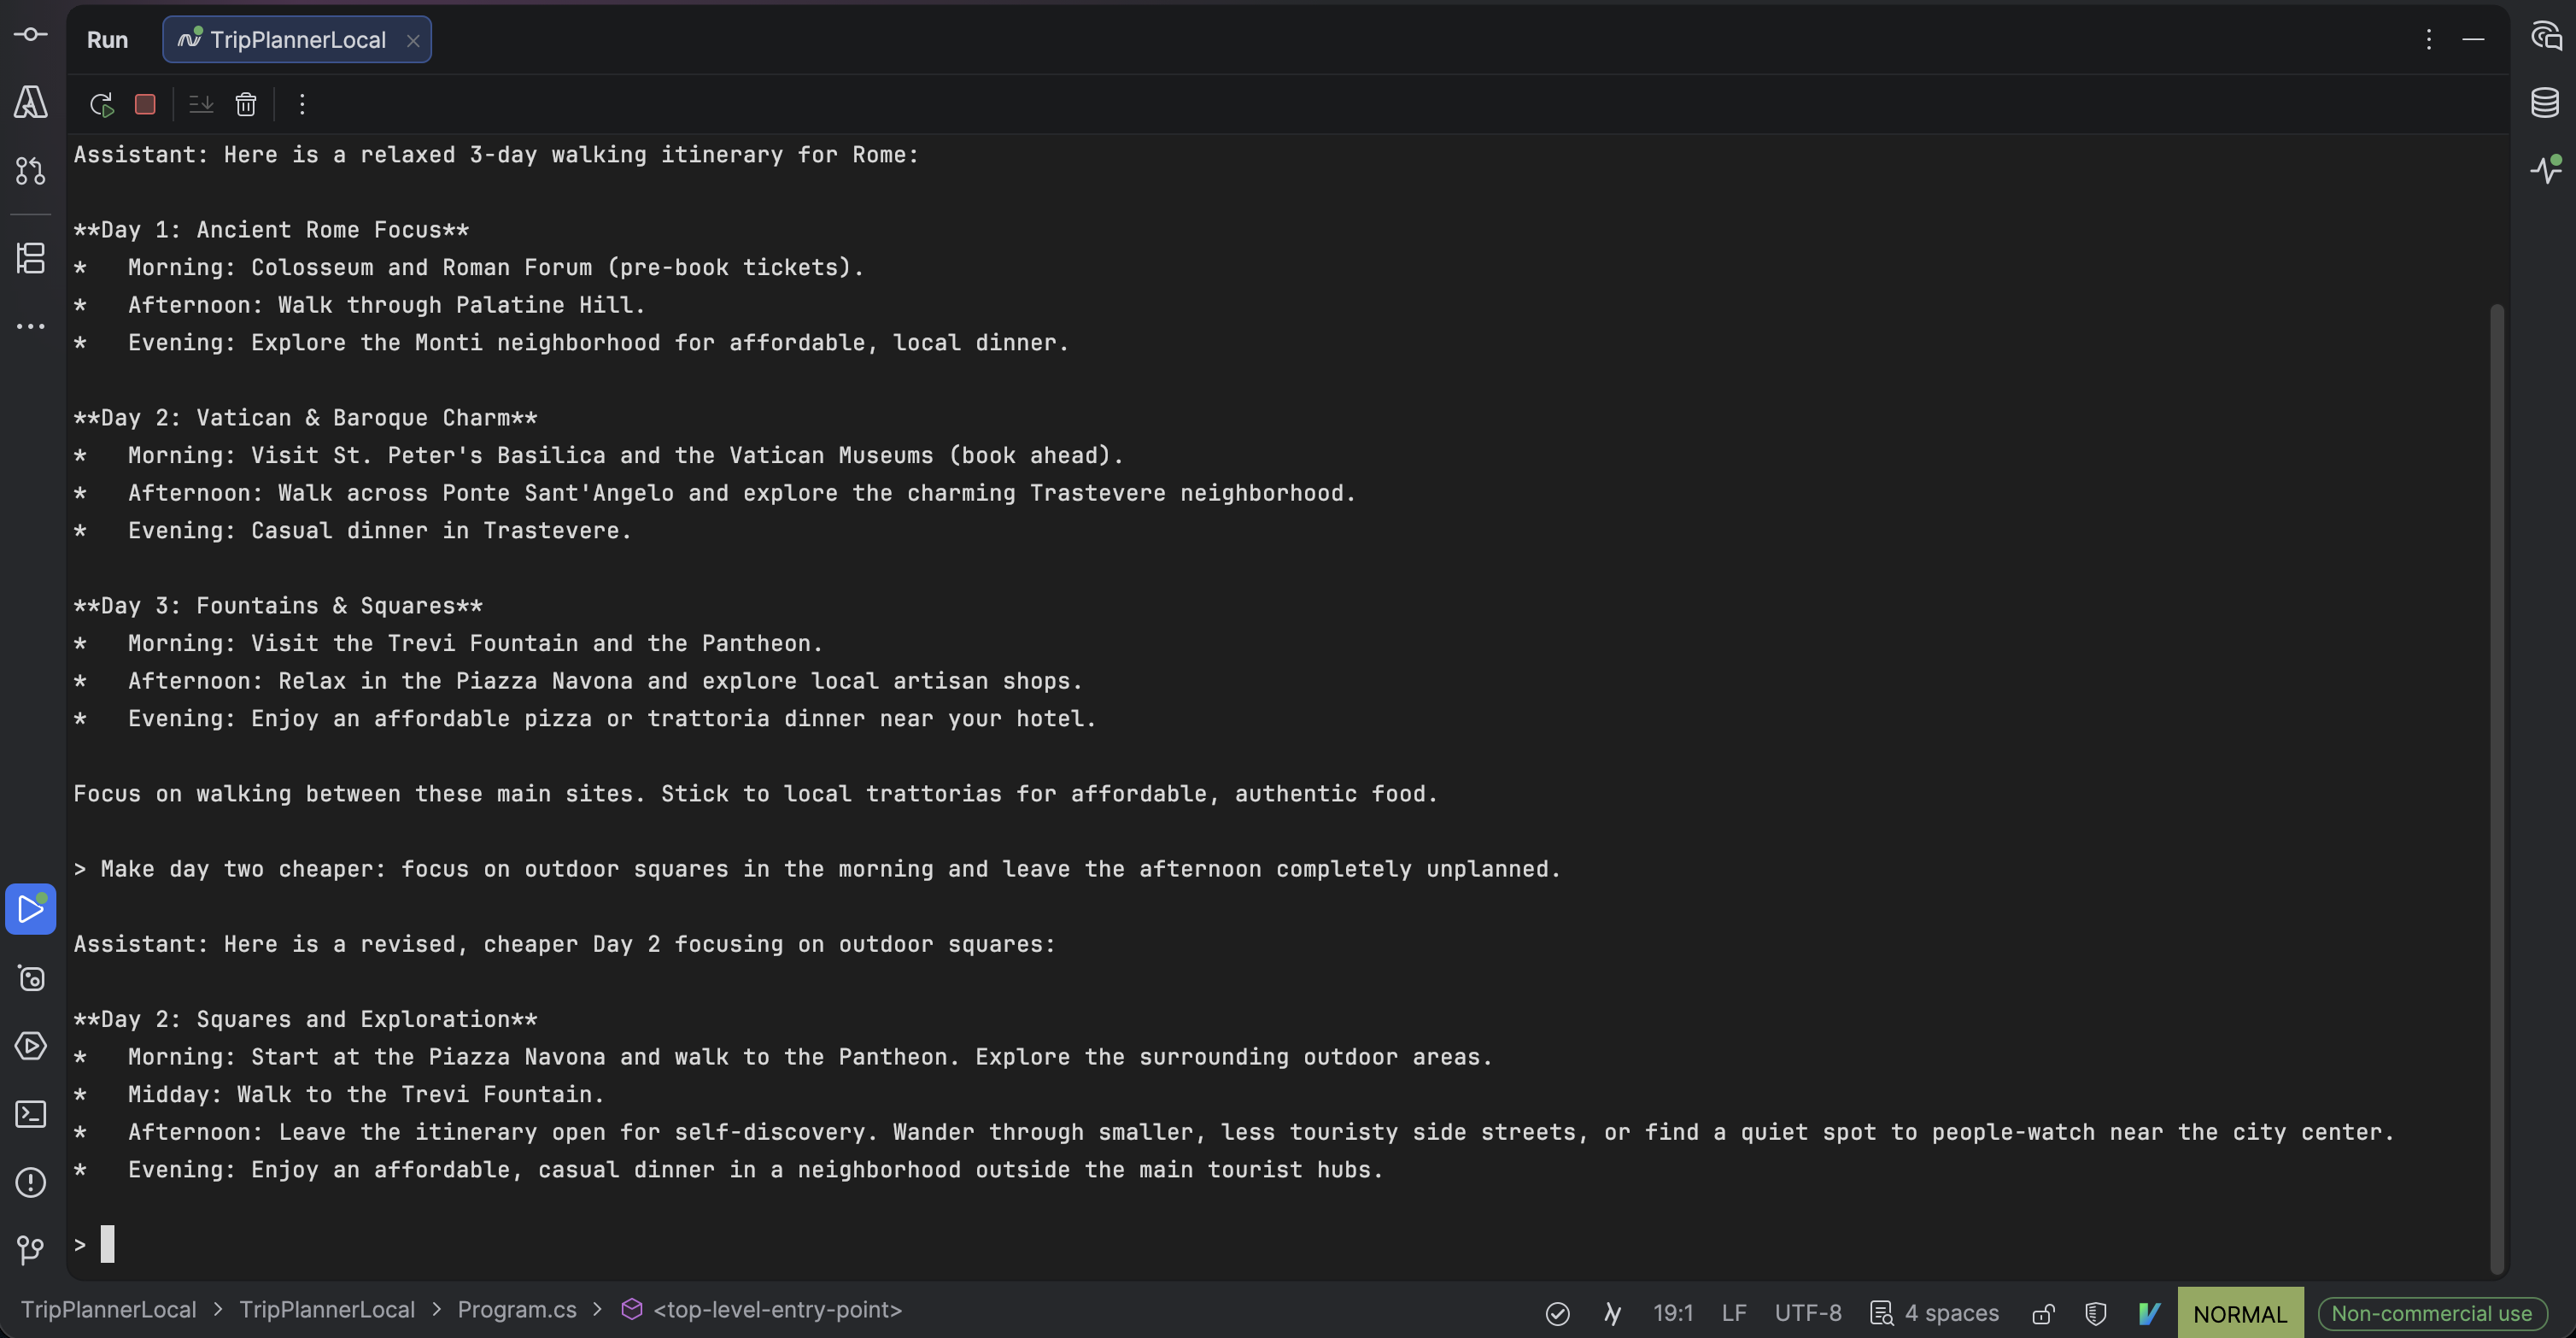
Type /exit to end the session. Blank lines are ignored, and end of input exits cleanly too.
Create an Azure OpenAI resource
Now we will give the same conversation loop a cloud-hosted model.
Open Azure Portal, sign in, and search for Azure OpenAI in the search bar. Open the Azure OpenAI service from the results.
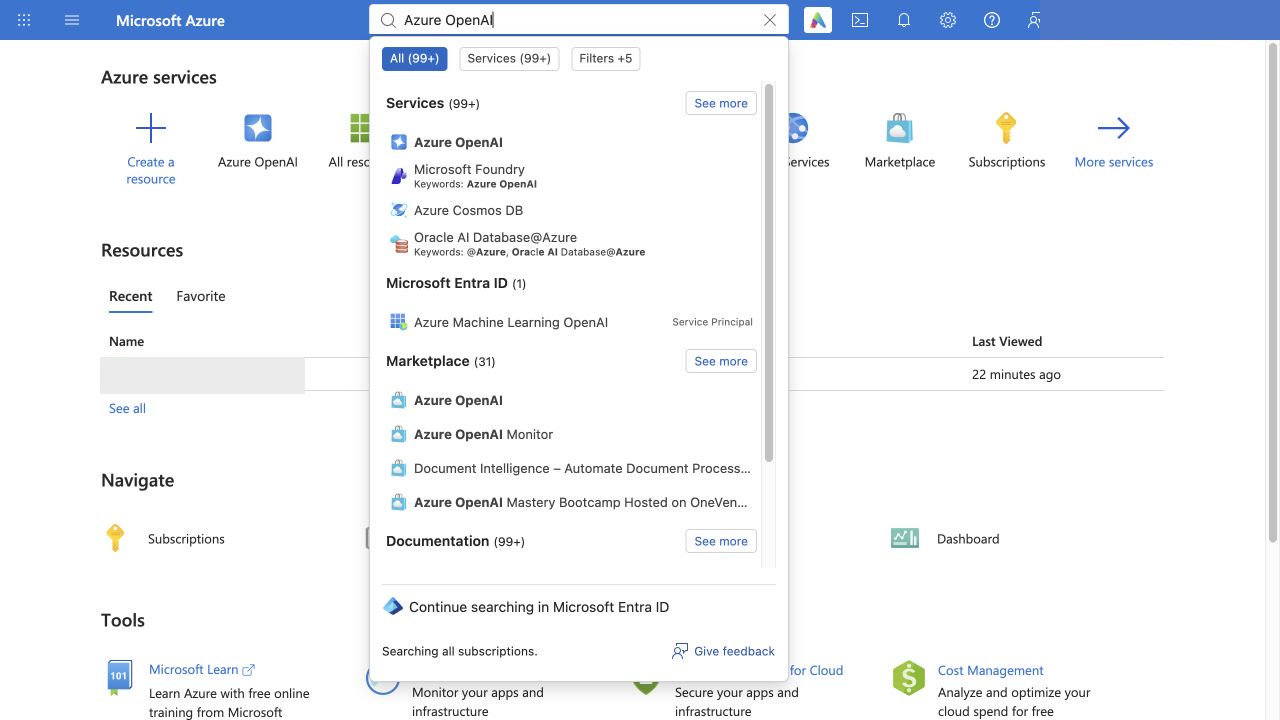
Choose Create, then select Azure OpenAI if the menu offers more than one resource type.
On Basics, open Resource group, choose Create new, enter a name for this demo group, and confirm it. Then fill in the remaining fields:
| Field | What to choose |
|---|---|
| Subscription | Your active Azure subscription |
| Resource group | Create a dedicated group, such as rg-your-demo |
| Region | A region with access to your intended model; I used Sweden Central |
| Name | A unique resource name of your own |
| Pricing tier | Standard S0 |
The resource group is the container we will use for cleanup. The Azure OpenAI resource supplies the model endpoint and its authentication keys. The model deployment, which we create next, is the named model instance that the C# app calls.
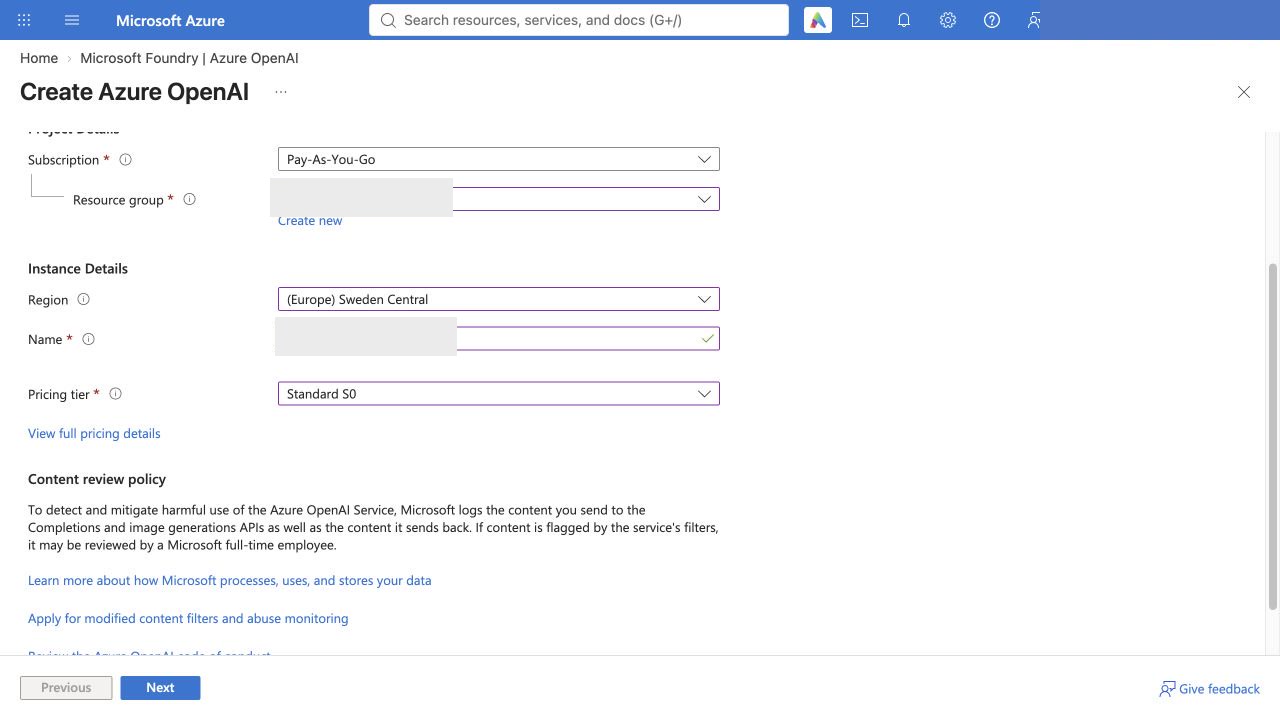
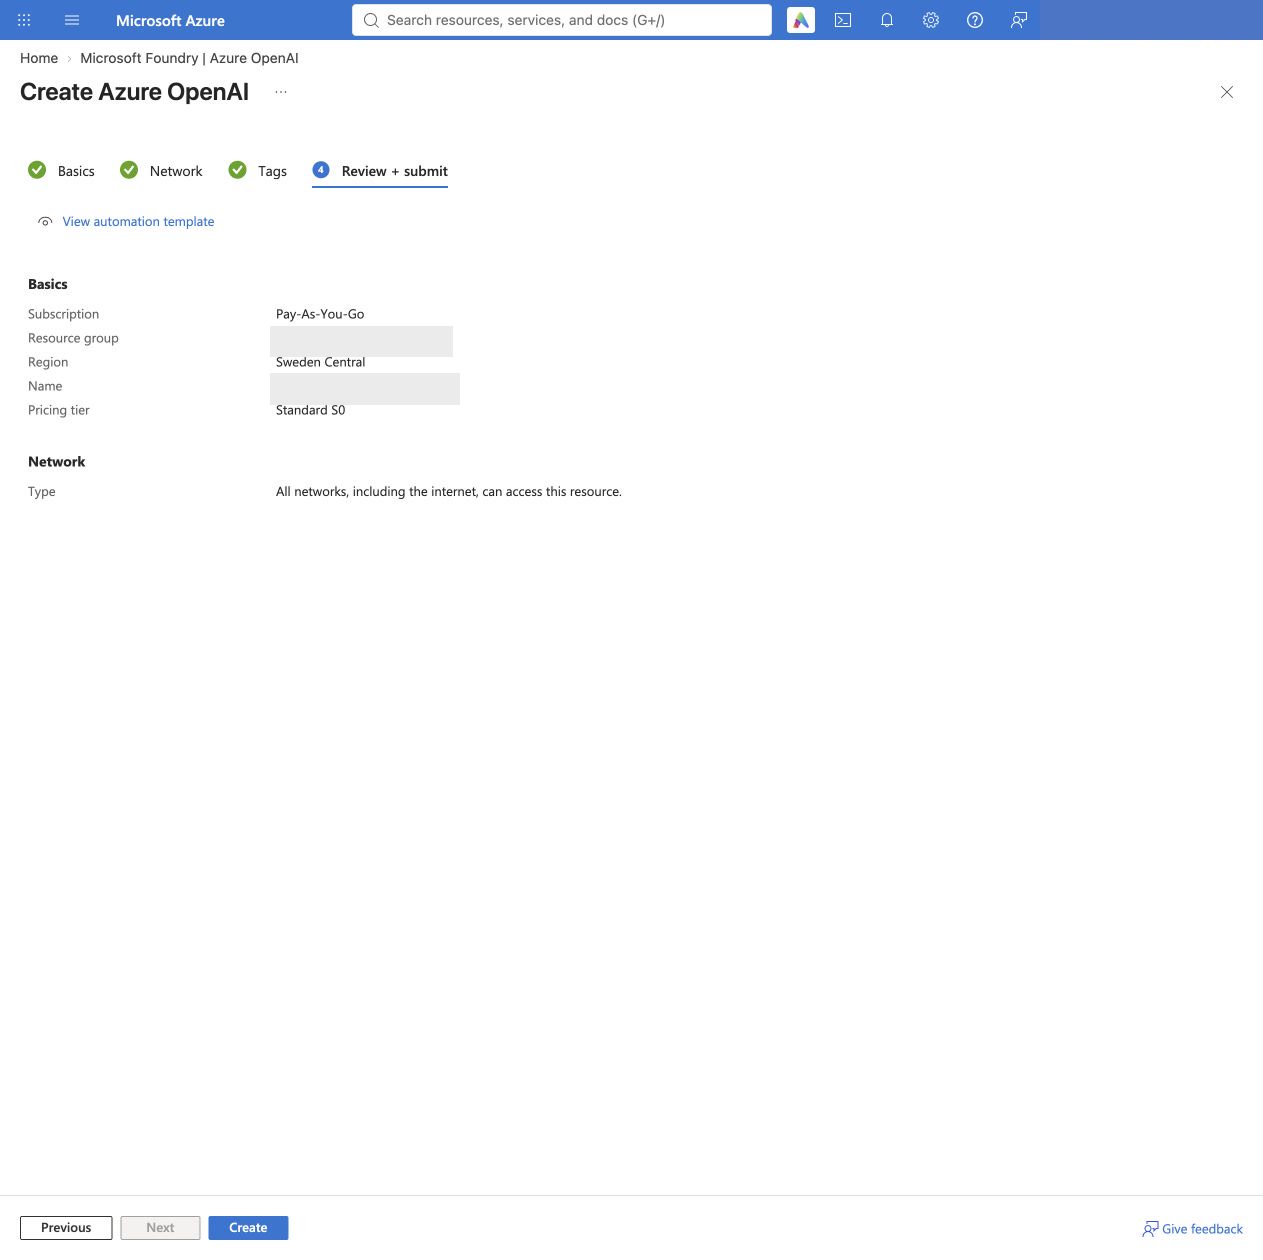
The Basics image uses an illustrative available name. In your own wizard, use the same unique resource name through review and creation; Azure resource names must meet its availability rules.
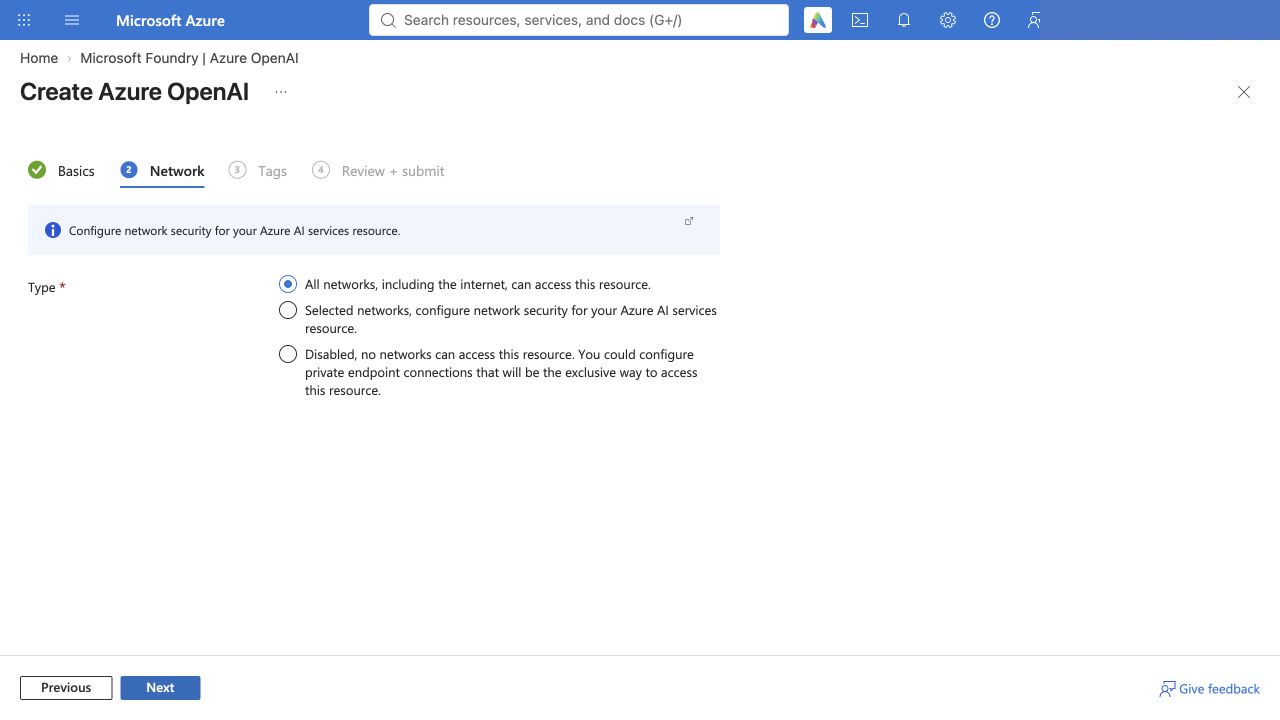
Choose Next to open Network. For this short demo from my local machine, I used All networks, including the internet, can access this resource. That makes the endpoint reachable over the internet; API requests still need authentication.
Continue through Tags, which you can leave empty for this exercise. On Review + submit, check the subscription, resource group, region, name, and network setting, then choose Create.
Wait for Azure to finish provisioning, then open the resource. On its Overview page, confirm the status is Active and choose Go to Foundry portal.
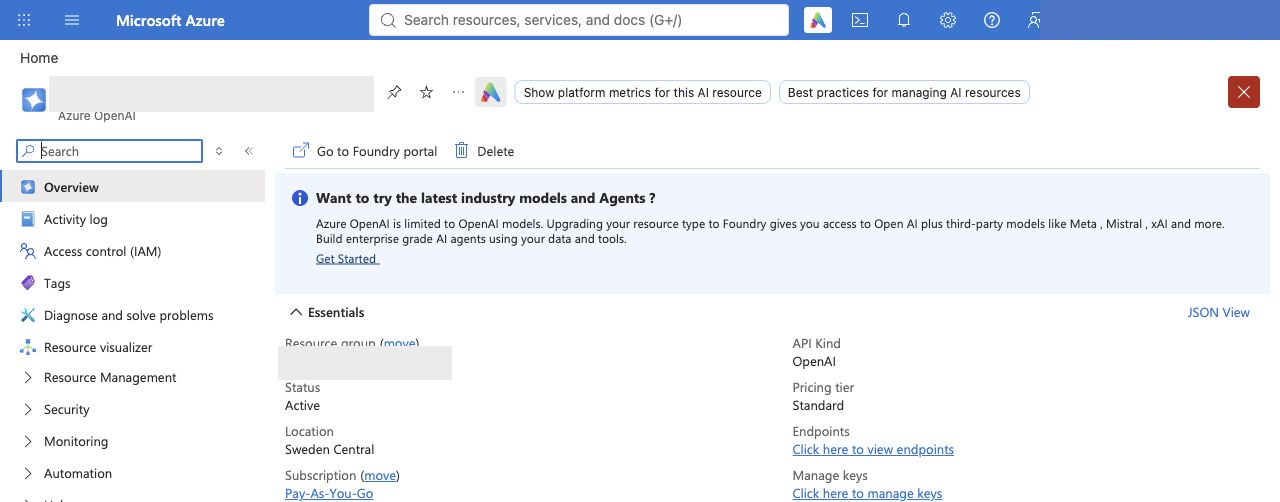
At this point, the Azure resource exists. It still needs a model deployment before our console app can use it.
Deploy the chat model
From the resource’s overview, choose Go to Foundry portal. In Foundry, open Deployments, choose Deploy model, then Deploy base model.
Search for gpt-5-nano, select it, and confirm the model selection.
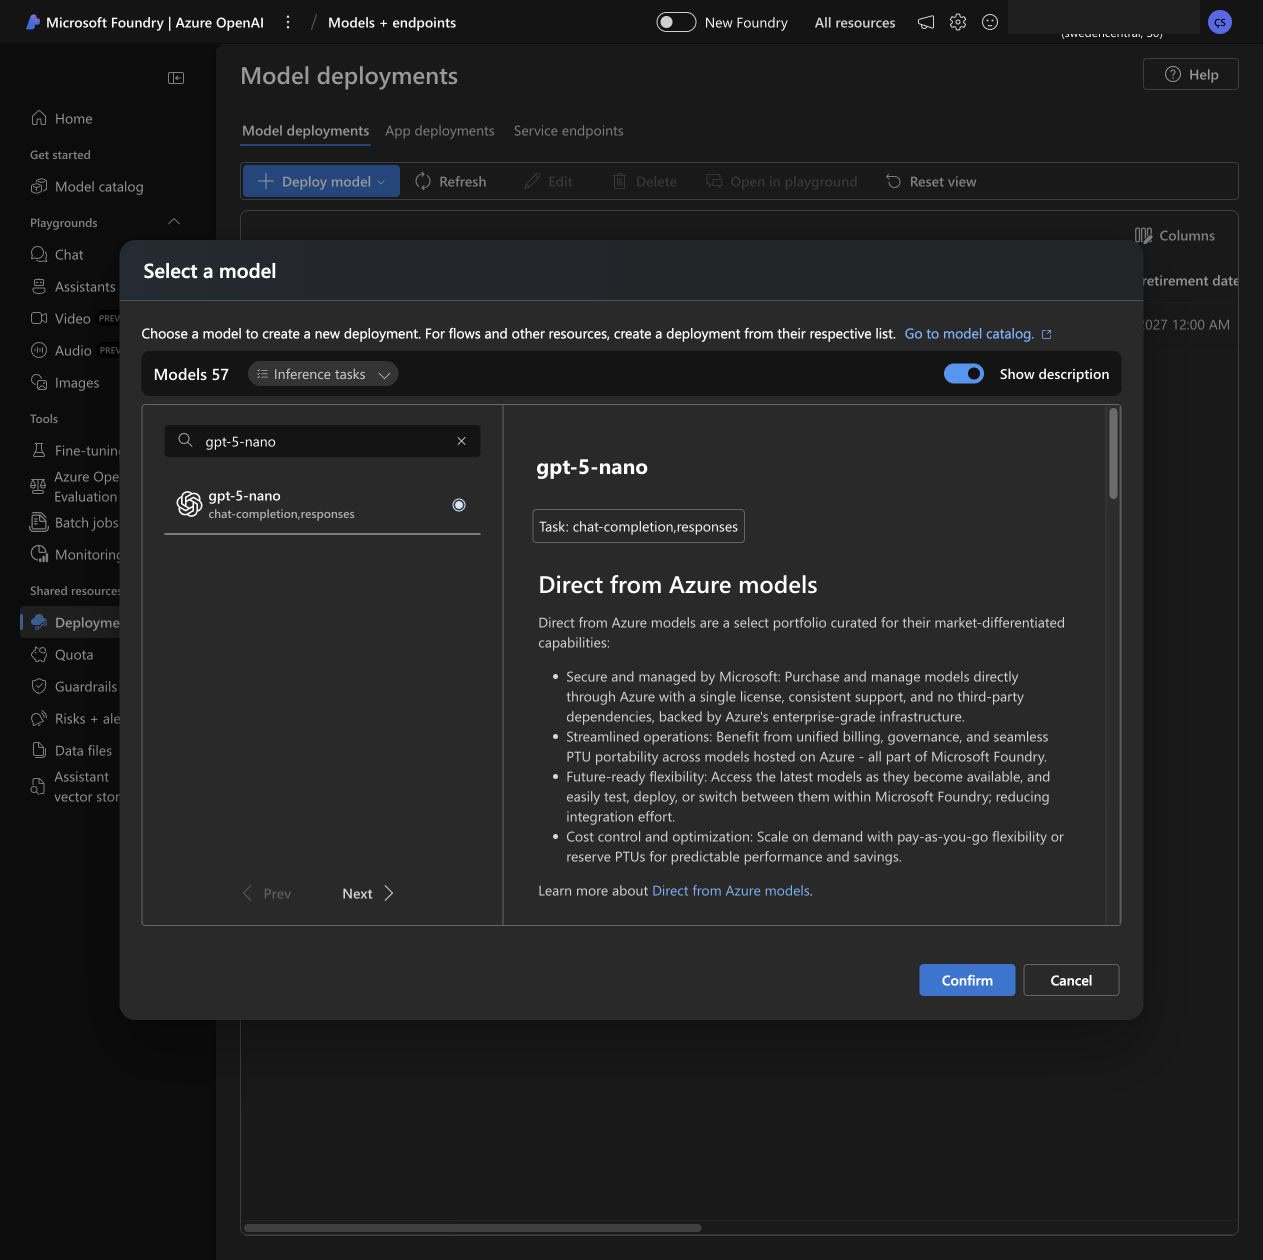
For this run, I used:
- Deployment name:
gpt-5-nano - Deployment type: Global Standard
- Model version:
2025-08-07, as offered by the portal for this deployment - Content filter: the default filter
Model availability and quota can differ between subscriptions and regions. Use a supported version shown in your portal; if this model is unavailable, choose a chat-completions model you can deploy and use its deployment name in the app configuration.
Global Standard bills API usage. The tokens-per-minute allocation controls request throughput; it does not set a dollar spending limit. Check the available quota before choosing the allocation for your demo.
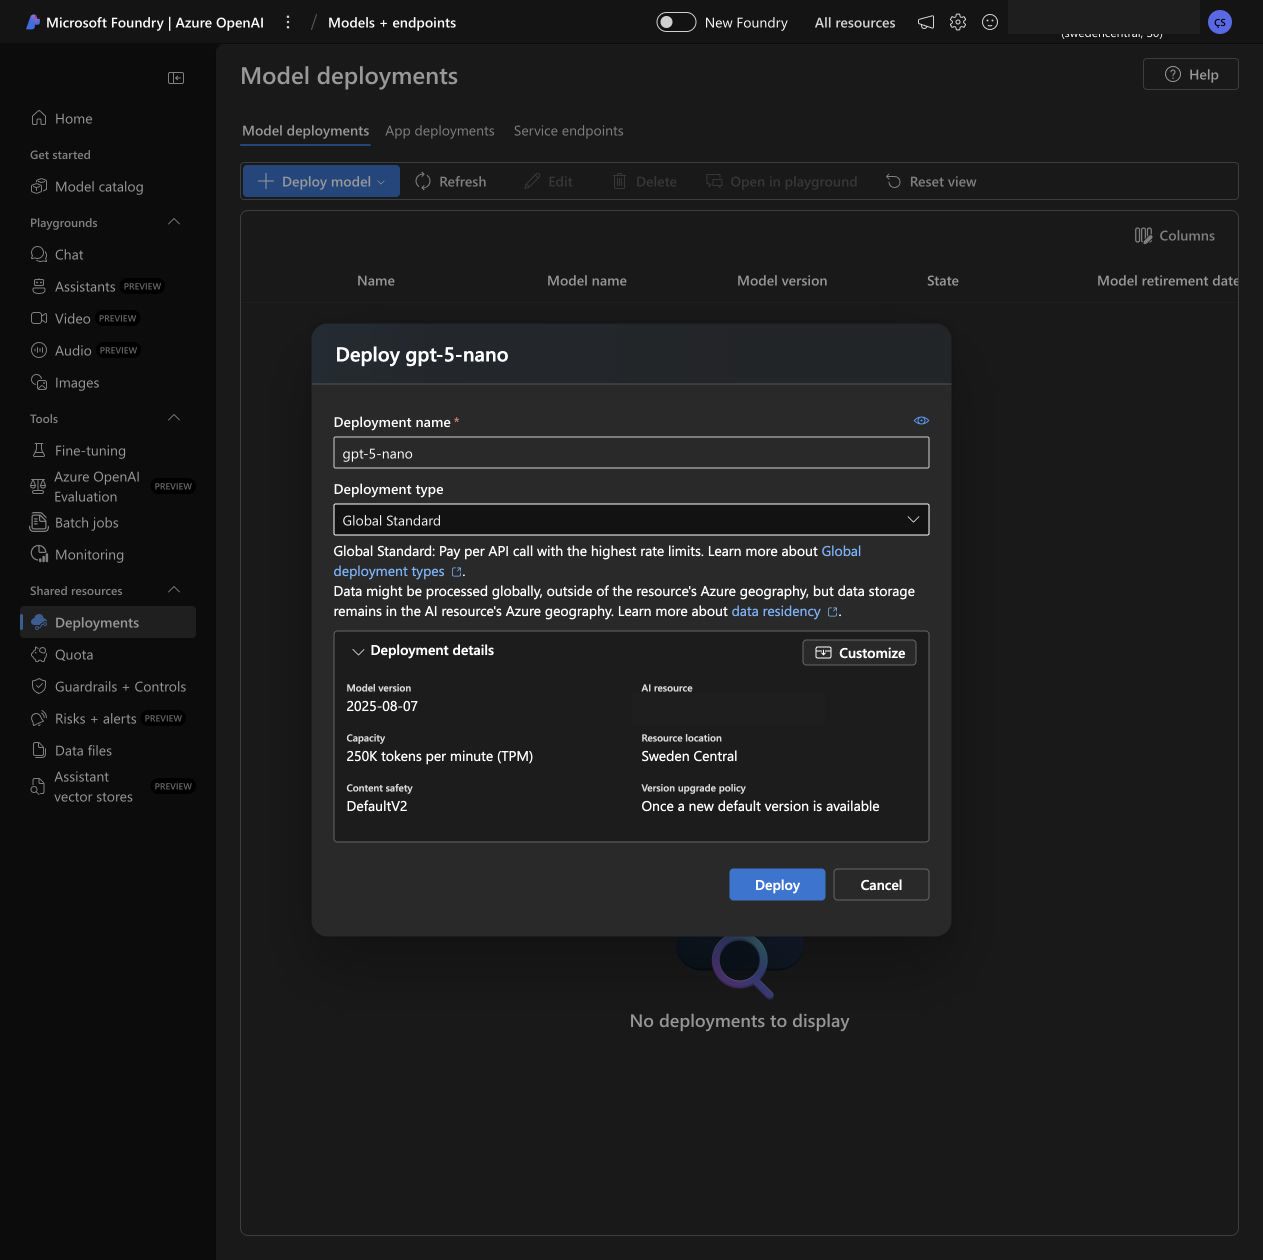
Choose Deploy and wait for Succeeded. You should now see the named deployment in the deployment list.
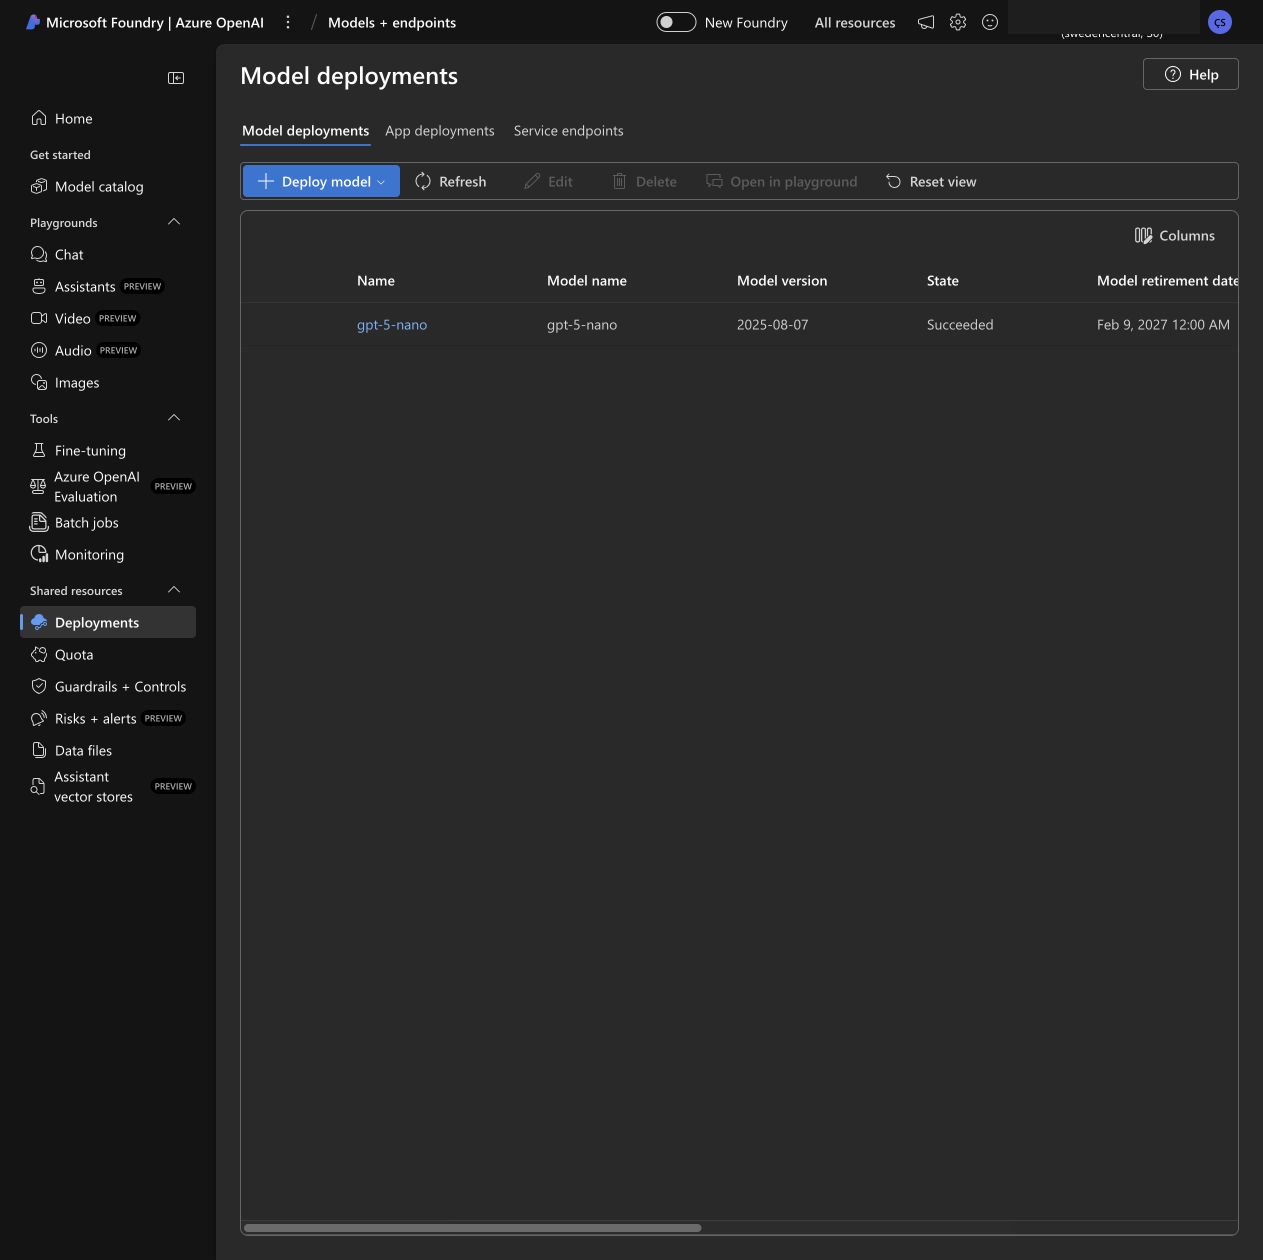
Keep the deployment name handy. The SDK’s model argument takes this deployment name, which can differ from the model’s catalog name.
Find the endpoint and key safely
Open the deployment details. This view shows the Target URI and the Key controls.
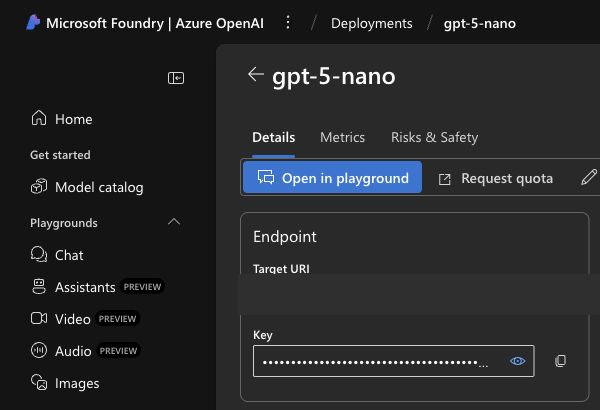
Keep the key hidden when taking screenshots. Be careful around copy controls too: a tooltip can expose the full copied value even while the key field is masked. Copy the key only when you are ready to enter it into your own terminal, and do not put it in Program.cs.
The Target URI may be a full Azure chat-completions URL, shaped like this:
https://YOUR-RESOURCE.openai.azure.com/openai/deployments/YOUR-DEPLOYMENT/chat/completions?api-version=...
Our OpenAI client uses the OpenAI-compatible API base instead:
https://YOUR-RESOURCE.openai.azure.com/openai/v1/
Keep your resource’s hostname and use the /openai/v1/ base for this program. Do not paste the Foundry project page URL or the full deployment-specific chat-completions path into AZURE_OPENAI_ENDPOINT. Microsoft documents this client configuration in its endpoint guidance.
You should now have three values: the API base, the deployment name, and the API key, all belonging to the same resource.
Add the complete cloud program
Open cloud/TripPlannerCloud/Program.cs, replace its generated contents with the following code, and save it:
using OpenAI;
using OpenAI.Chat;
using System.ClientModel;

var model = Environment.GetEnvironmentVariable("AZURE_OPENAI_DEPLOYMENT");
var endpoint = Environment.GetEnvironmentVariable("AZURE_OPENAI_ENDPOINT");
var apiKey = Environment.GetEnvironmentVariable("AZURE_OPENAI_API_KEY");

if (string.IsNullOrWhiteSpace(model) || string.IsNullOrWhiteSpace(apiKey) ||
    !Uri.TryCreate(endpoint, UriKind.Absolute, out var endpointUri) ||
    endpointUri.Scheme != Uri.UriSchemeHttps)
{
    Console.Error.WriteLine("Set AZURE_OPENAI_DEPLOYMENT, AZURE_OPENAI_API_KEY, and AZURE_OPENAI_ENDPOINT before running.");
    Console.Error.WriteLine("Use the OpenAI-compatible endpoint: https://YOUR-RESOURCE.openai.azure.com/openai/v1/");
    Environment.ExitCode = 1;
    return;
}

var systemPrompt = """
You are a practical travel planning assistant.
Give concise, useful answers. Keep answers under 180 words unless asked for more.
Do not pretend to know live prices, bookings, or real-time availability.
If the user leaves out important details, ask a short follow-up question.
When you suggest an itinerary, keep it easy to scan.
""";

ChatClient client = new(
    credential: new ApiKeyCredential(apiKey),
    model: model,
    options: new OpenAIClientOptions { Endpoint = endpointUri });

var history = new List<ChatMessage>
{
    new SystemChatMessage(systemPrompt)
};

Console.WriteLine("Trip Planner Cloud");
Console.WriteLine("Type your travel question. Type /exit to quit.");

while (true)
{
    Console.Write("> ");
    var input = Console.ReadLine();

    if (input is null || input.Equals("/exit", StringComparison.OrdinalIgnoreCase))
    {
        break;
    }

    if (string.IsNullOrWhiteSpace(input))
    {
        continue;
    }

    var userMessage = new UserChatMessage(input);

    var completion = await client.CompleteChatAsync([.. history, userMessage]);
    var reply = string.Concat(completion.Value.Content.Select(part => part.Text)).Trim();

    if (string.IsNullOrWhiteSpace(reply))
    {
        Console.WriteLine("Assistant: No response received. Please try again.");
        continue;
    }

    history.Add(userMessage);
    history.Add(new AssistantChatMessage(reply));
    Console.WriteLine();
    Console.WriteLine($"Assistant: {reply}");
    Console.WriteLine();
}
This app uses the same system instruction and console loop as the local version. The SDK’s SystemChatMessage, UserChatMessage, and AssistantChatMessage represent the same roles we sent to Ollama.
CompleteChatAsync receives the saved history and the current user message on every turn. The app saves both new messages only after the request returns nonempty text. In this small demo, Azure errors surface in the console; add targeted handling when you build on the example.
The configuration check at the top is also deliberate. A missing deployment, key, or HTTPS endpoint produces a setup message before the application tries to call Azure.
Configure and run the cloud conversation
In the terminal where you will run the app, set your endpoint and deployment name. Replace the placeholders with your own values:
export AZURE_OPENAI_ENDPOINT="https://YOUR-RESOURCE.openai.azure.com/openai/v1/"
export AZURE_OPENAI_DEPLOYMENT="gpt-5-nano"
Set AZURE_OPENAI_API_KEY in the environment used to launch the app. A plain .NET console app does not load .env files automatically, so this walkthrough uses environment variables.
Start the app from the trip-planner folder in that same terminal:
dotnet run --project cloud/TripPlannerCloud/TripPlannerCloud.csproj
If you start the app through a Rider run configuration, add the same three variables there. Keep the API key out of Program.cs and source control.
Enter the three-day Rome itinerary prompt from the local run and wait for the answer. Then ask for day two to focus on outdoor squares and leave the afternoon unplanned. In the cloud test, gpt-5-nano made that change and said that days one and three remained as before.
That is the behavior we wanted to verify: the second request can refer to the first answer because the app carries the earlier messages forward. In my run, the cloud follow-up kept days one and three while revising day two; your model’s exact wording can differ.
Prompt control and conversation limits
Try changing one instruction at a time. For example, ask for one activity per half-day, a slower pace, or a shorter answer. That makes it easier to judge what changed.
A system prompt gives the assistant a consistent role and response style, but it does not enforce factual accuracy or provide live prices and availability. This sample has no travel-search or booking tools. Check the suggestions independently before planning a real trip.
History also grows with every successful turn. We resend the earlier messages, so a longer session uses a larger context and can take more time and tokens. This beginner version does not trim, summarize, stream, or persist the conversation; keep the demo sessions short.
Common issues
- The local request fails: check that Ollama is running on
http://localhost:11434and that the configured model is installed. - The cloud app reports missing configuration: set all three environment variables in the same terminal that starts the application.
- Azure returns 401 or 403: check the key and access to its resource.
- Azure returns 404: check the
/openai/v1/API base and the deployment name. - Azure returns 429: check request rate and available deployment quota.
- The answer ignores a constraint or invents a detail: inspect both the history and prompt, and remember that this app has no external source for current travel facts.
Clean up when you are done
Use /exit to end the console session. For the cloud version, also remove the key from that terminal’s environment:
unset AZURE_OPENAI_API_KEY
Closing the app does not delete the Azure resource or model deployment.
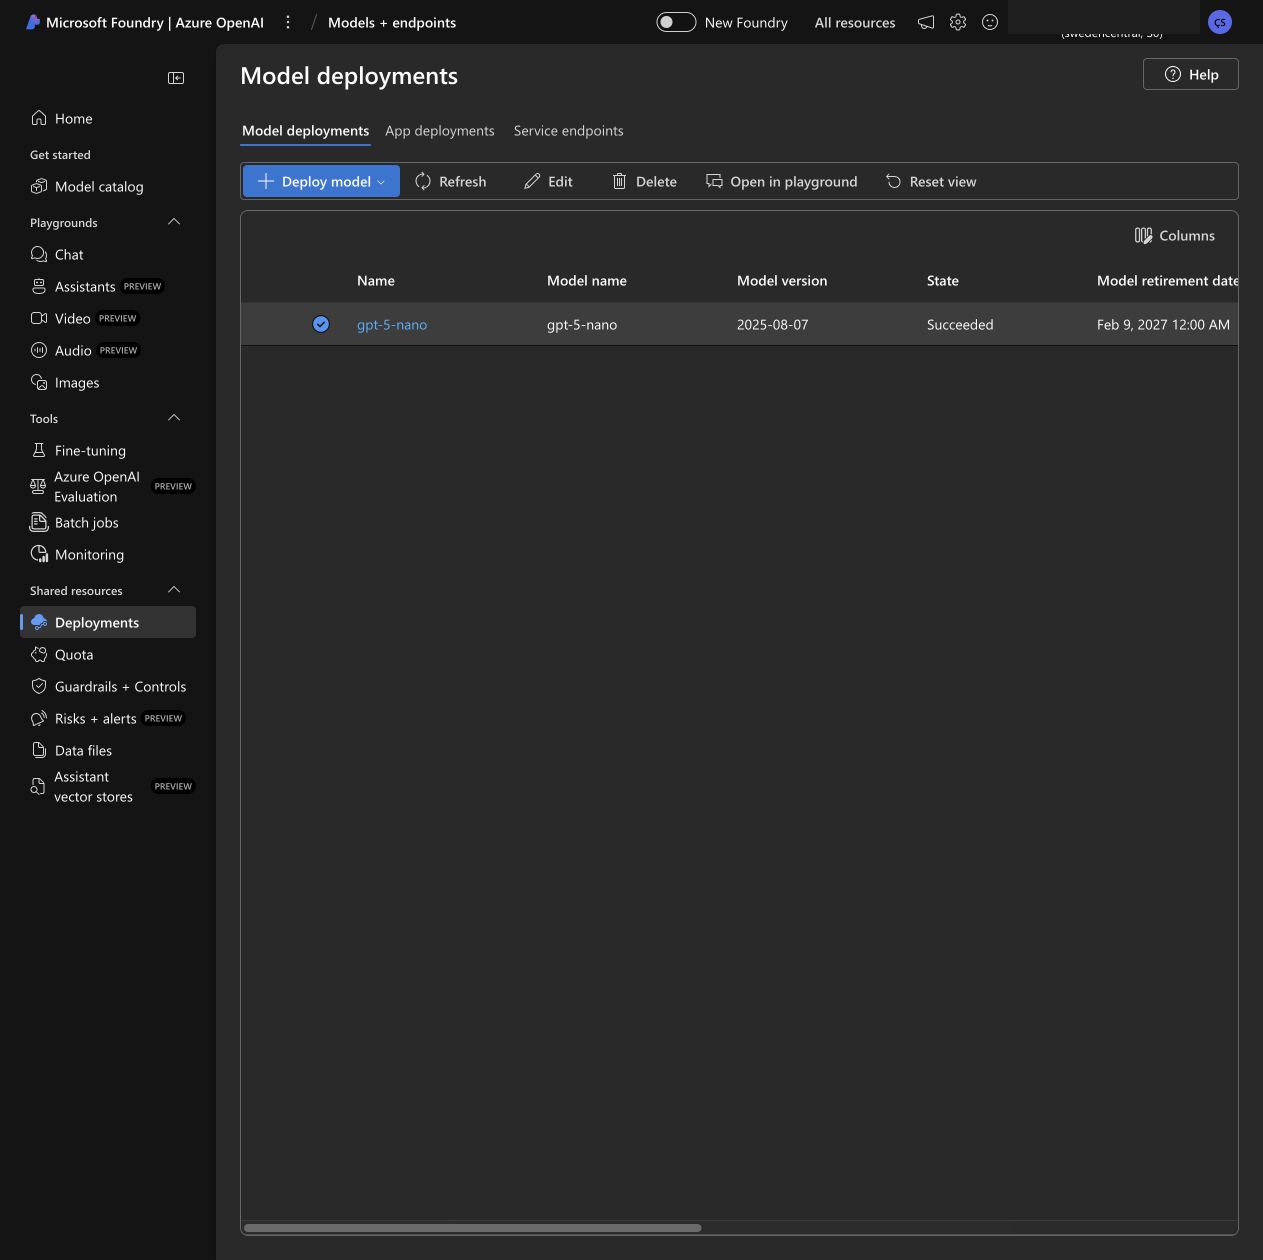
If you want to keep the Azure resource but remove just this model, open Foundry’s Deployments list, select the demo deployment, and choose Delete. The screenshot shows the selected deployment and the Delete control; review the portal’s confirmation before proceeding.
To remove the whole demo, return to Azure Portal, open Resource groups, and select the dedicated group you created, such as rg-your-demo. Review its resource list first so you know exactly what will be removed. The example below shows one Azure OpenAI resource in that group and the Delete resource group control.
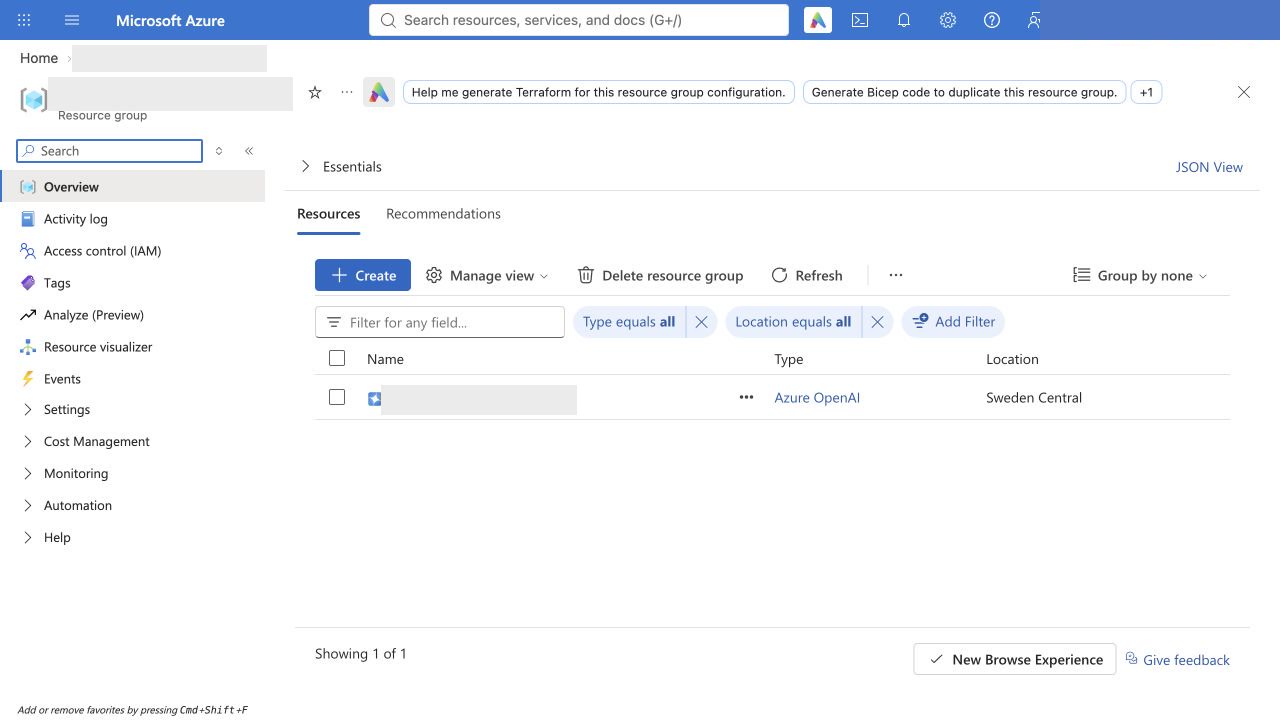
Choose Delete resource group only when you are ready to remove everything listed in that dedicated group. Azure asks you to type the resource-group name to confirm; check that name and the resource list before submitting. This deletes the group’s resources, including the Azure OpenAI resource and any model deployment in it. Microsoft documents this resource-group deletion flow. If you reused a group that contains other work, delete only the demo resources you no longer need.
Wait for Azure to finish deleting the resources. Keep the deployment if you intentionally want to reuse it for the next exercise, and review its usage rather than assuming the console exit command cleaned it up.
Result
You now have the same small conversational app in two forms: Ollama on your machine and an Azure-hosted chat model called from C#.
The useful change is the state the application carries between calls. It stores completed exchanges, sends them with the next question, and keeps the system instruction present throughout the session. That gives follow-up requests enough context to make sense, while keeping the implementation small enough to read directly from Program.cs.