Introduction
There’s plenty amount of free hosting options for JavaScript world, but when you need to deploy your personal projects which written in Go, C#, Python etc. there’s almost zero free option for you to quickly deploy/test your application.
Also it was always an issue when you want to host your websites at home. Installing software, buying static IP, setting port forwarding etc. Last couple of months I discovered a way to simplify and solve this issue, that is Cloudflare tunnels.
We will be using Raspberry Pi to use this tunnel, but if you have any kind of linux installed pyhsical/cloud computer you can use it too. This guide for debian based distros but you can find the runner programs for your OS in their regarding documentations.
Get ready to discover how to run your apps on your own computer using Docker, Raspberry Pi, Cloudflare Tunnel, and GitHub/GitLab CI/CD pipelines. I’ll guide you through the process, making it easy to set up and improve how you develop and host your applications. Let’s dive in!
Getting ready
Make sure you have;
- Docker
- Raspberry PI with SSH access
- Cloudflare account
- Domain and Cloudflare DNS
- Github or Gitlab account
- Basic linux knowledge
Install docker on RPI
If you haven’t, you can install with using official documentation here
Add your user to docker group
sudo usermod -aG docker $USER
Cloudflared tunnel
Go to your cloudflare dashboard. On the left menu you should see Zero Trust. Navigate to ZeroTrust page and then on the left panel again Access > Tunnels
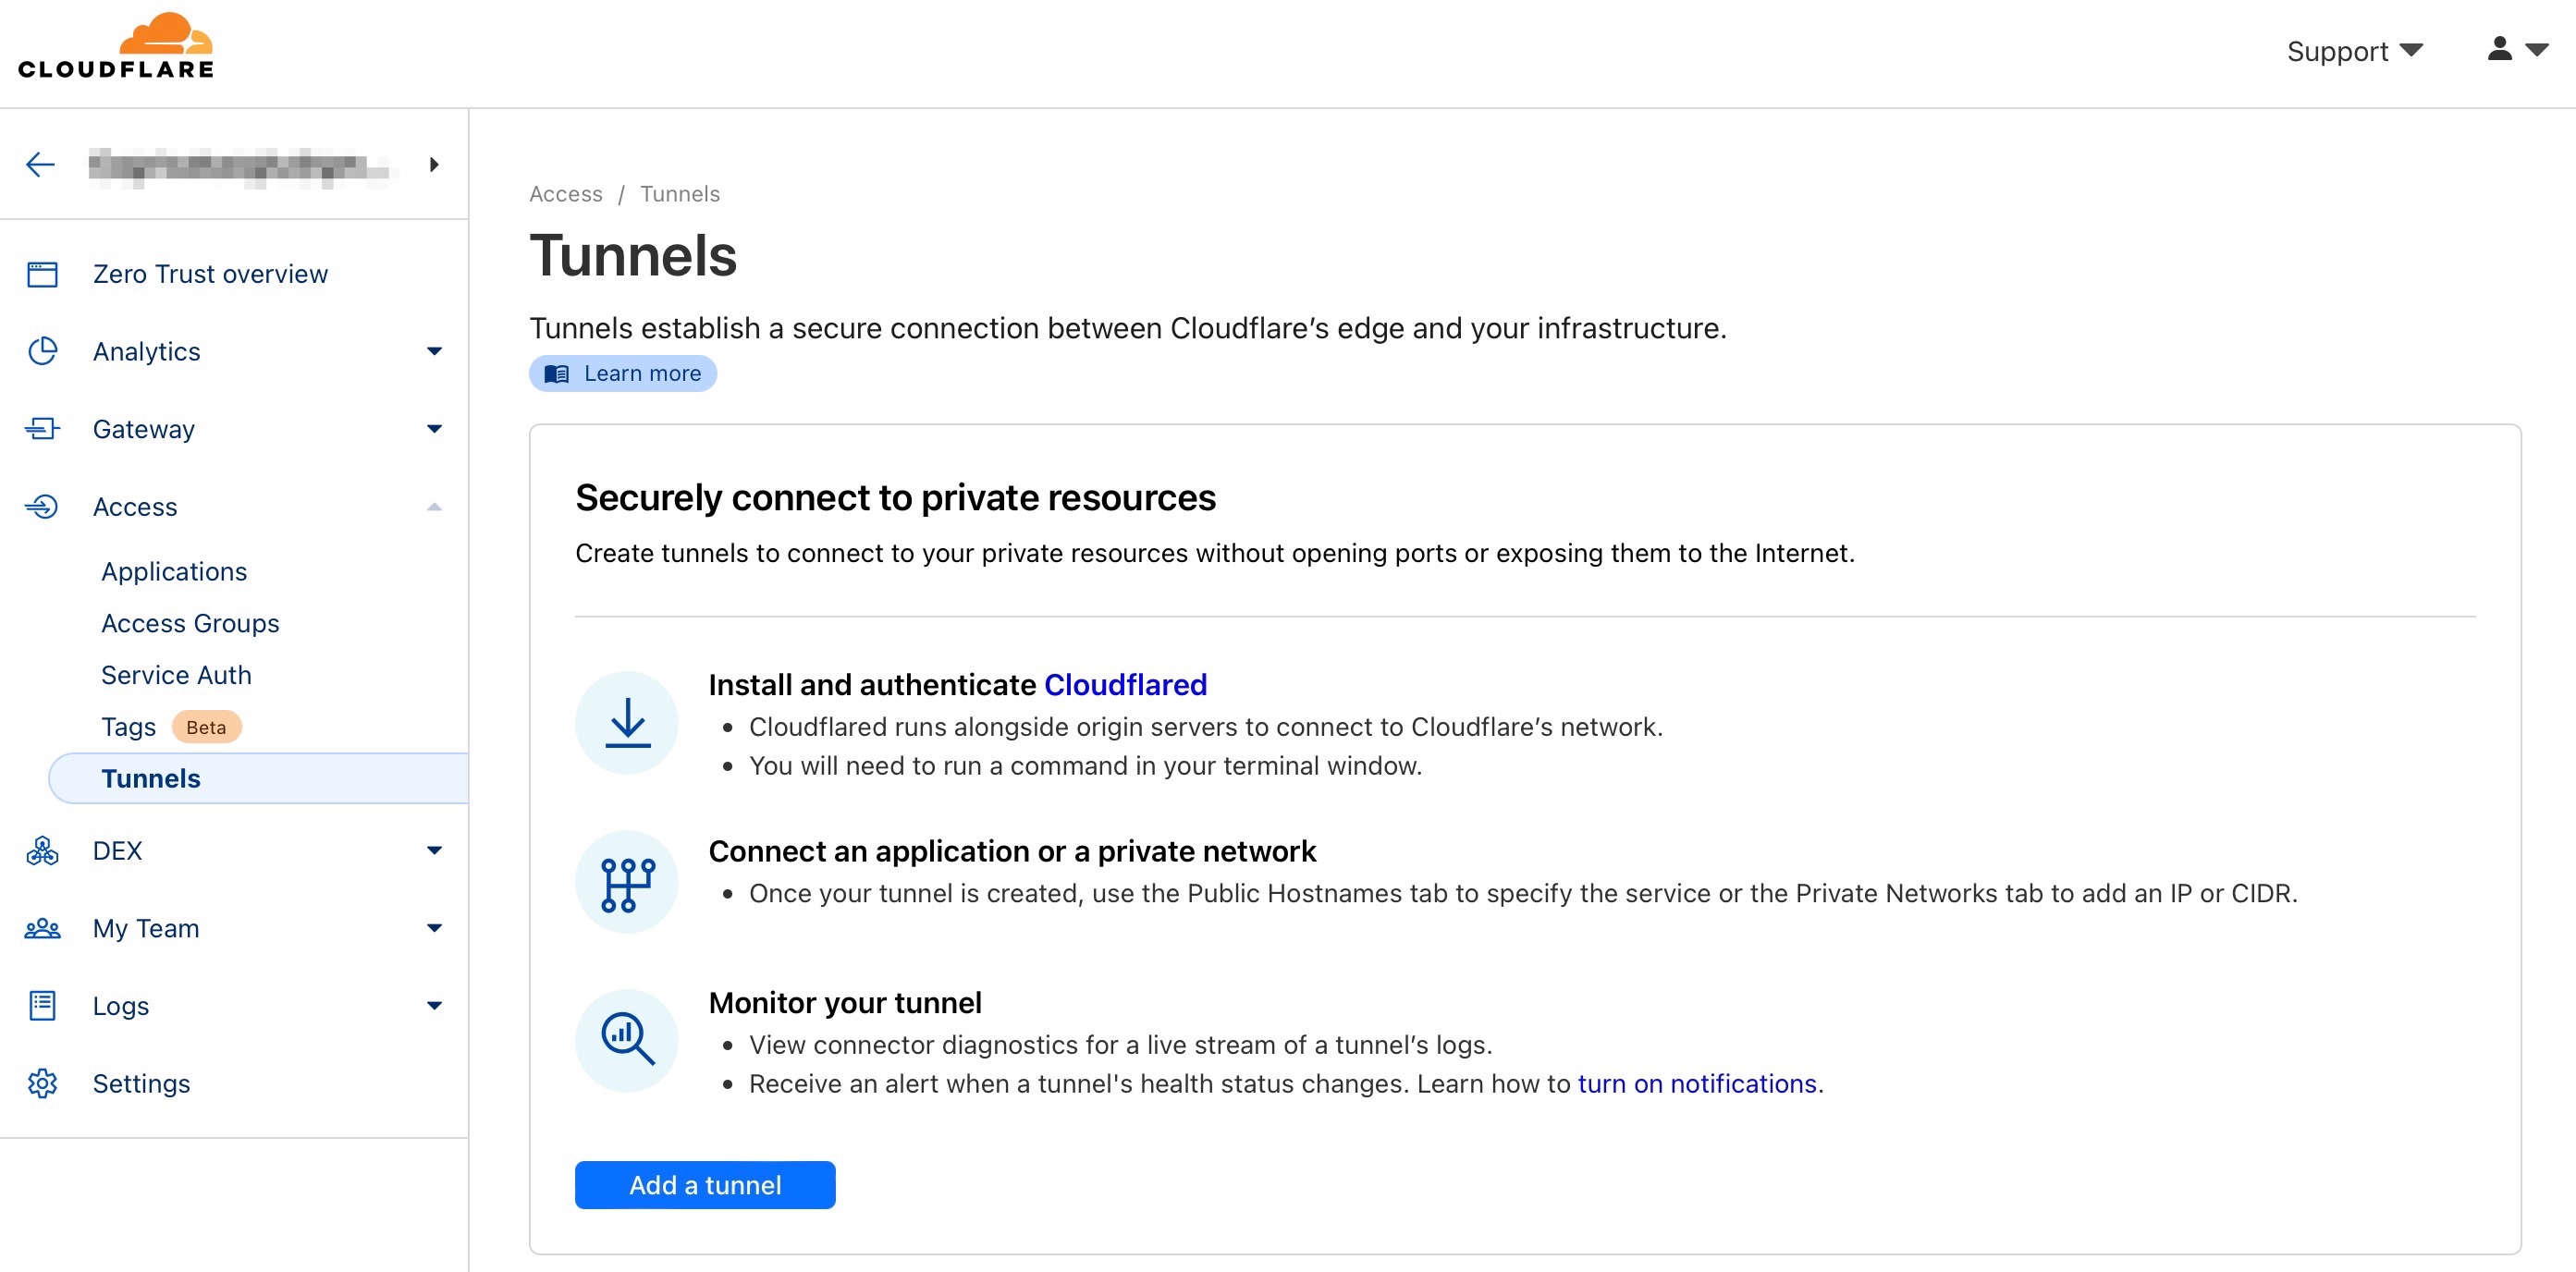
Click add a tunnel, give it a name then Save tunnel.
There’s plenty of options, but we will be using Docker here.
Click Docker.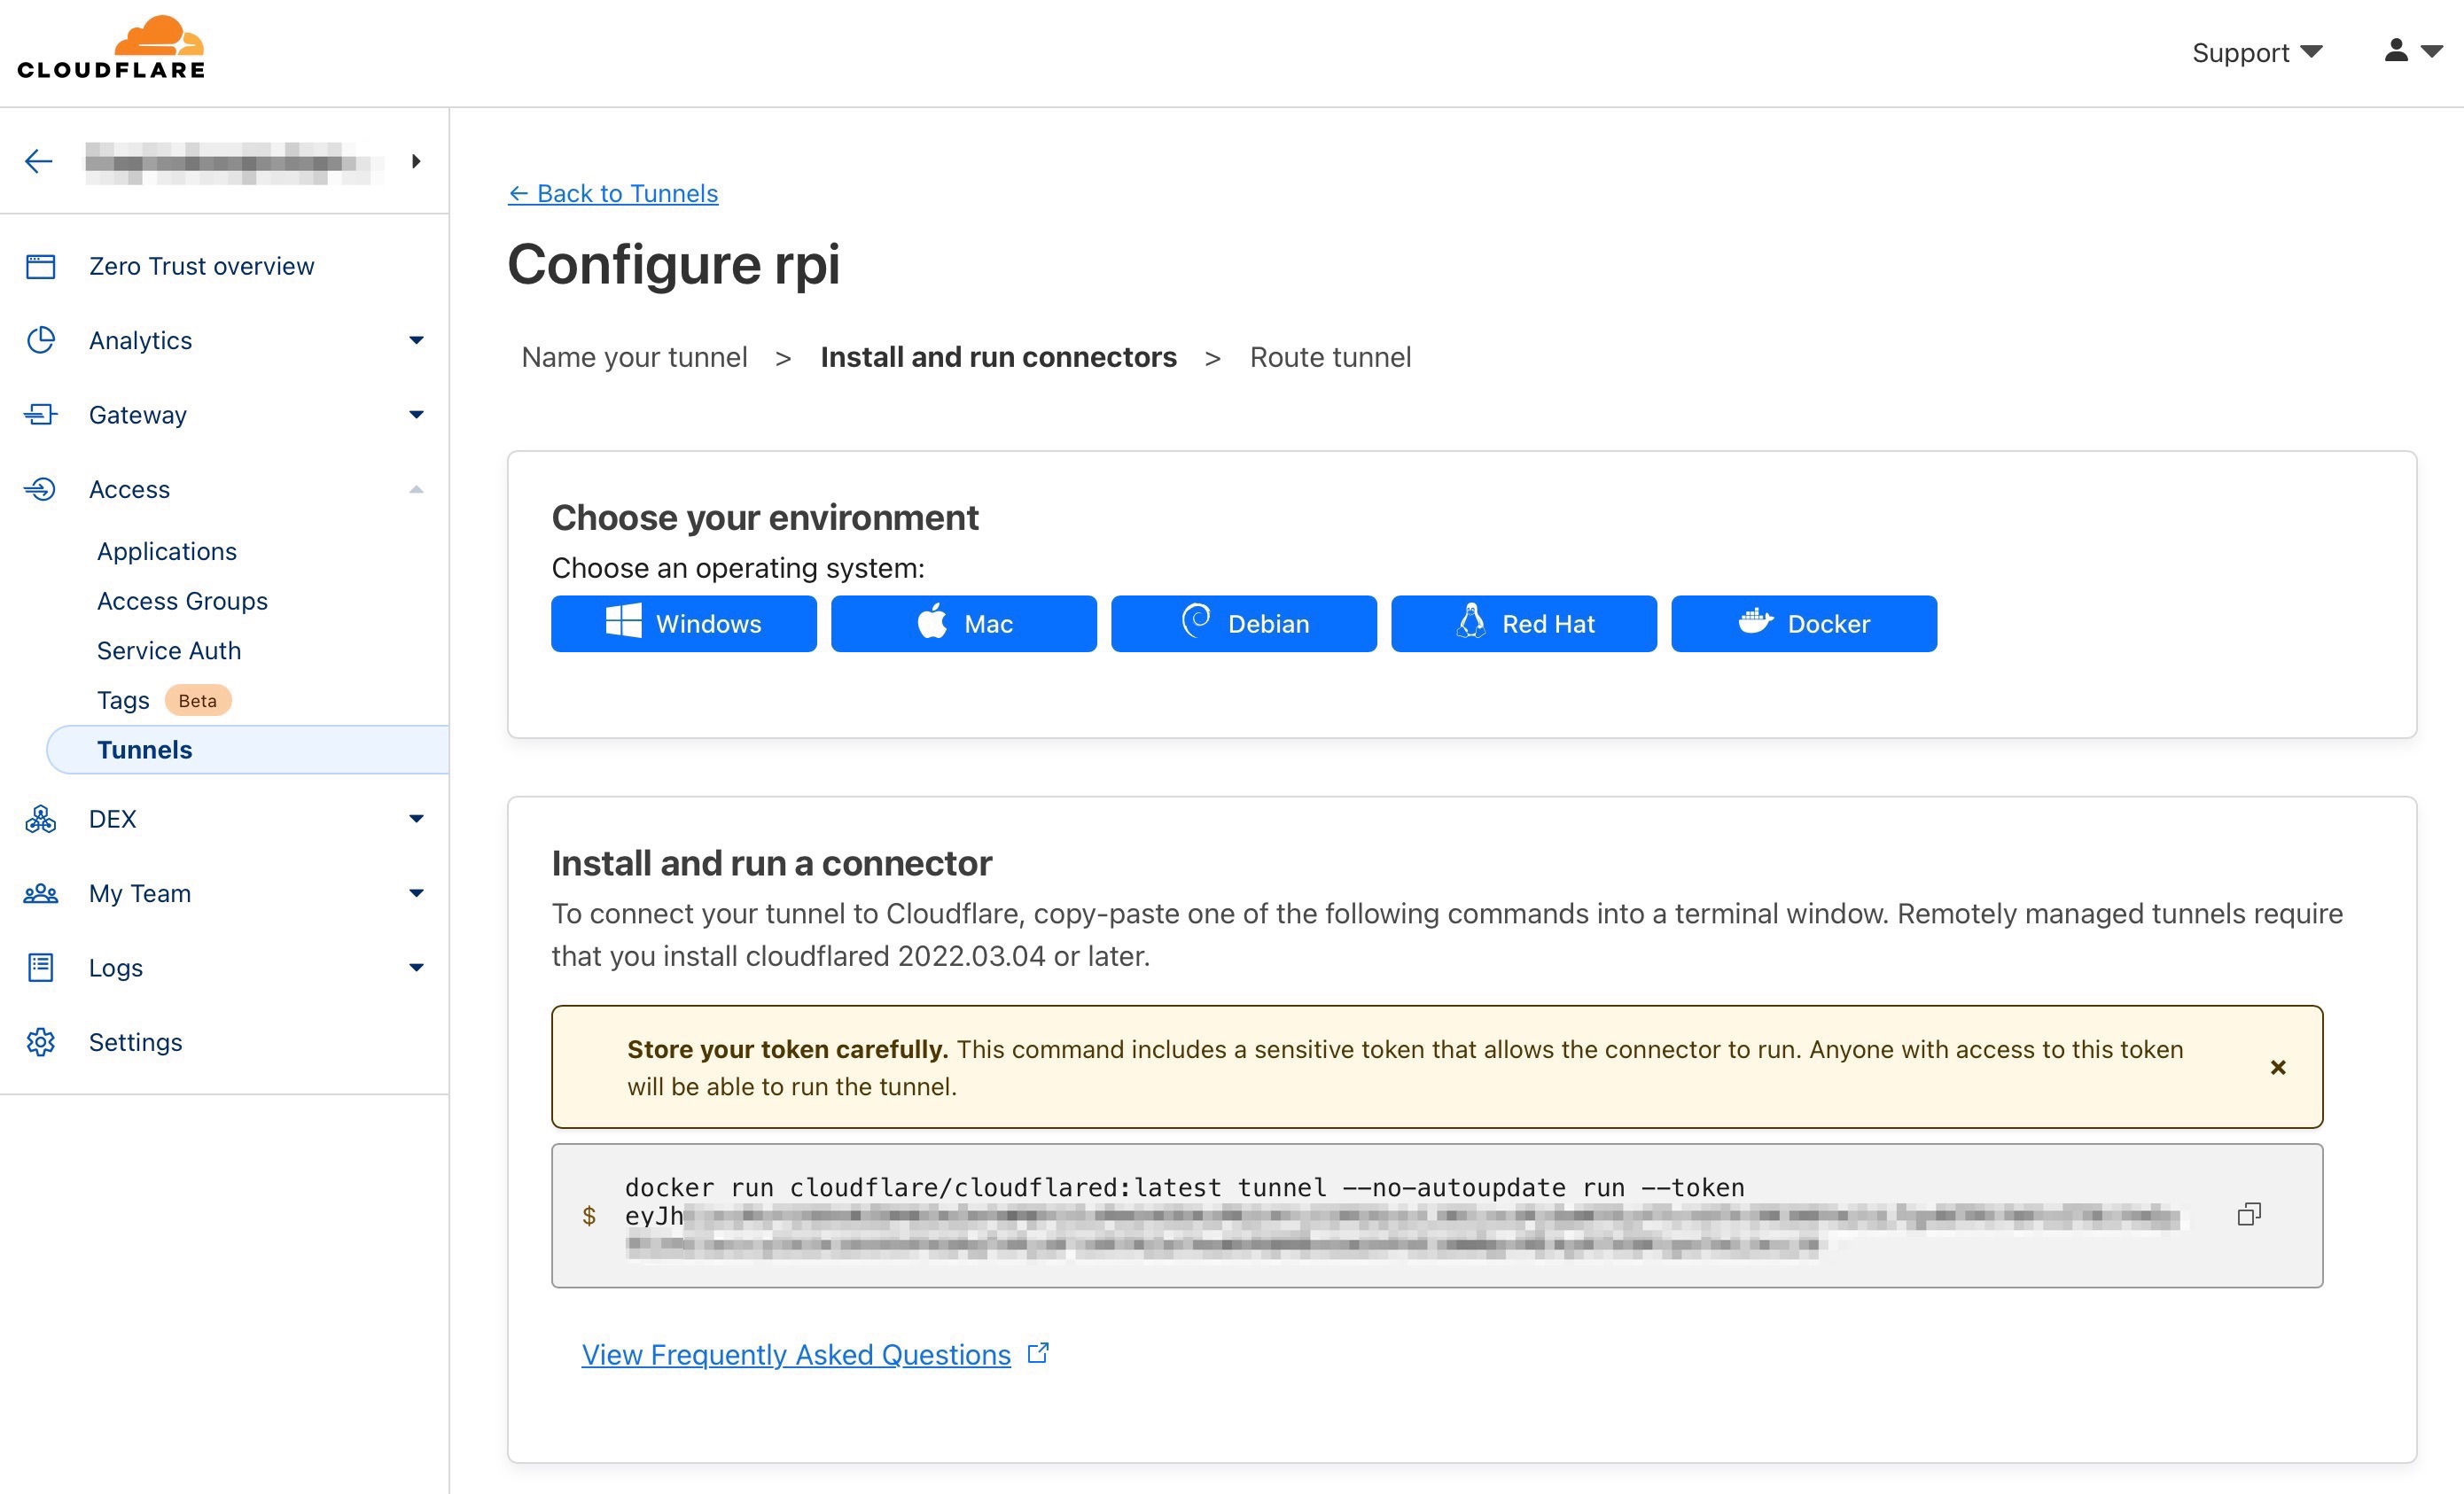 Copy the command. But don’t execute that yet!
We will add extra flags to that command.
We should isolate our docker network from the host. For more information Docker Networking overview.
–detach for using detached mode
–restart always we want this tunnel running always
–network tunnel we’re isolating the tunnel’s network and host machine’s, you can name anything I’ve used tunnel
–name cloudflared for executing docker commands easily
Merge the command you copied with above flags which you want. You will be end up something like that.
docker run --detach --restart always --network tunnel --name cloudflared cloudflare/cloudflared:latest tunnel --no-autoupdate run --token [YOUR_TOKEN_HERE]
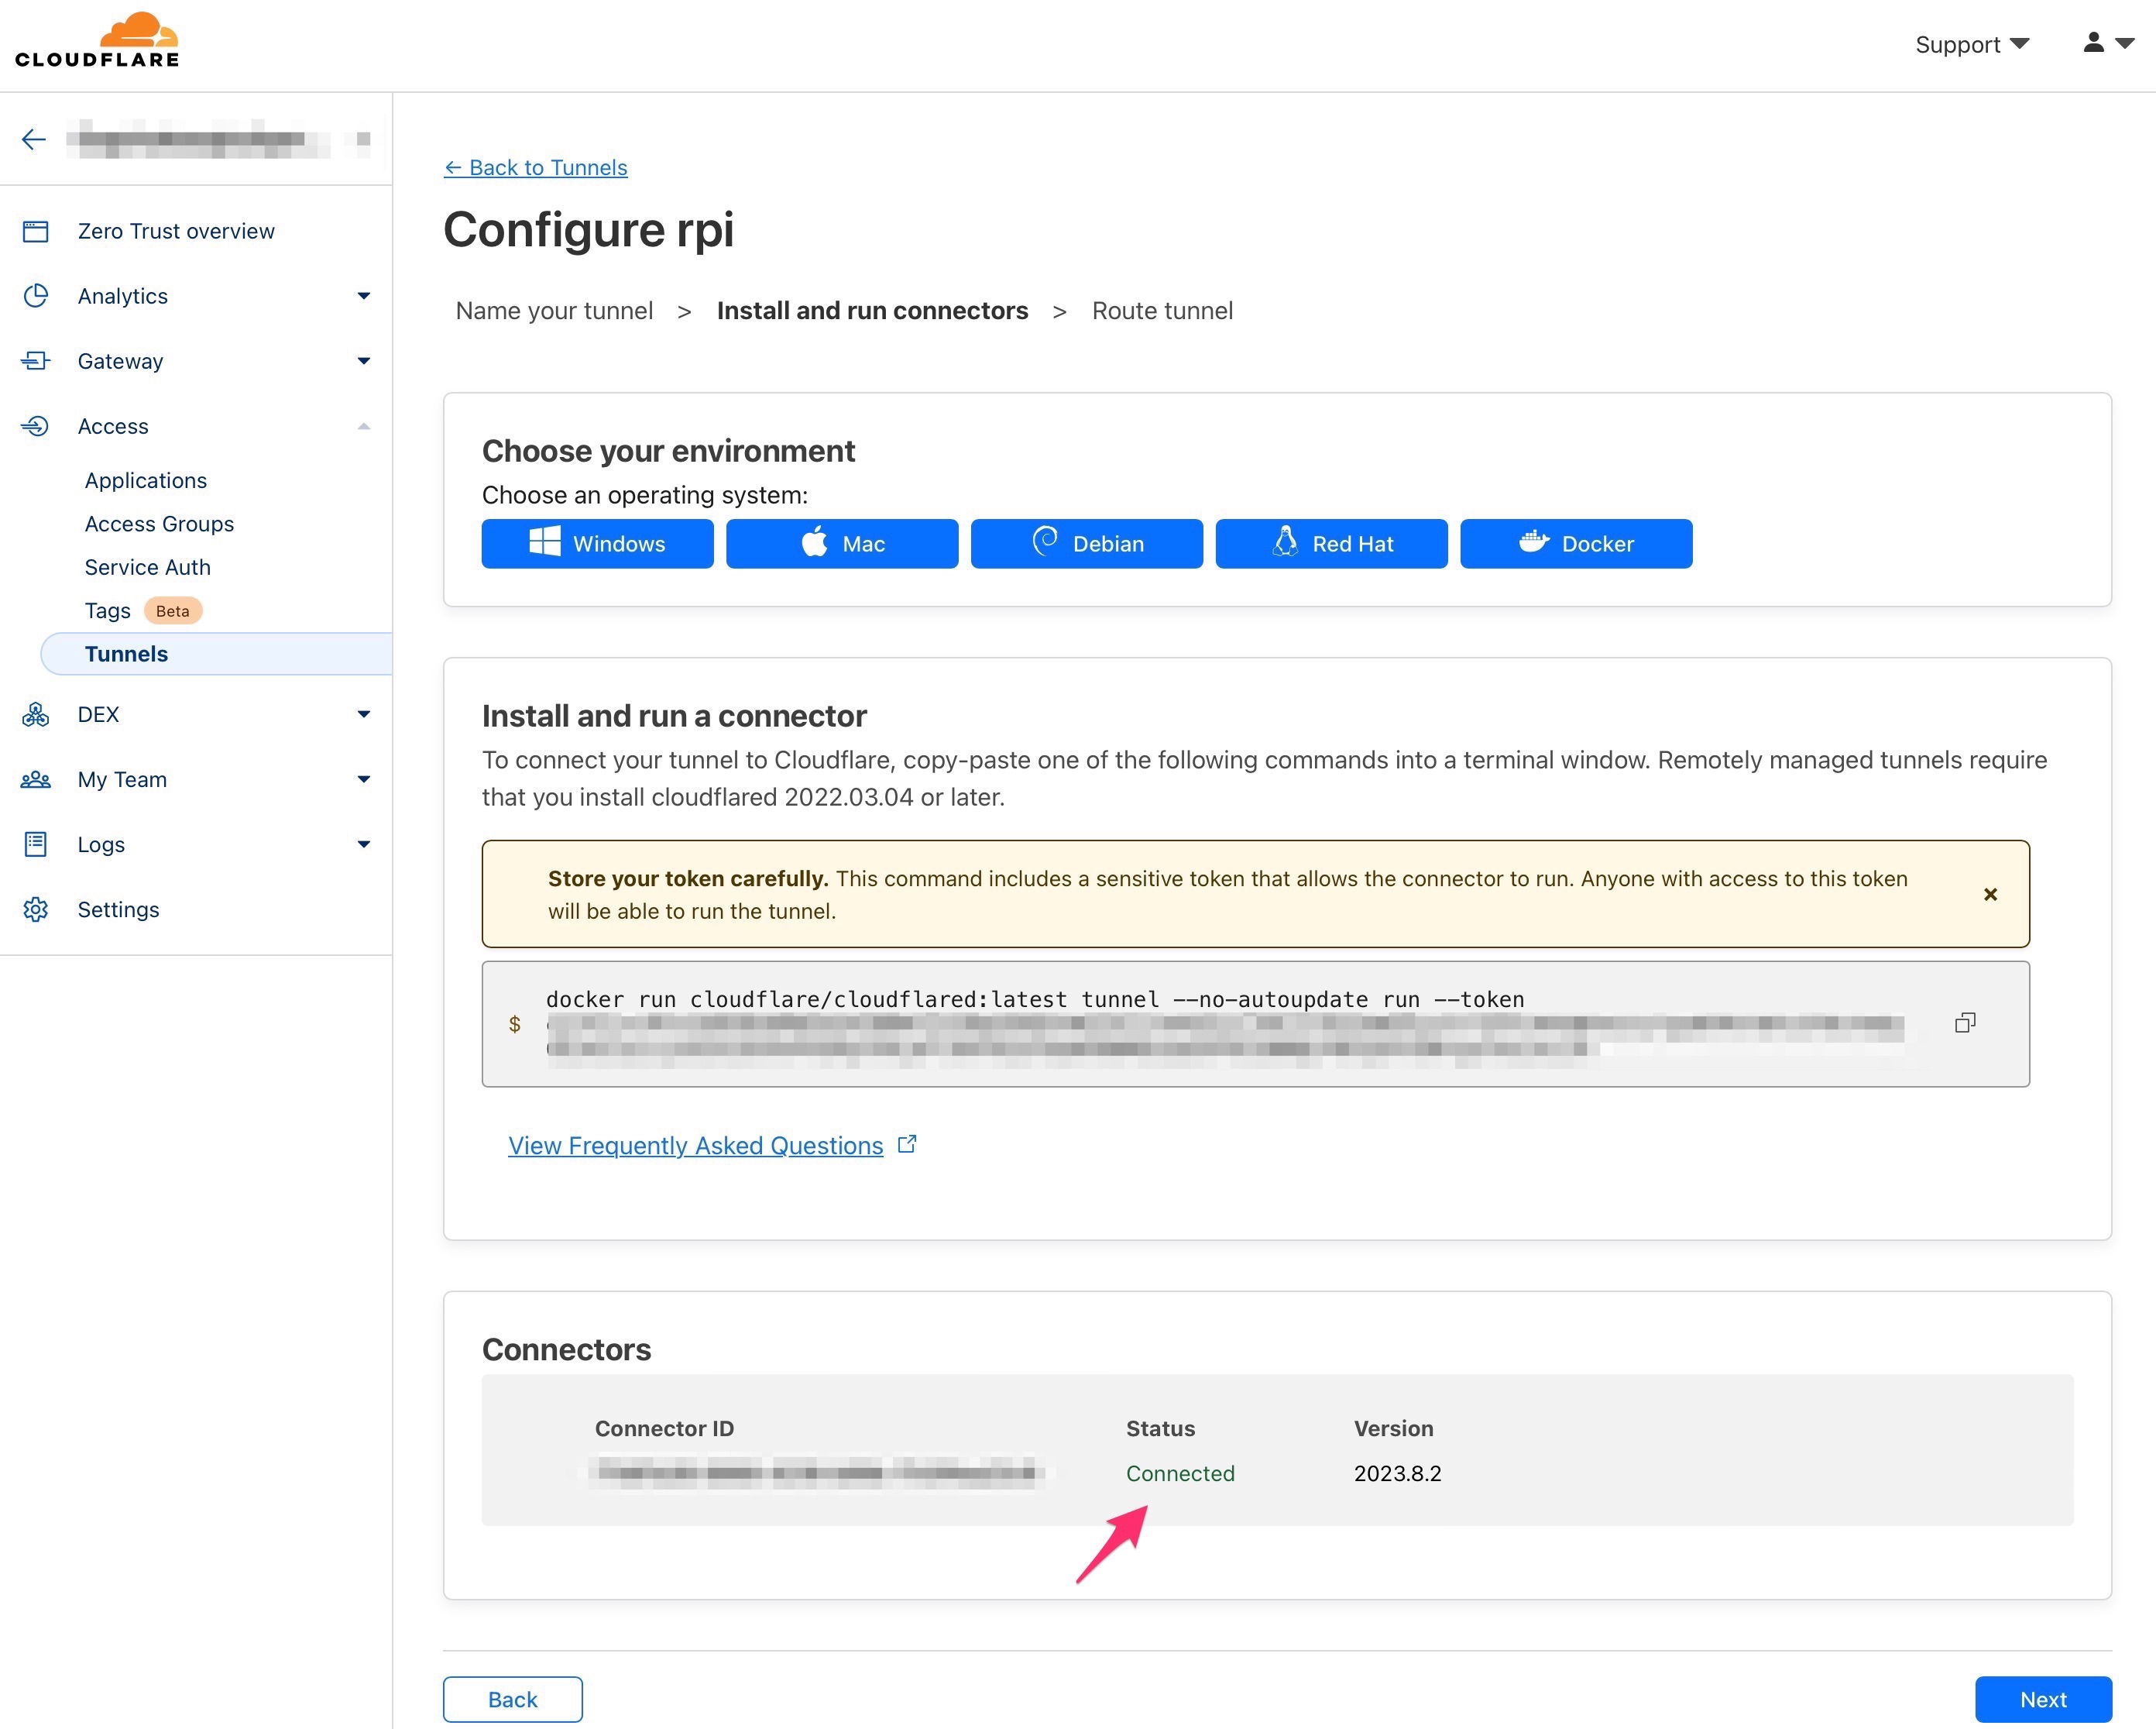
After executing this command on your RPI, you should see it connected in below in the page
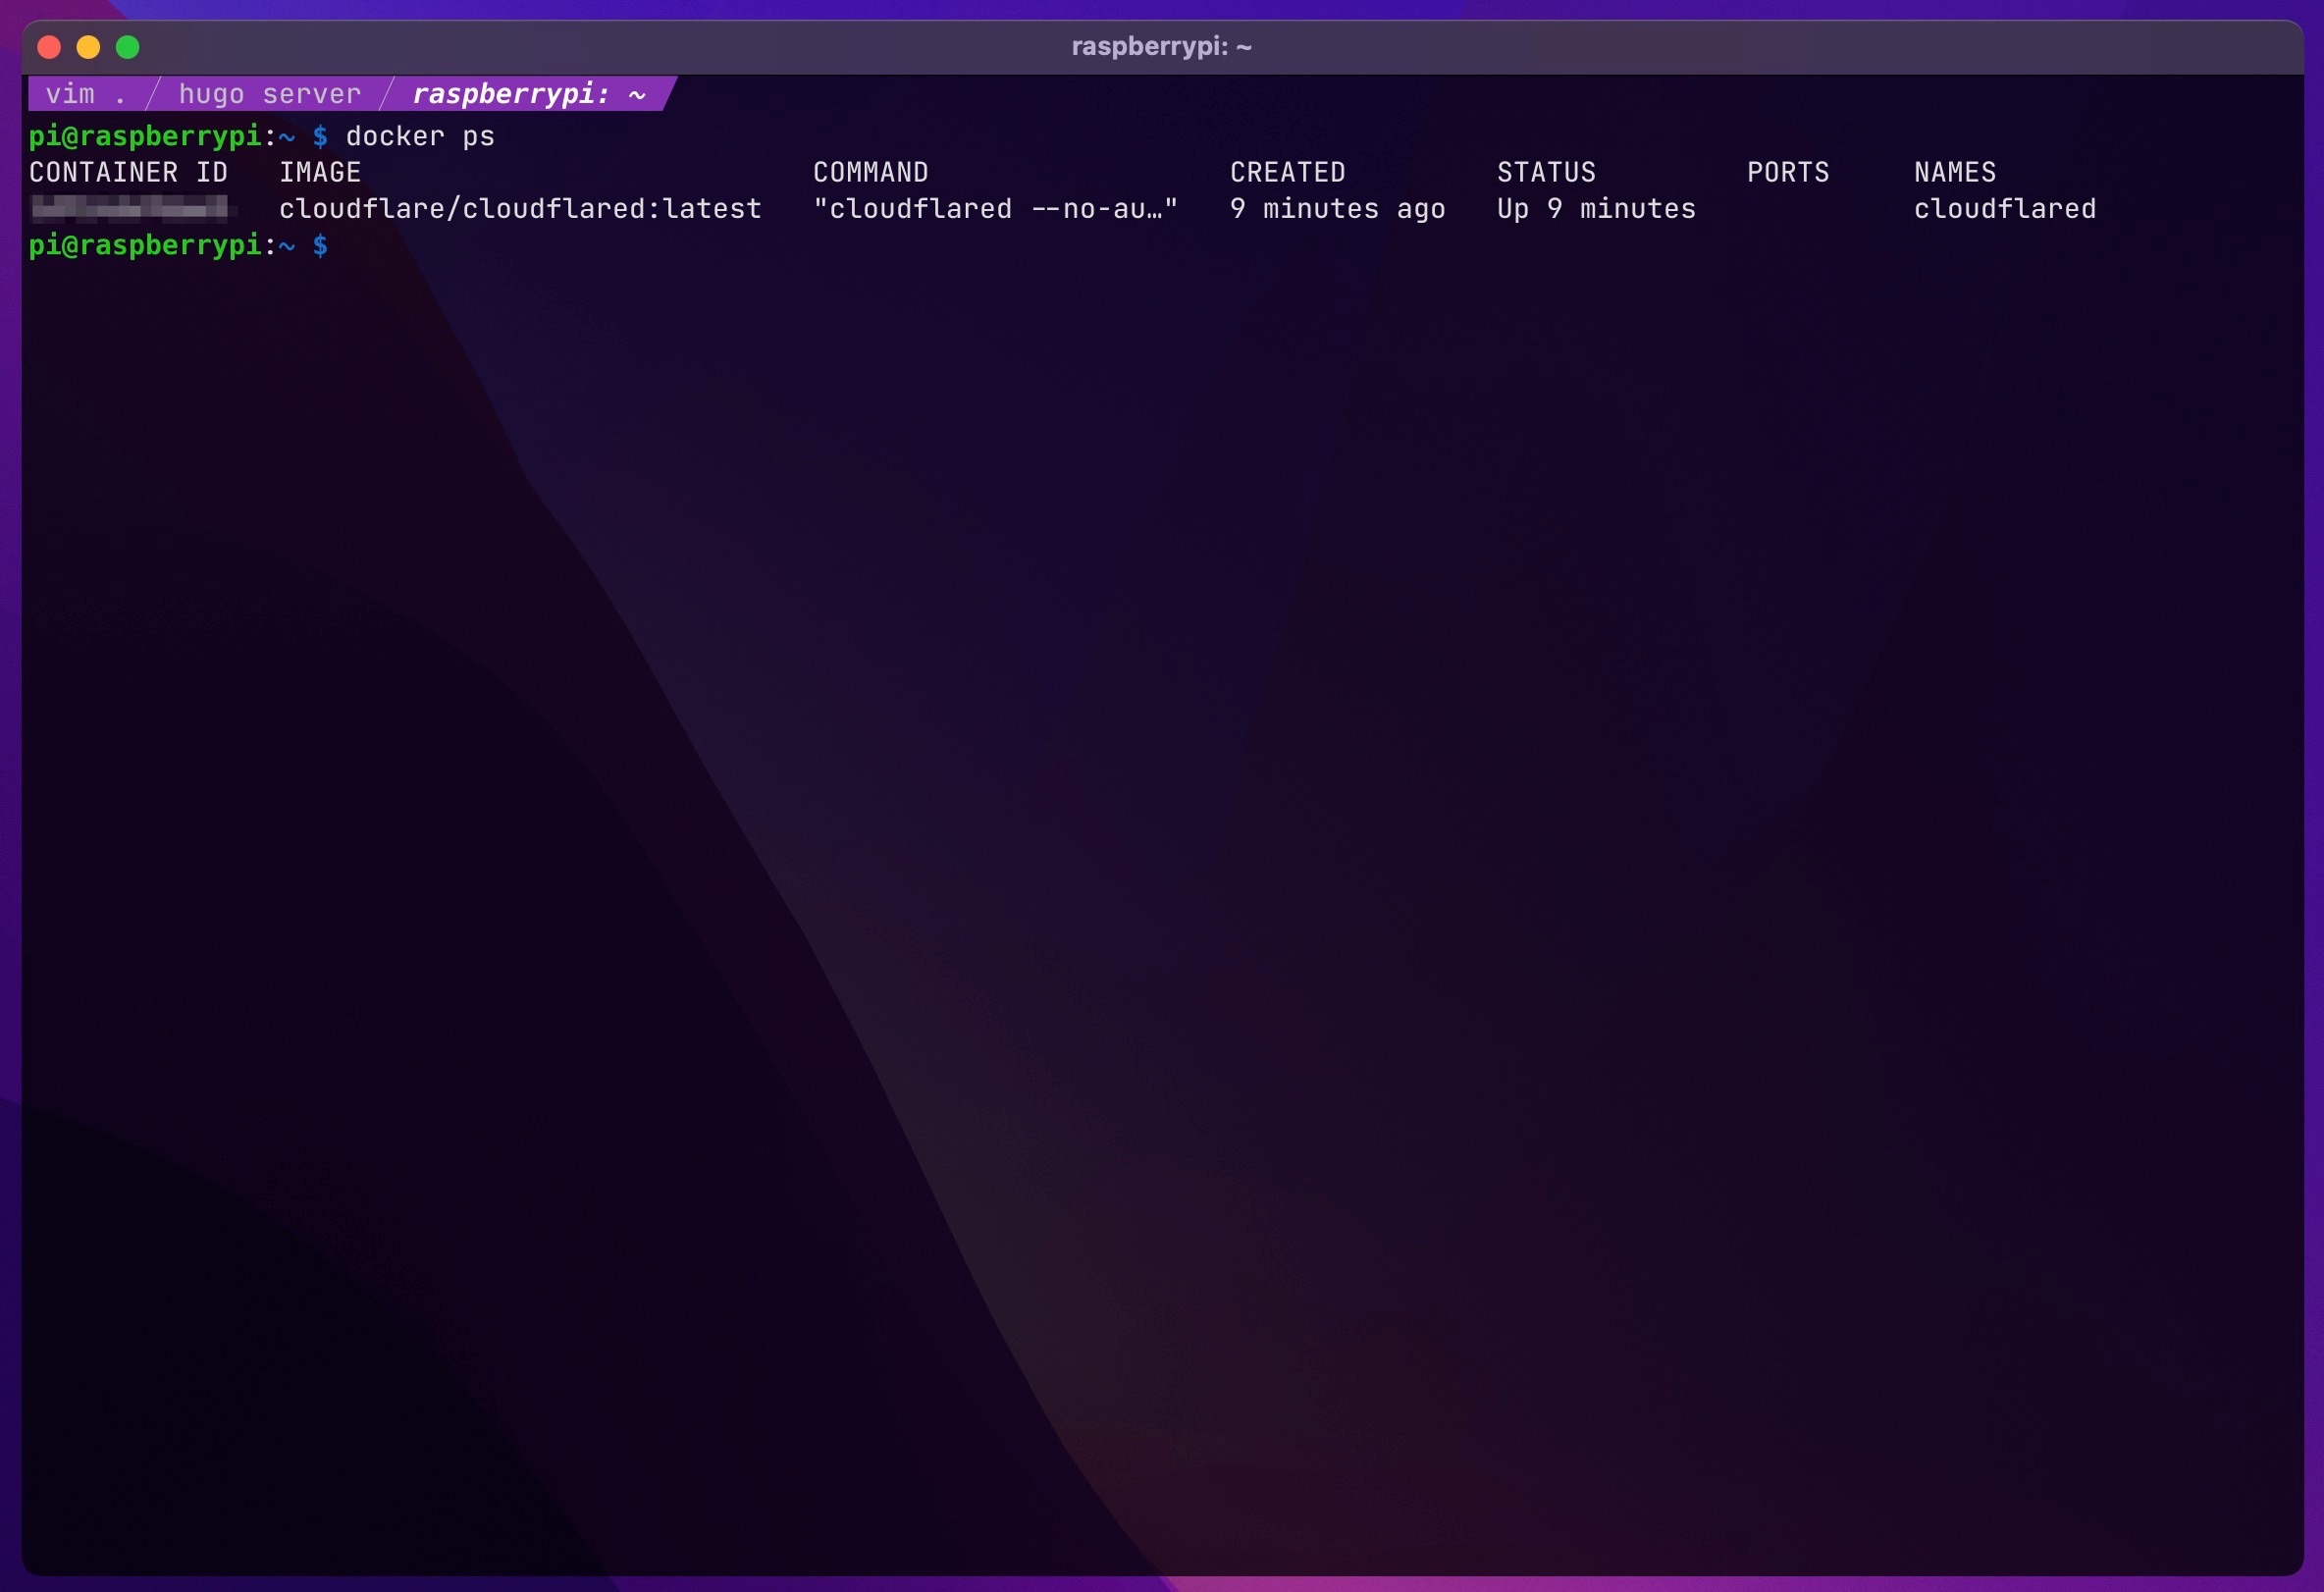
Also you can confirm it’s running with docker
docker ps
Click Next
Now it’s time to create some hostnames.
We will be creating a “Hello World” app in our RPI then will expose it to the web through tunnel.
First let’s set things properly here .
– Subdomain or Path they are both optional, for the sake of simplicty I will be using subdomain option here.
– Pick your domain on the Domain dropdown.
– Type should be HTTP for this instance (don’t worry cloudflare will cover HTTPS by itself if you set it on your domain already)
– And the URL..This is part is important, we will pass our Docker container’s name(tag) first, then docker container’s port second here.
– For our hello world app, we will be name it helloworld in docker and make it use 8001 port later on.
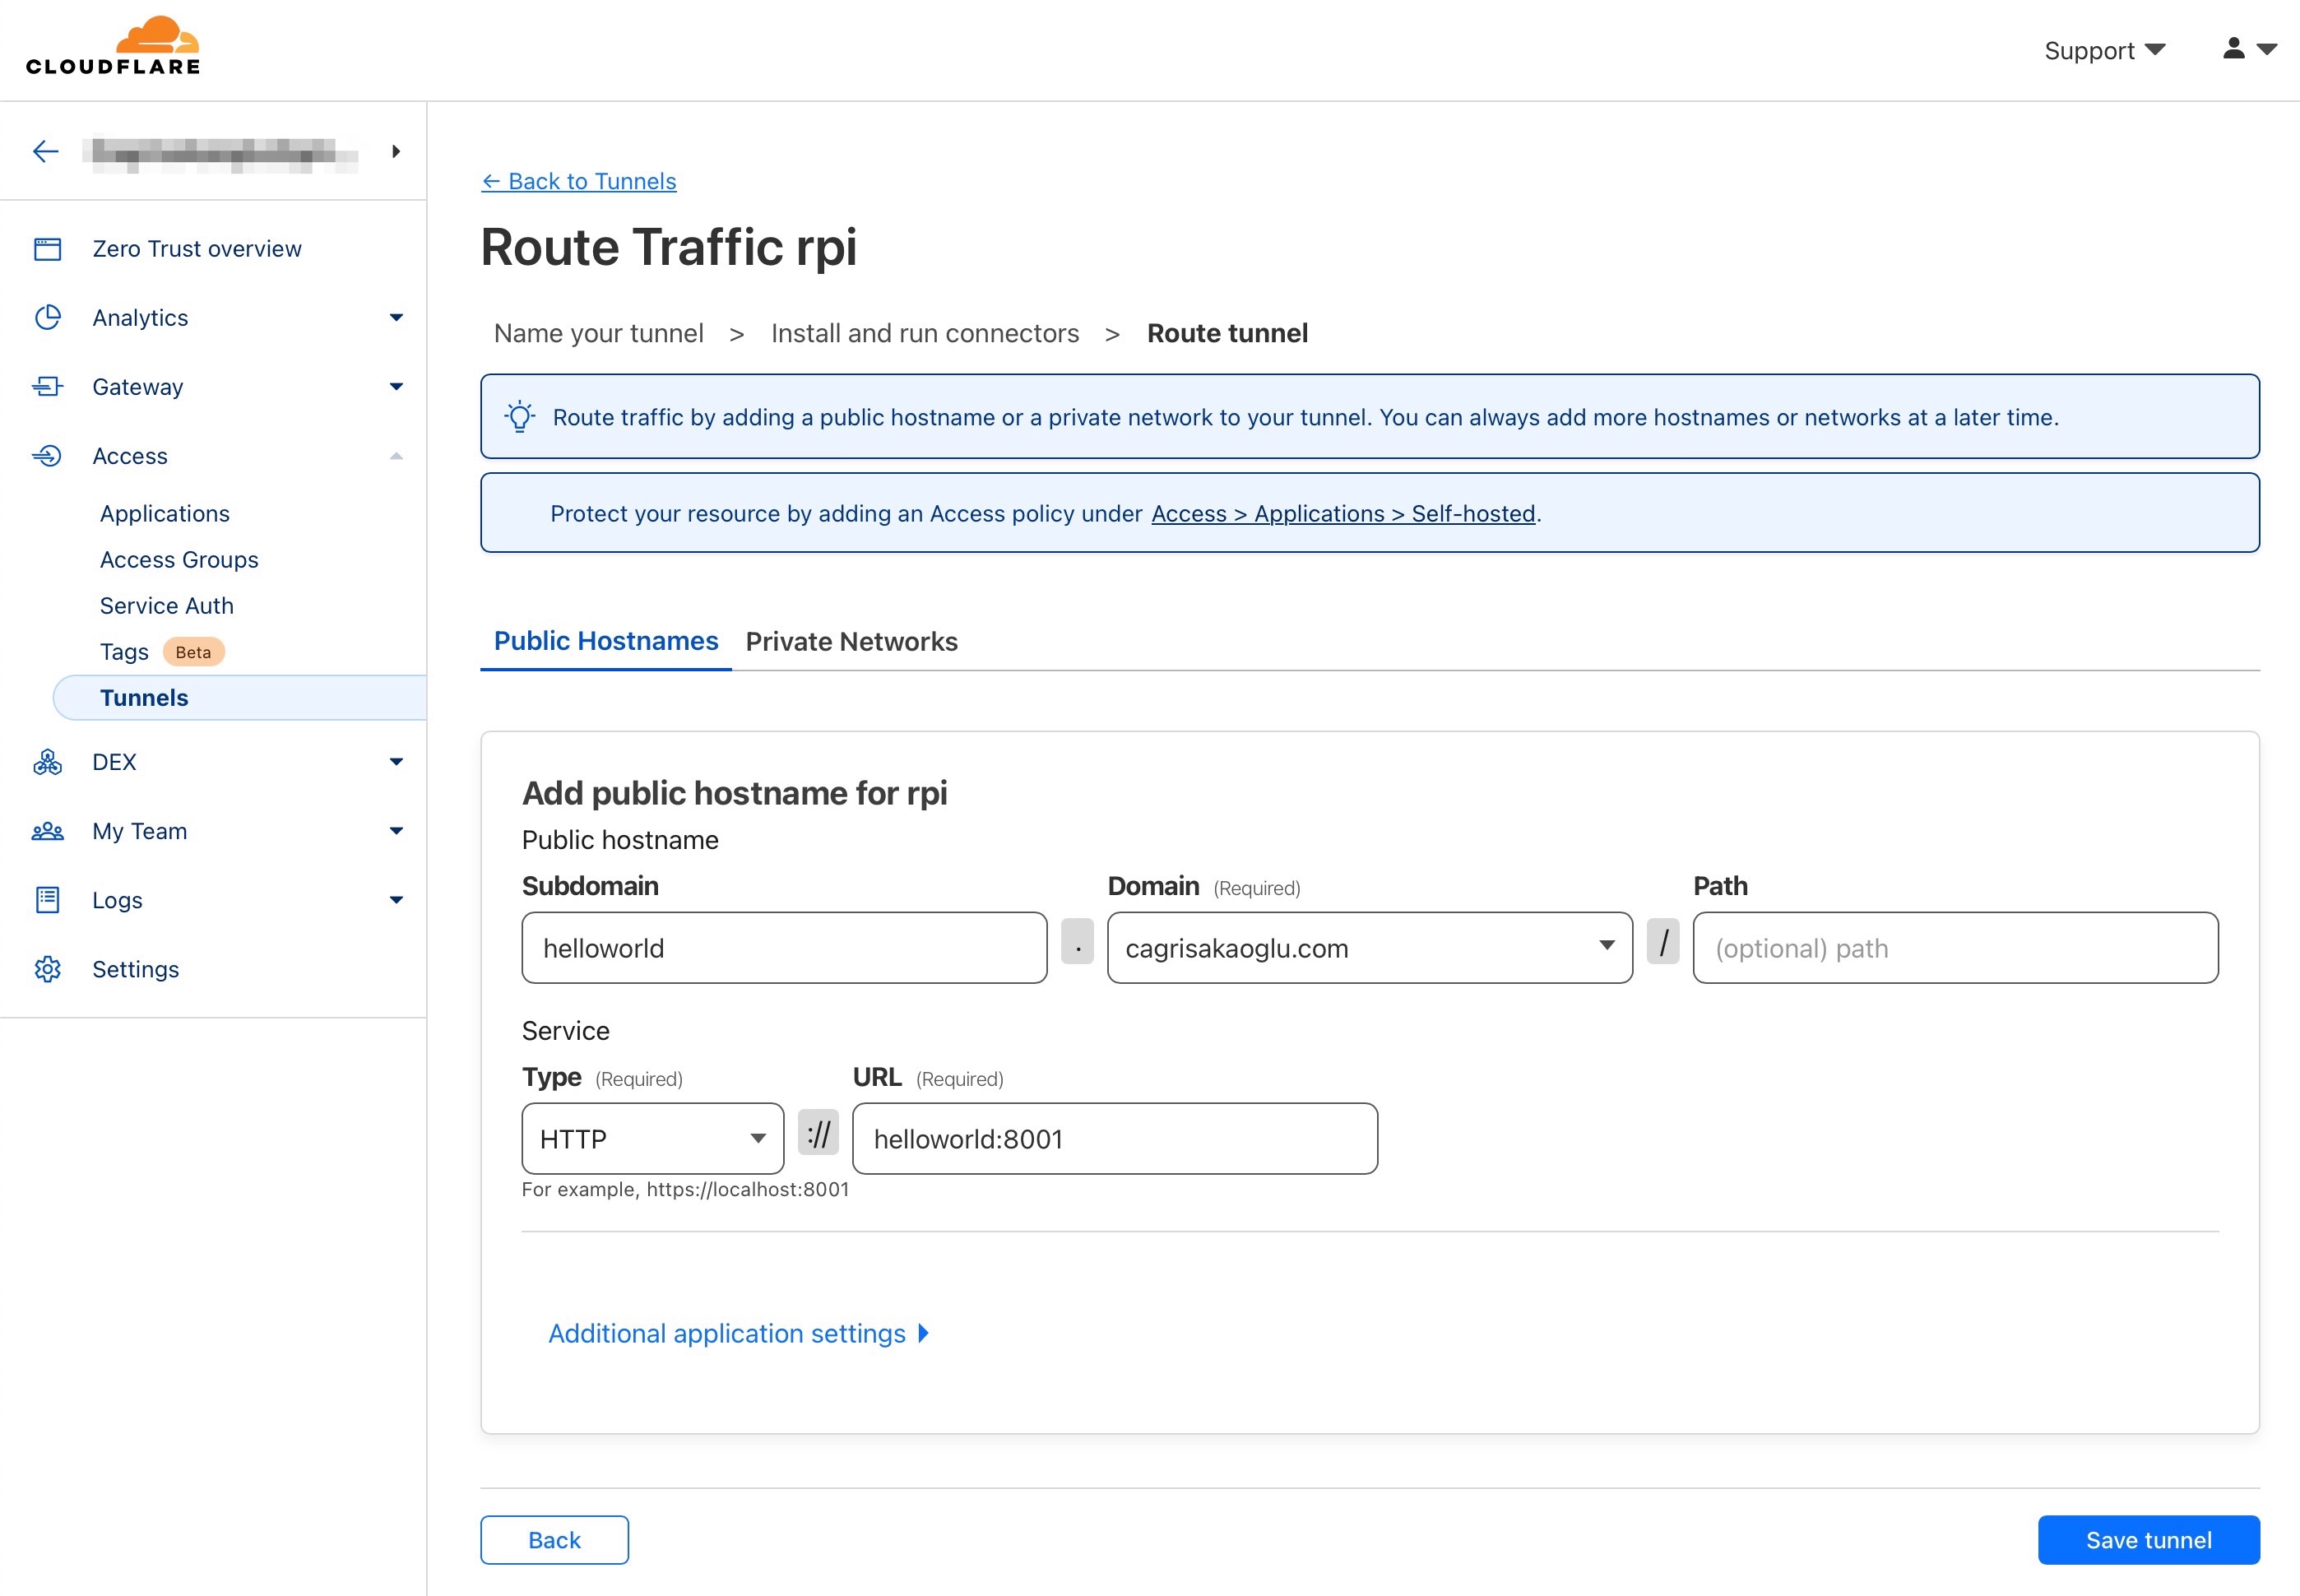
helloworld:8001
Click Save tunnel
You should see a similar window which showing Status - Healthy
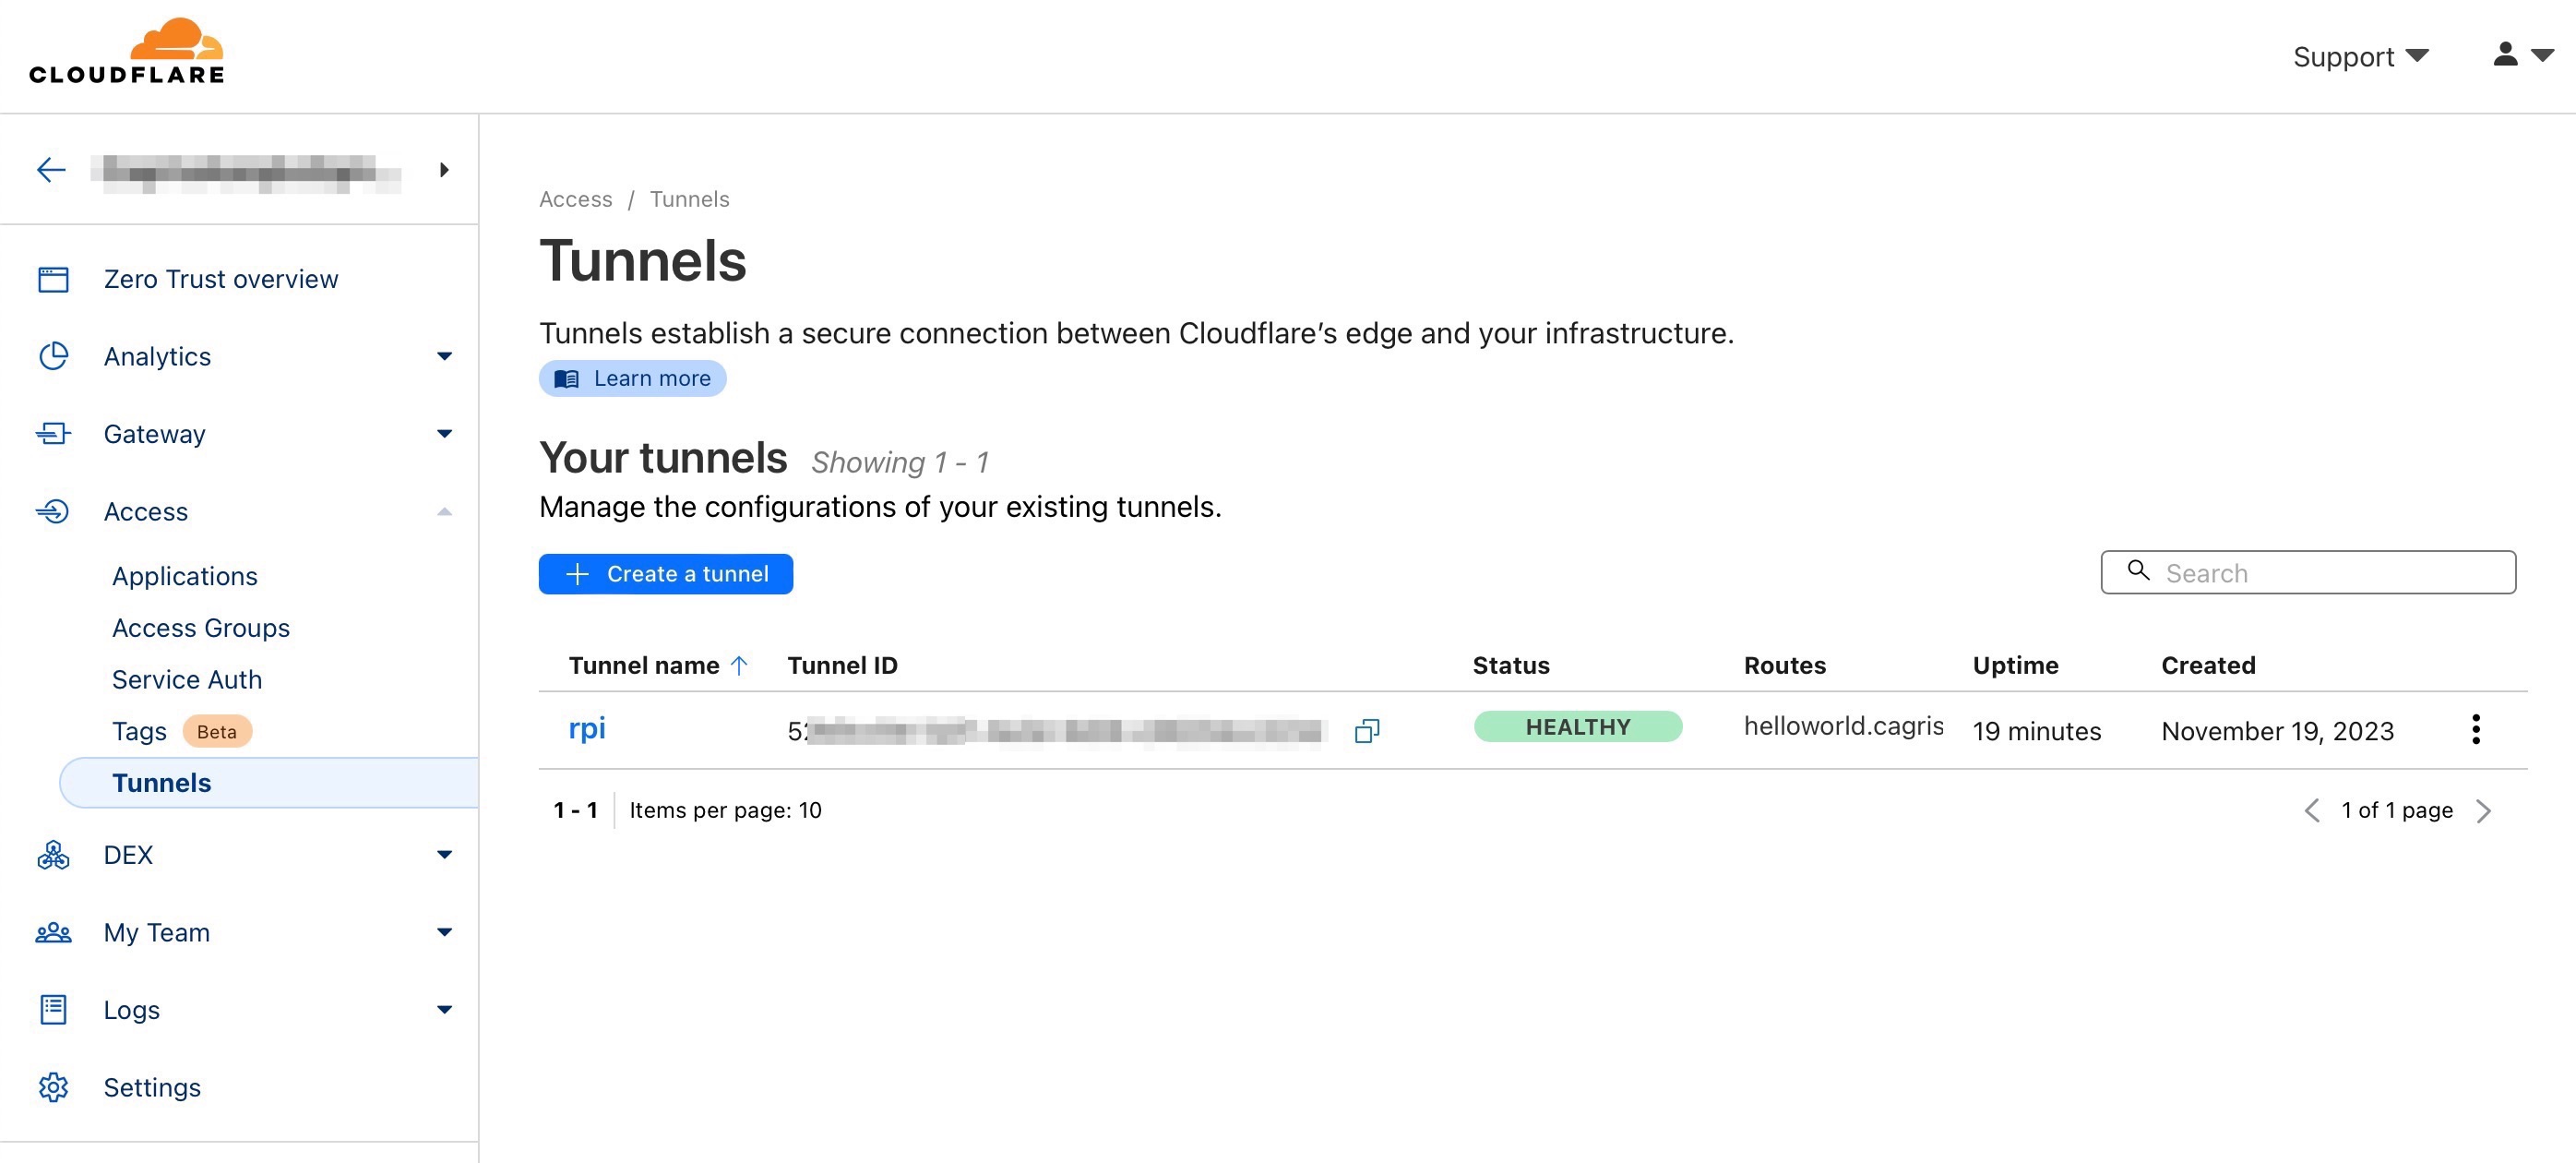
Voila! 👽
Let’s try to navigate to our newly created route Oops yeah, here’s the mighty cloudflare bad gateway page.
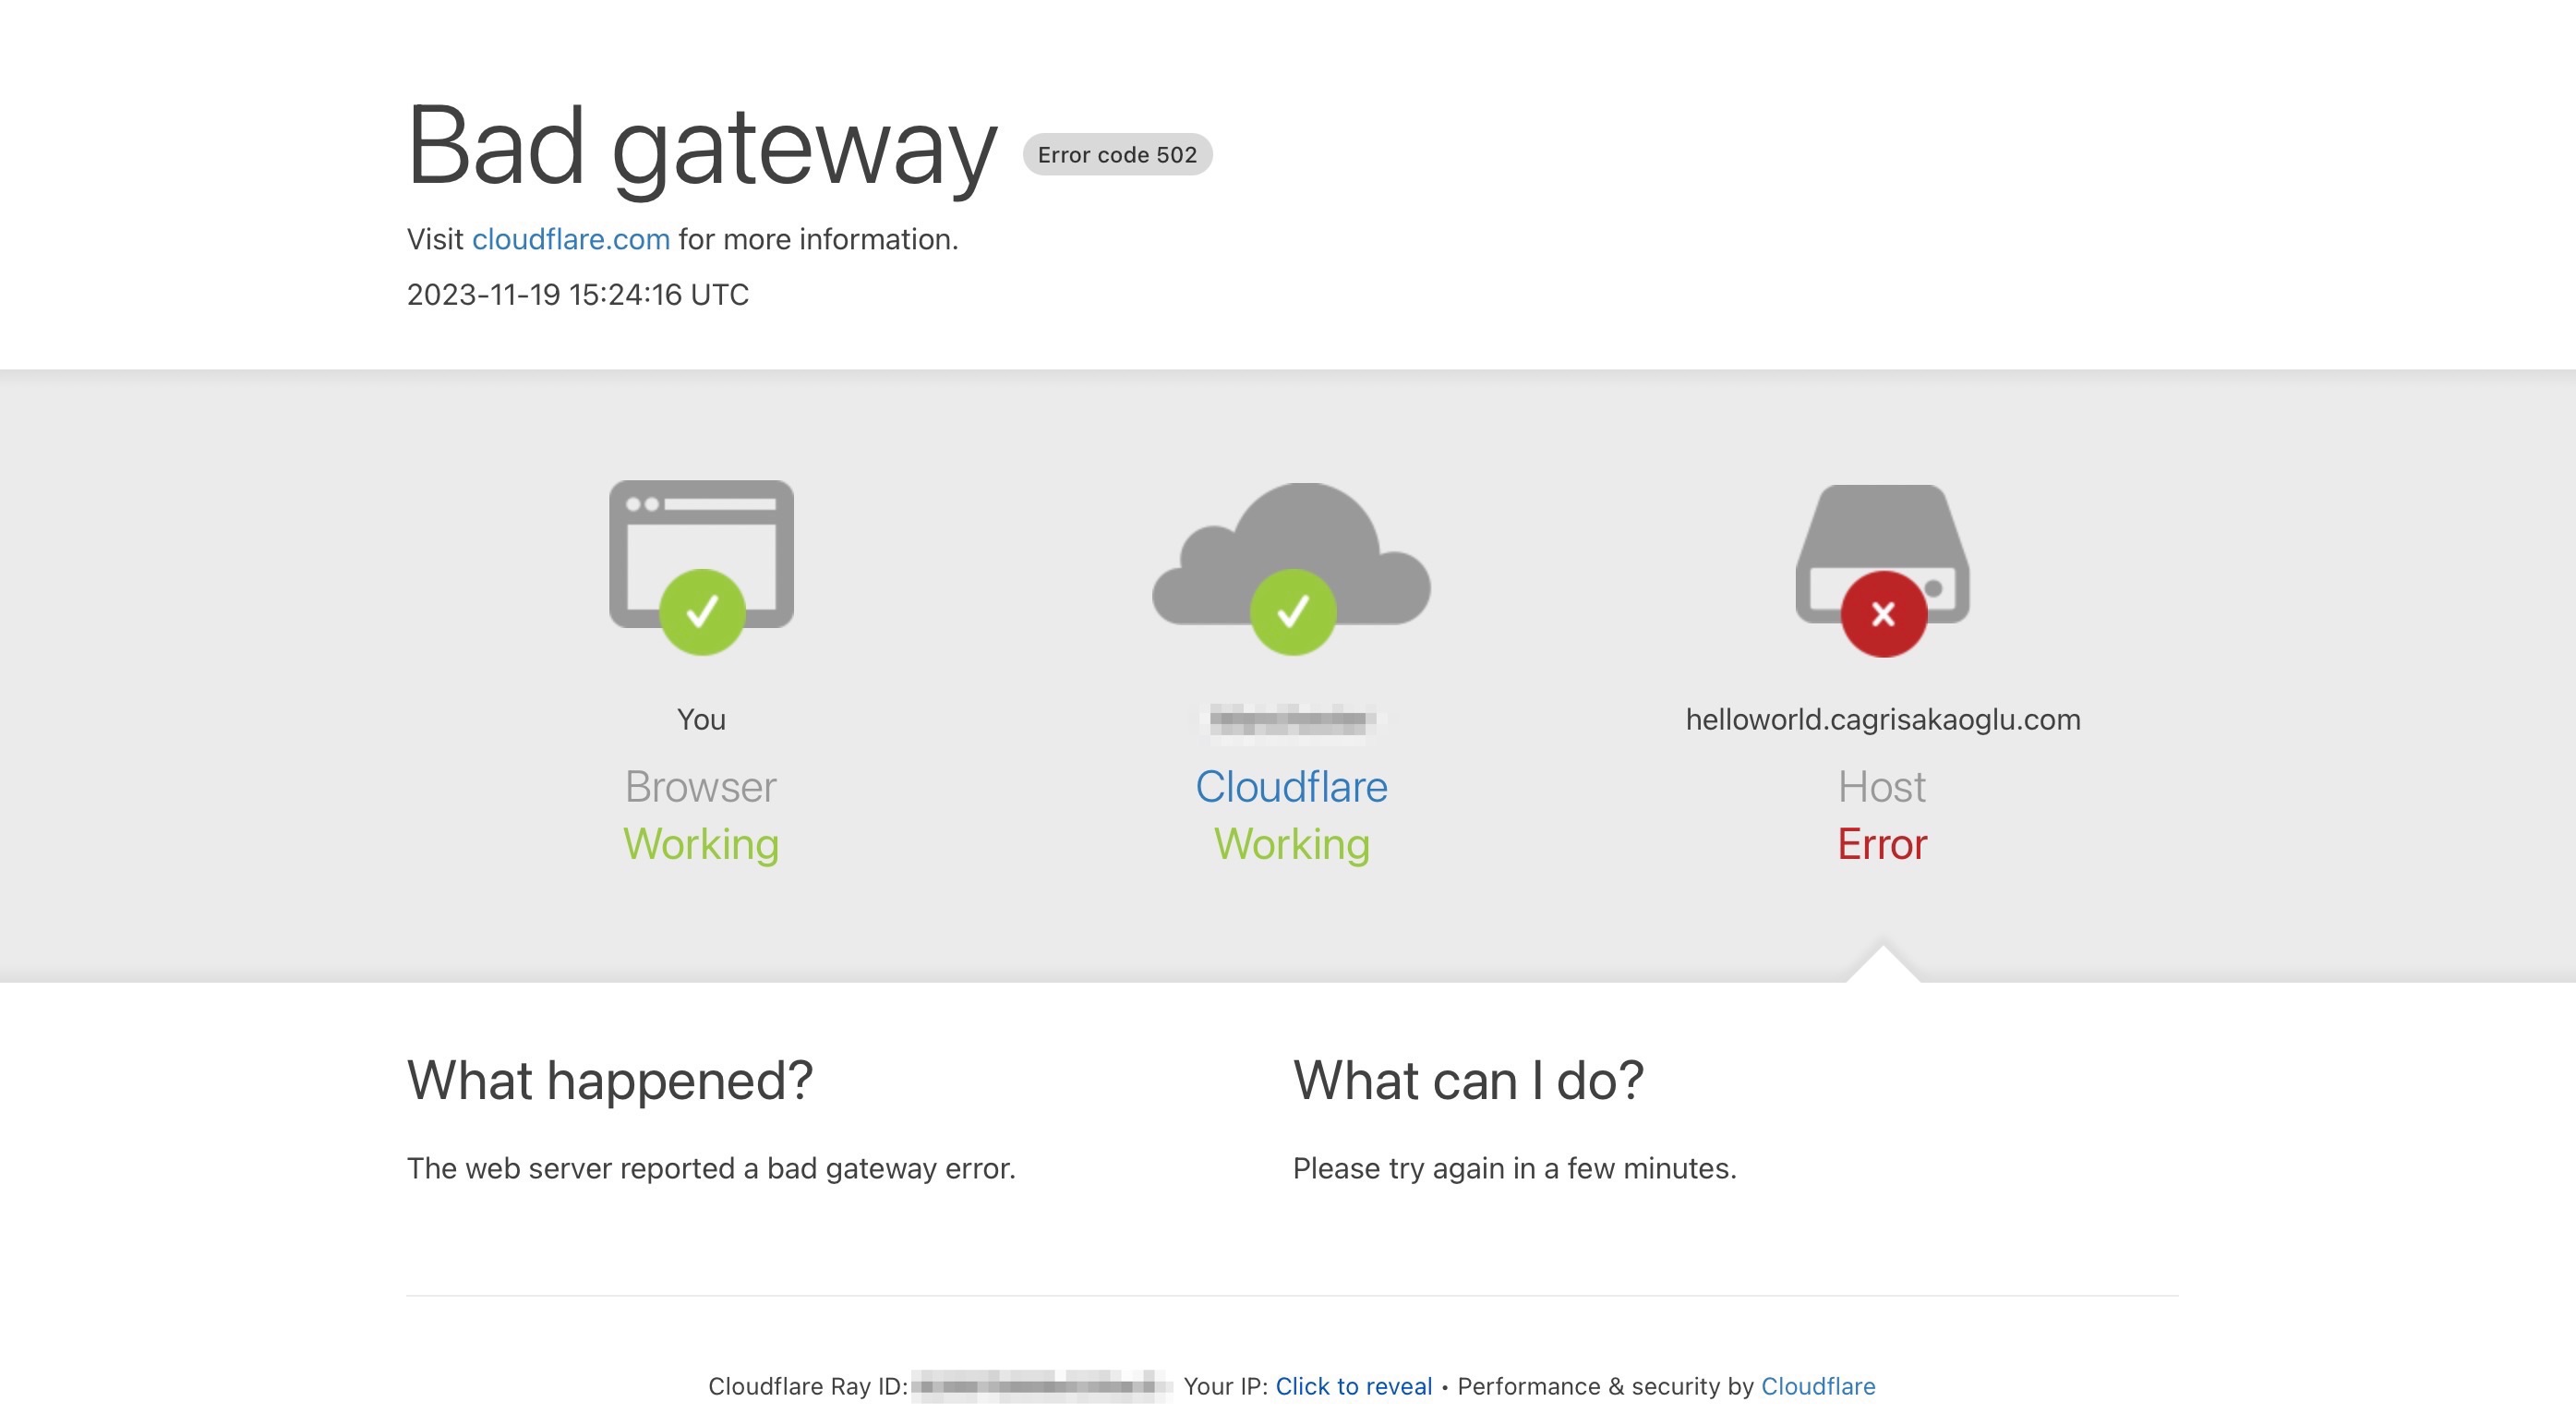
Okay, now it’s really time to create the Hello World app.
Hello World App in Docker
You can literally use any web related docker image for this purpose, but I will be using a simple http-echo image for displaying “Hello world” message.
The only important part is setting the port and container name correctly here for reflecting our cloudflare tunnel route setting. (8001 and helloworld)
Here’s modified http-echo container docker run for our usecase
docker run -d --network tunnel --name helloworld hashicorp/http-echo -text="Hello World" -listen=:8001
When docker created the container.
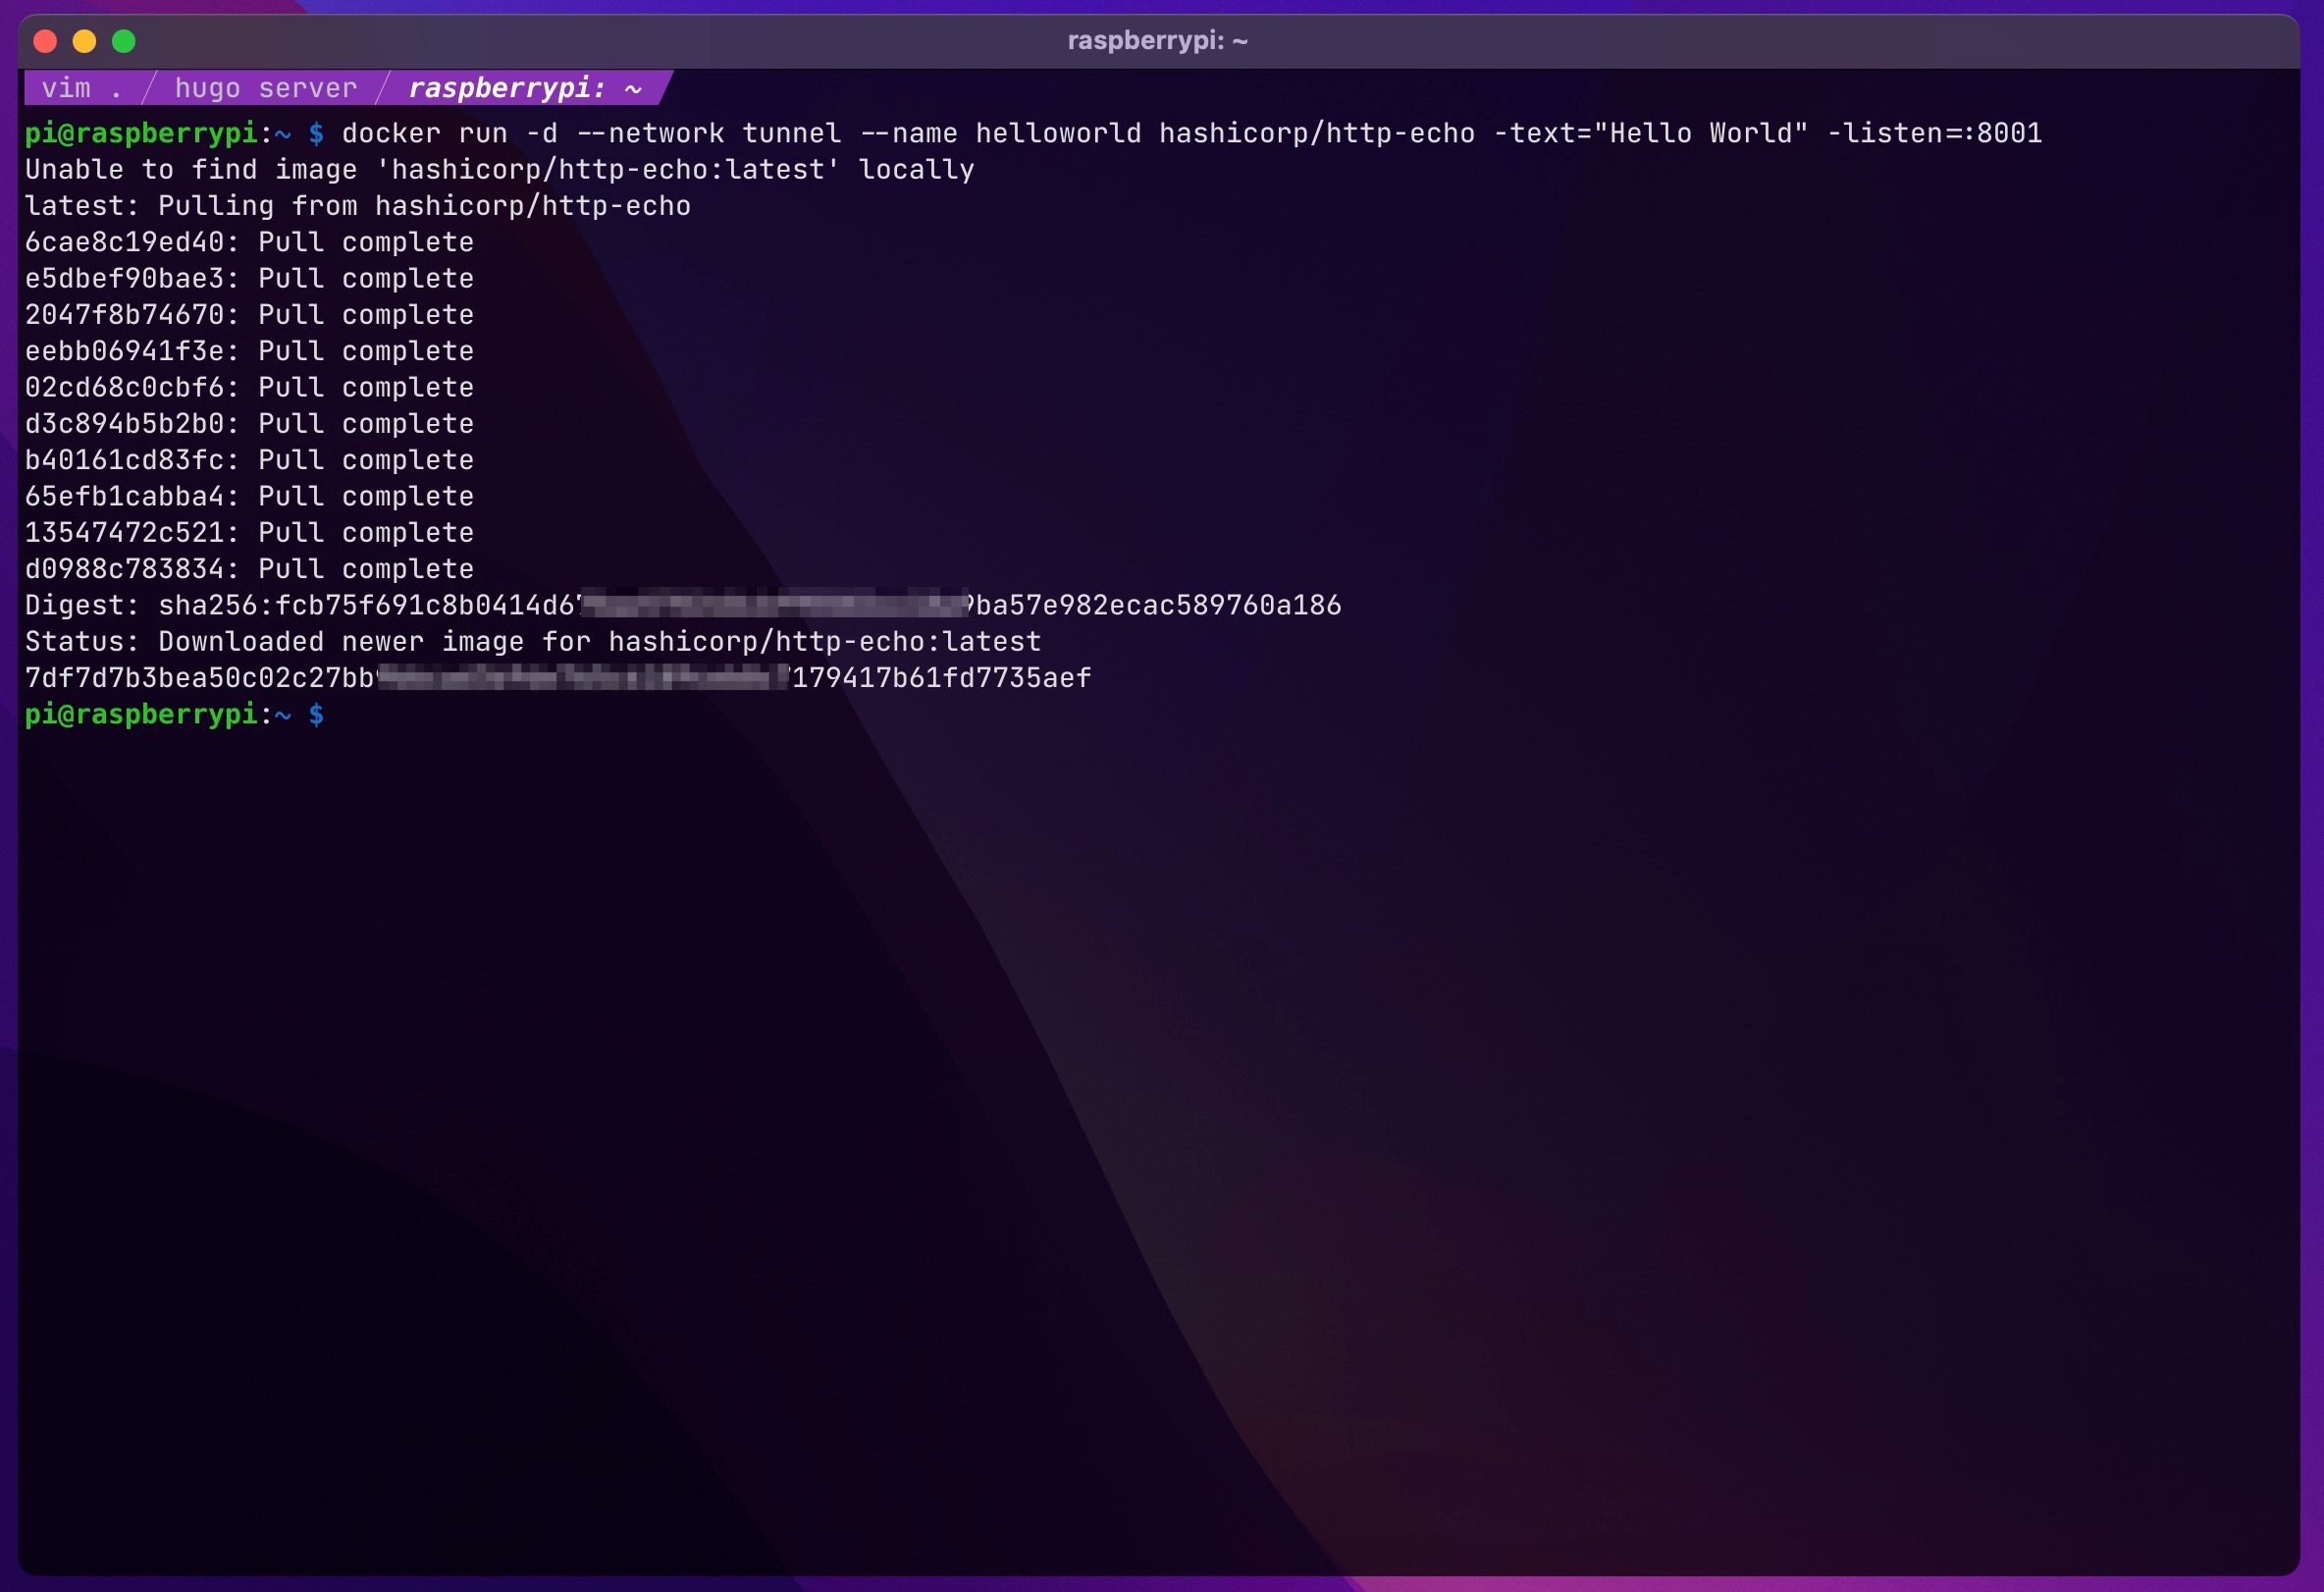
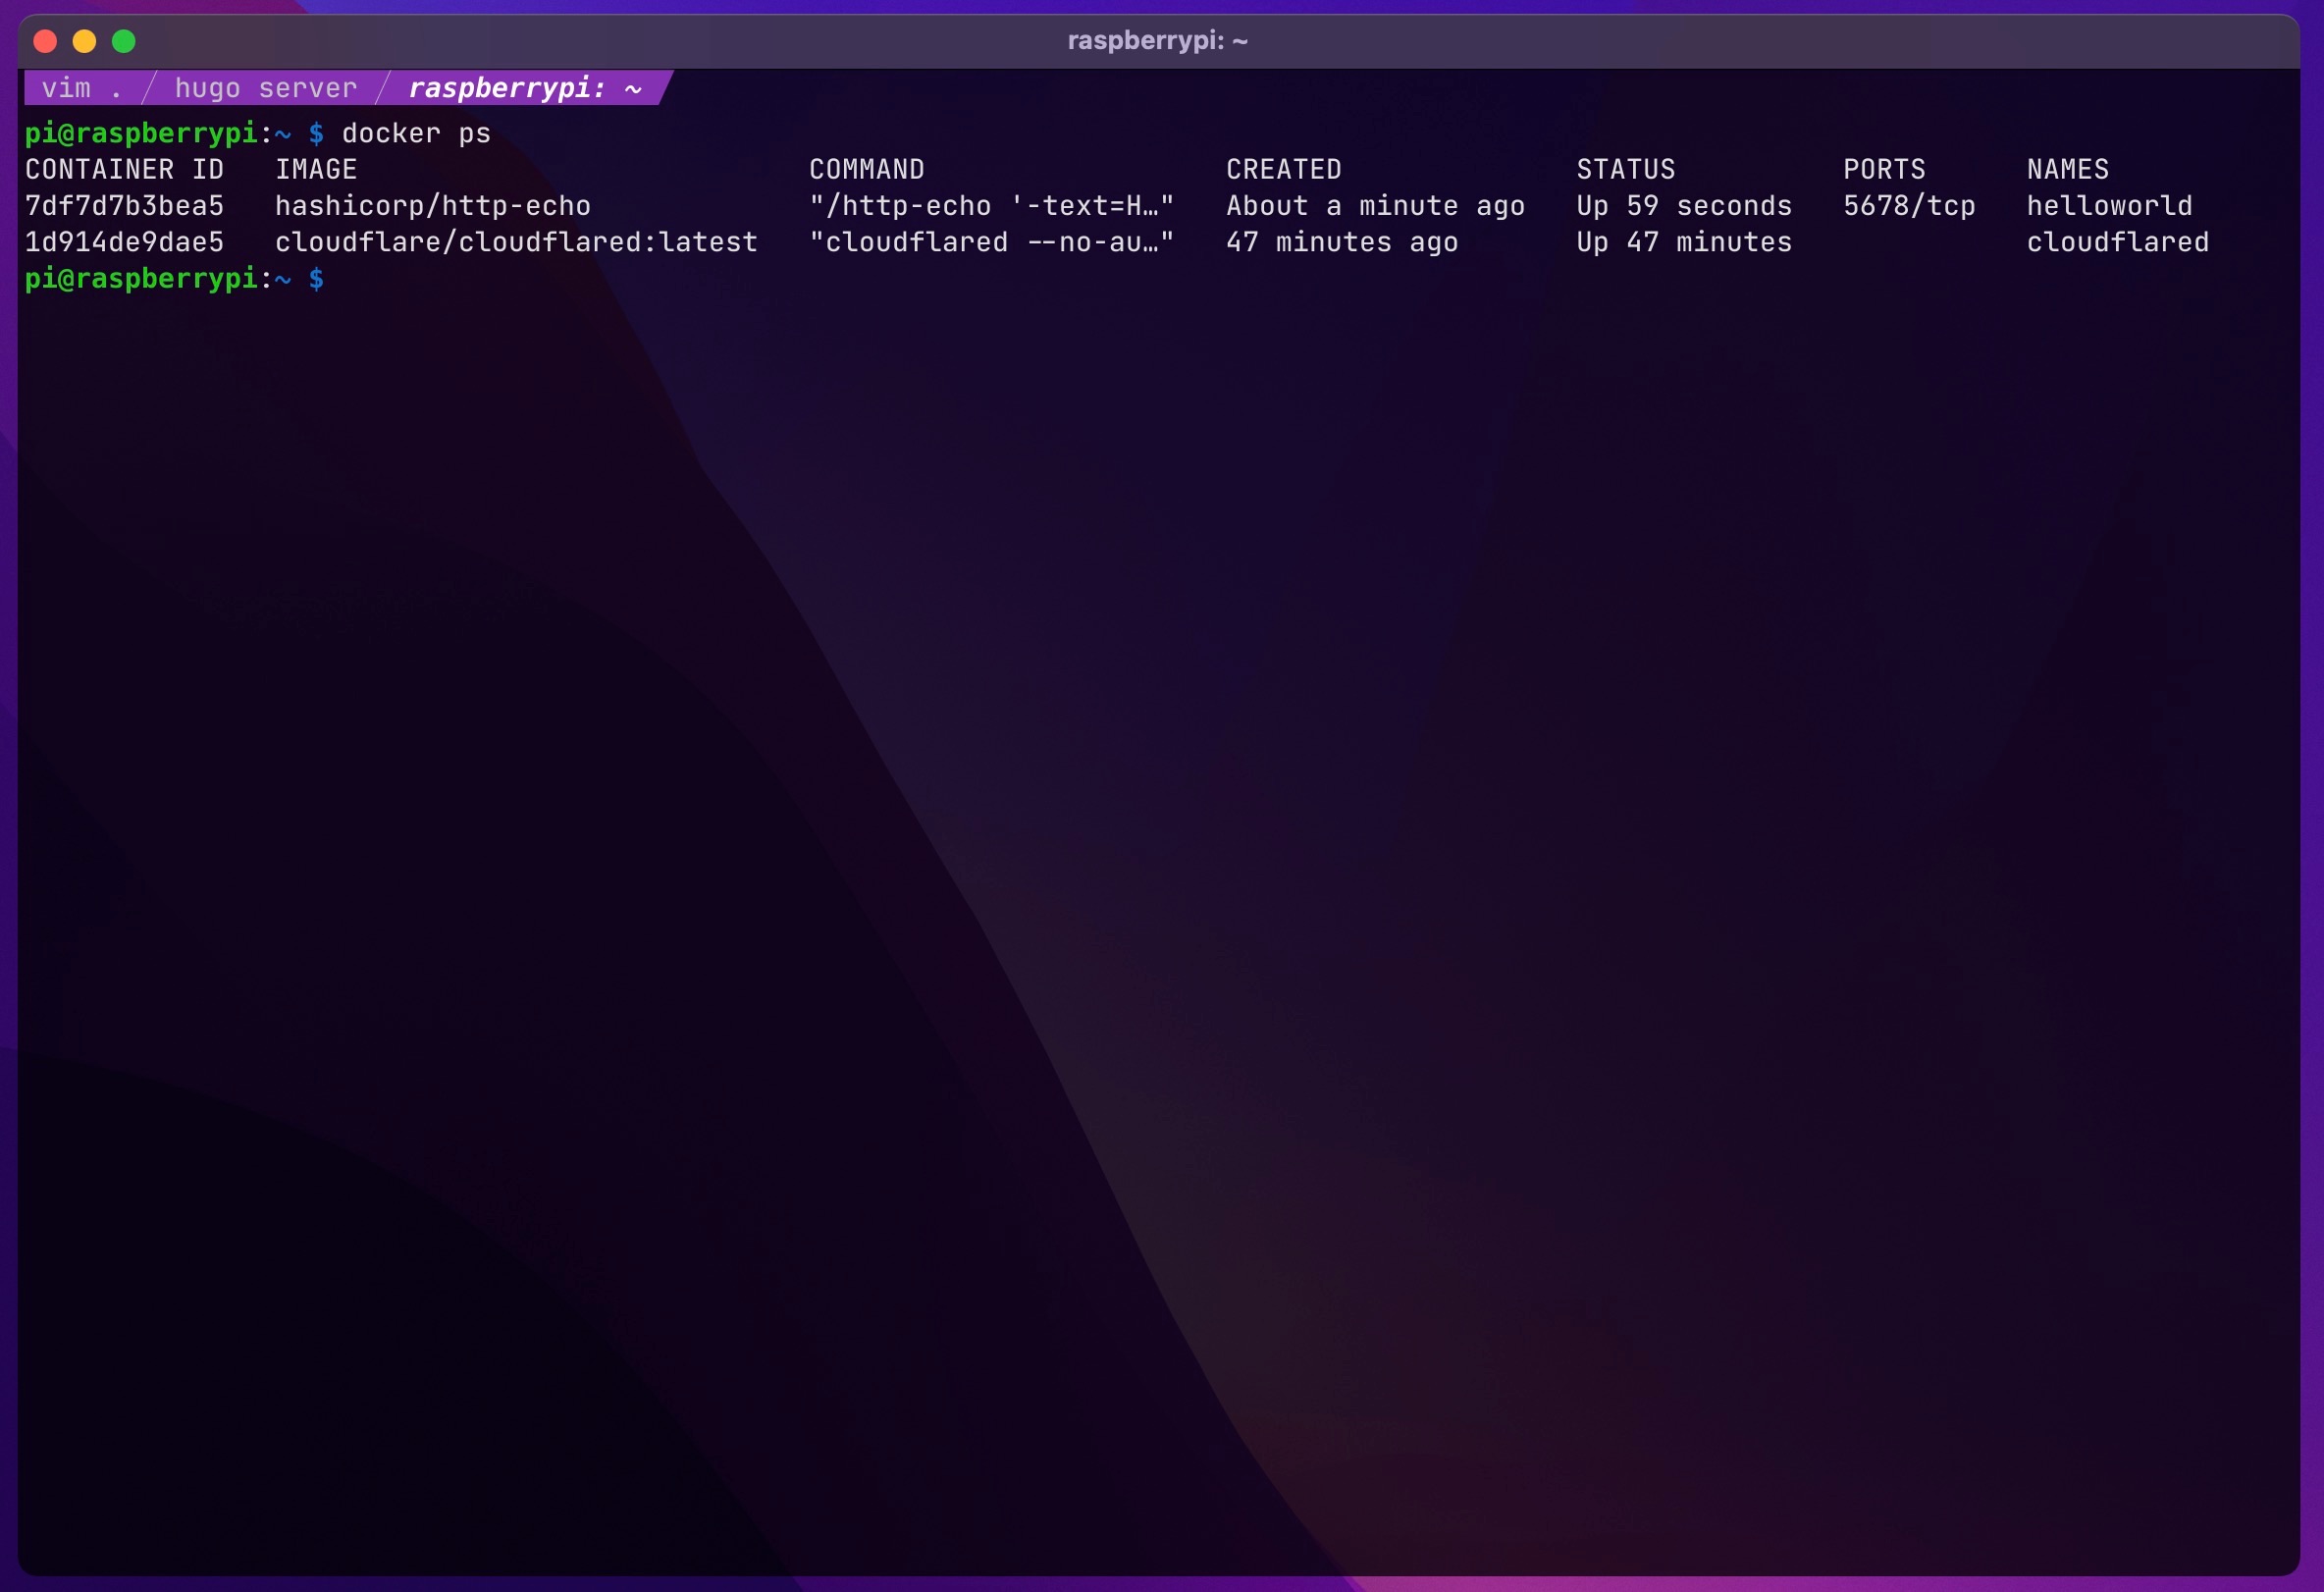
You should confirm it’s running with docker
docker ps
Let’s see the webpage in action
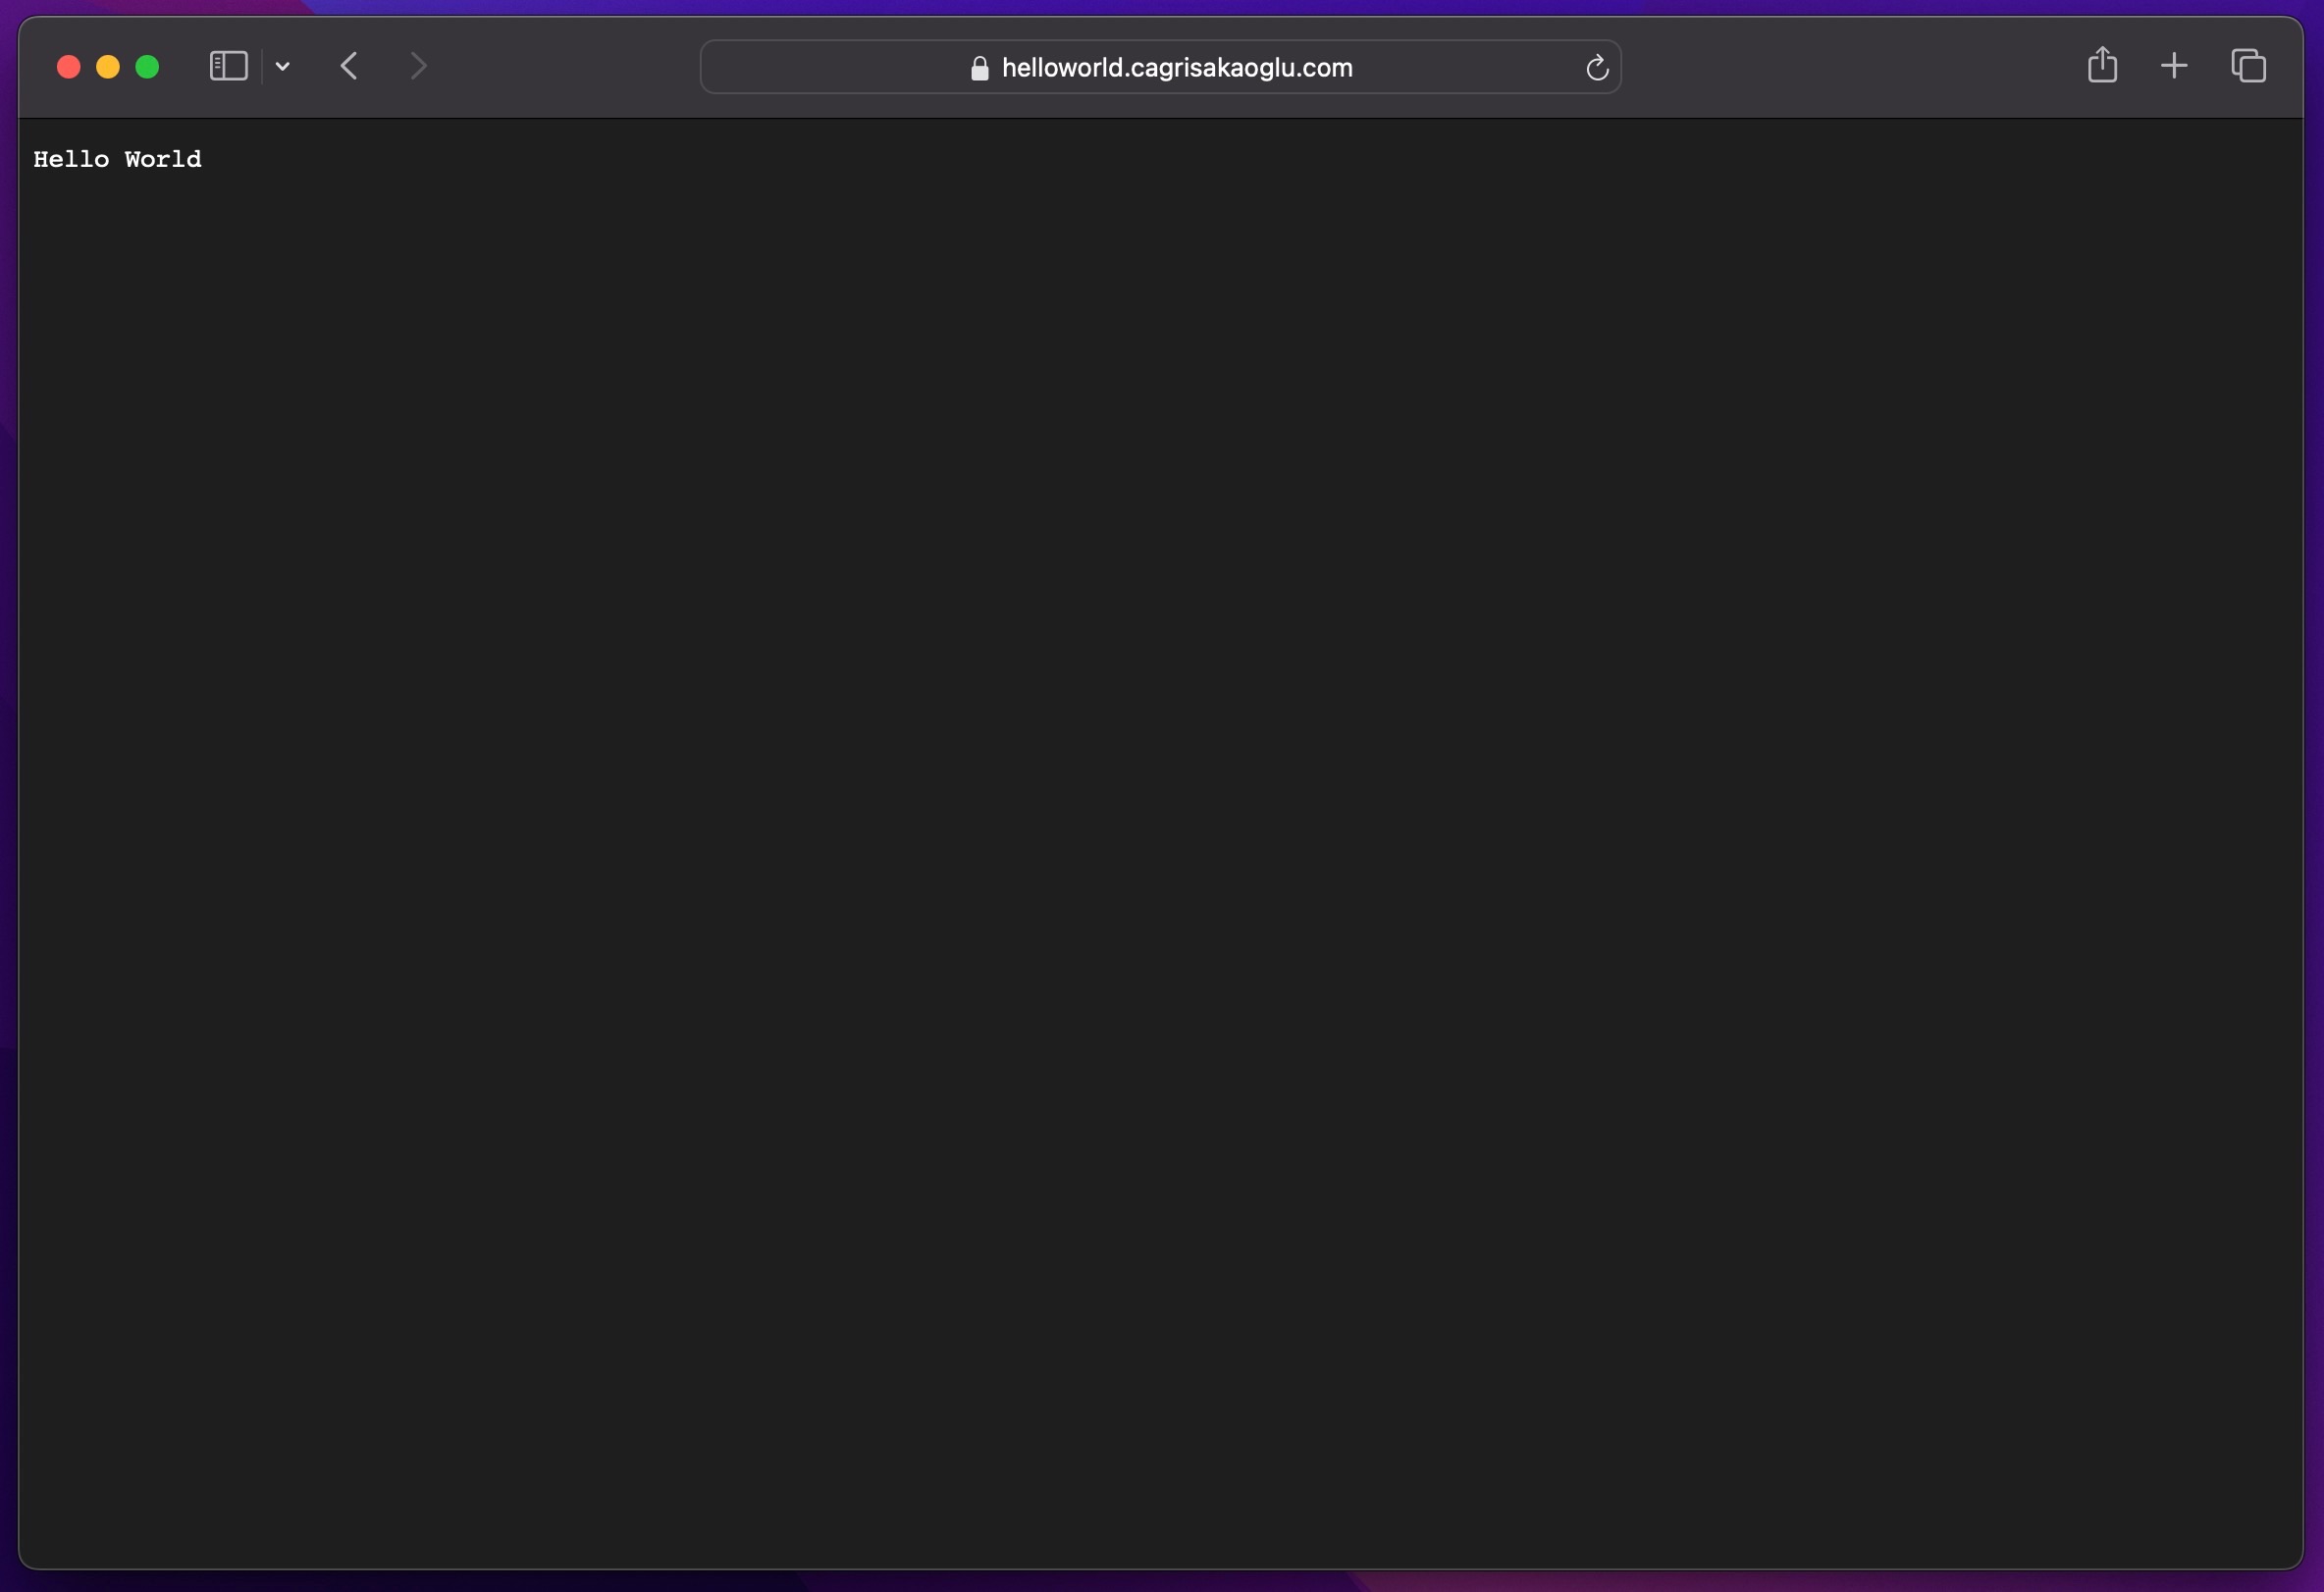
Great! We did it 🚀
Let’s continue with creating CI/CD pipelines with Github/Gitlab
Self-Hosted Runners
Self hosted runners or self-managed runners mean that the programs run on the machines you own and have full control over it.
We will be using them only for deploying, but you can use them for building and testing too. Using this runners with sudo privilege are convenient but be aware what you do!.
We can set them up for both Github and Gitlab, I will be explaining step by step both of them.
Let’s start with Gitlab;
Gitlab Self-Managed runner
There’s couple of ways to install Gitlab runner, I picked installing using the official repository which is pretty straight-forward in official docs
– Add the official GitLab repository to RPI (For Debian/Ubuntu/Mint):
curl -L "https://packages.gitlab.com/install/repositories/runner/gitlab-runner/script.deb.sh" | sudo bash
– Install the latest version of GitLab Runner:
sudo apt install gitlab-runner
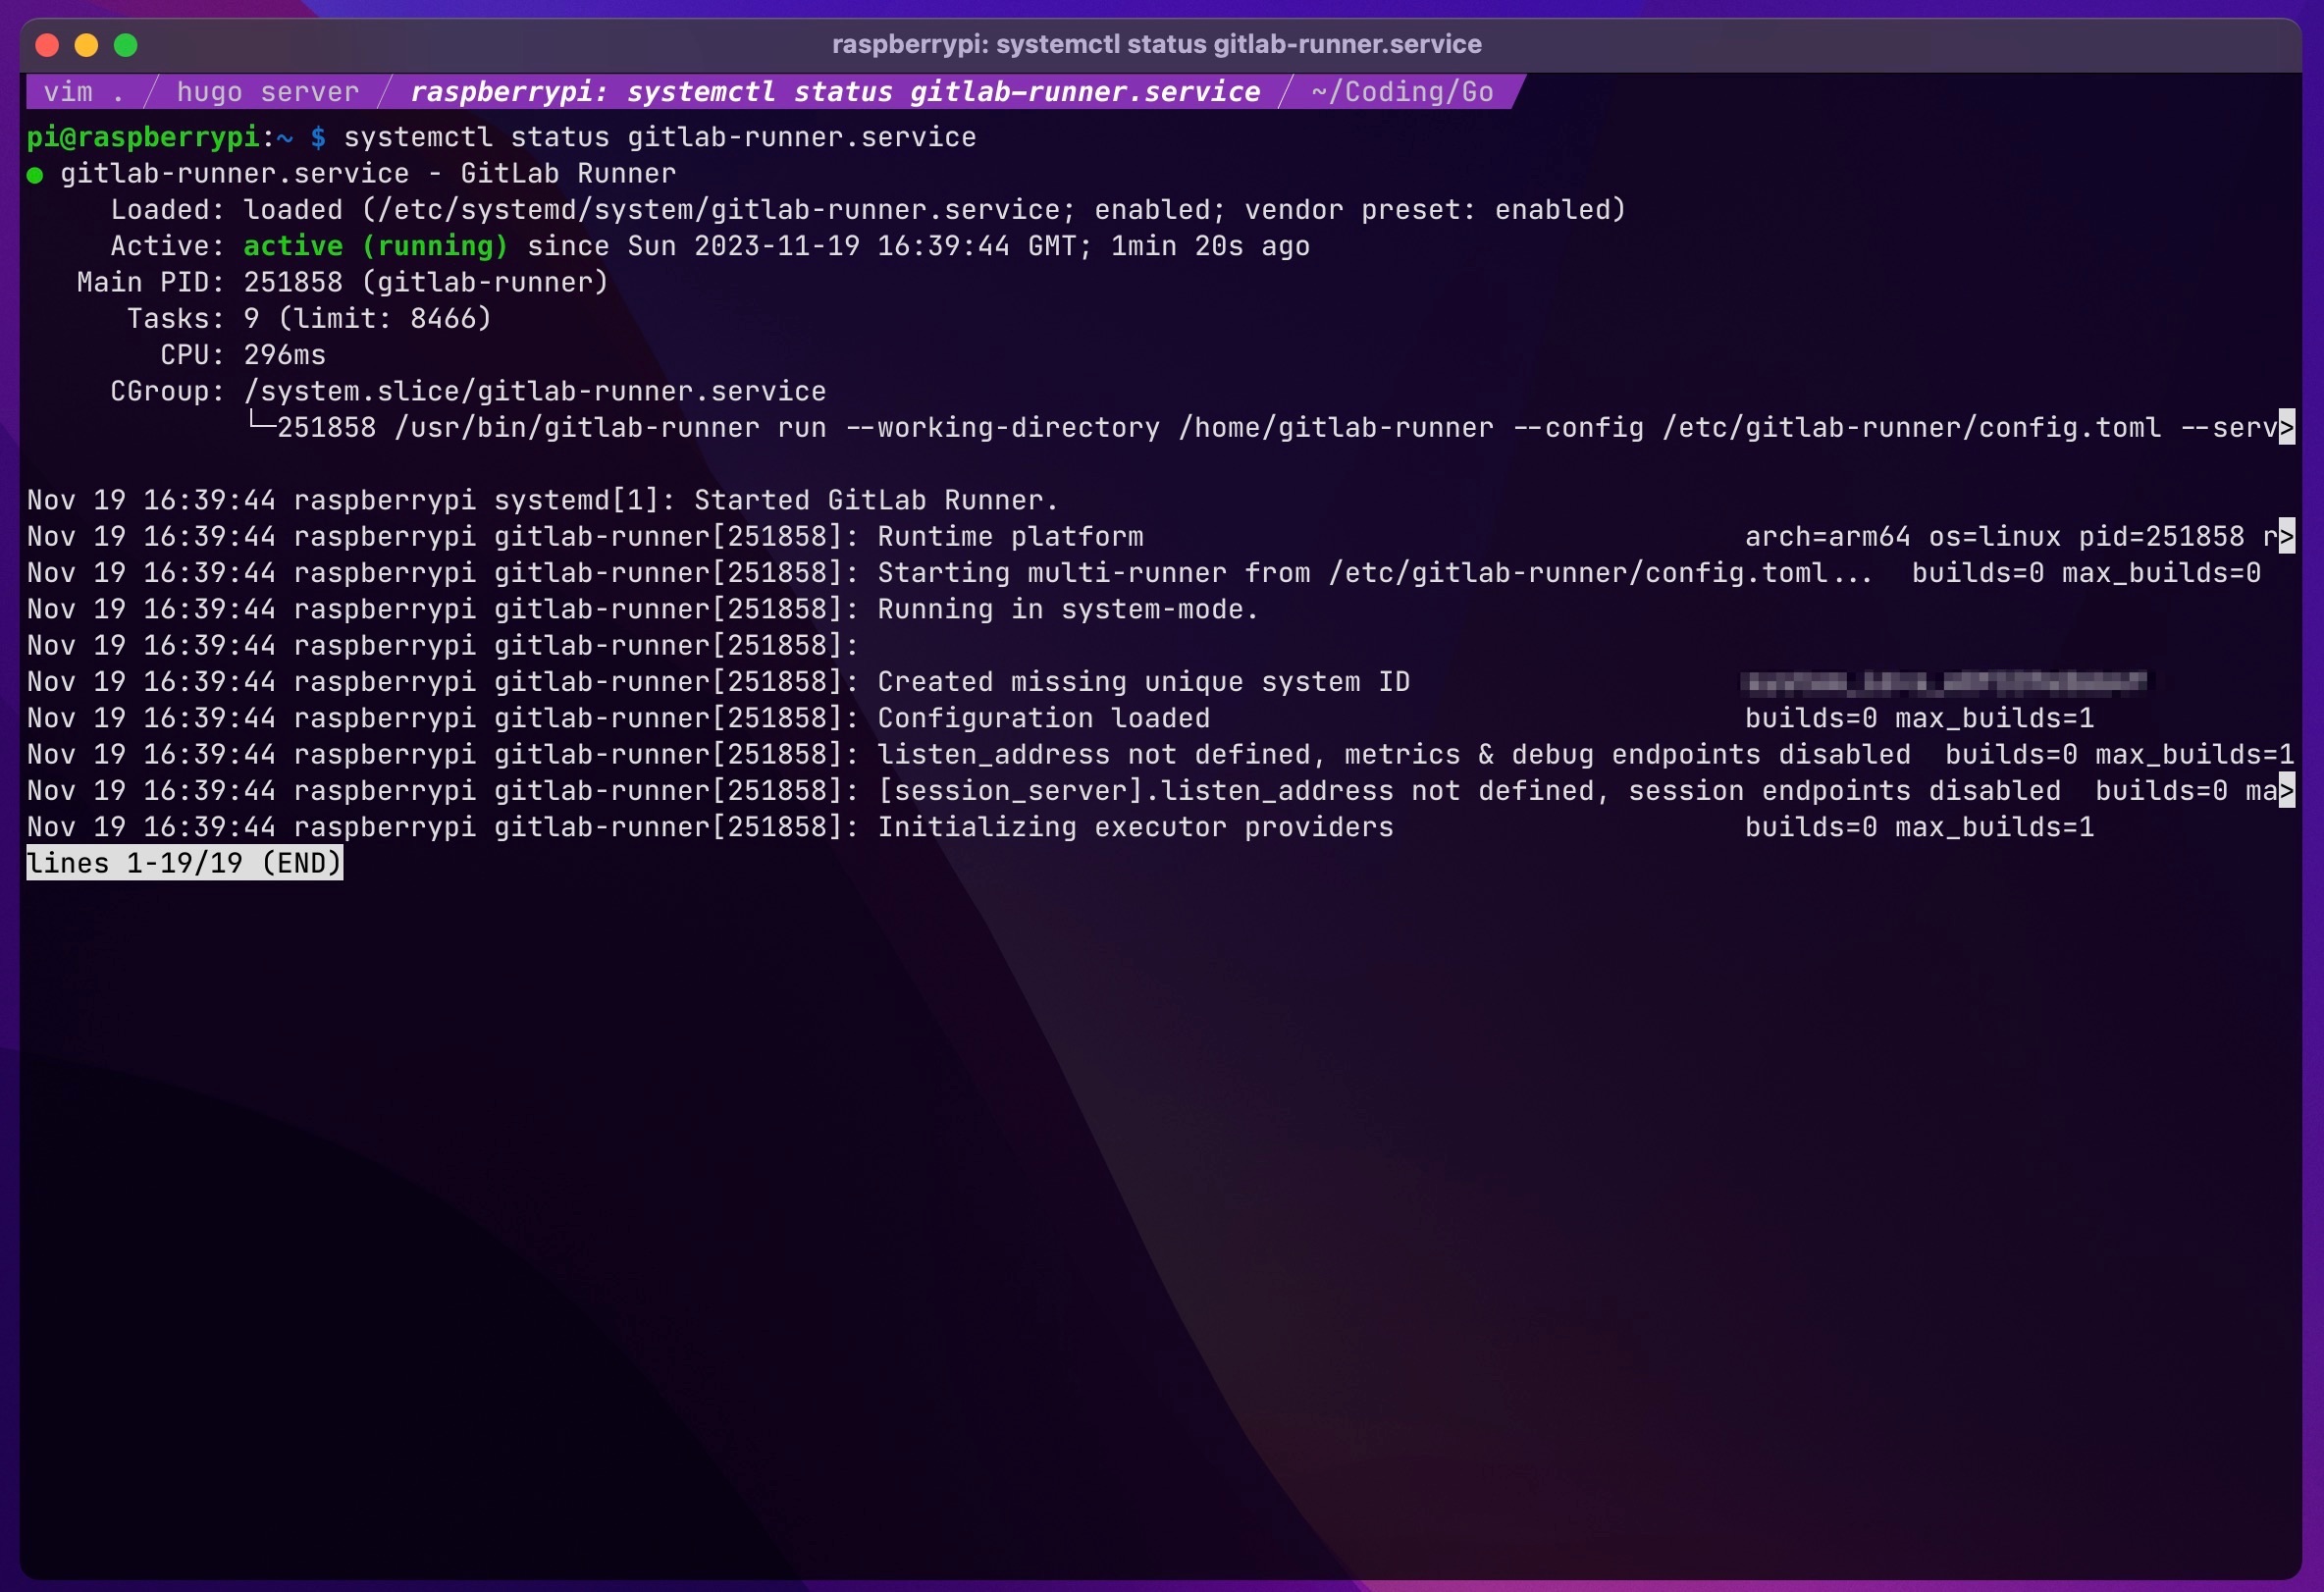
– After installing runner you can check if it’s service is running
systemctl status gitlab-runner.service
And you should see a similar output like this
Now add gitlab-runner user to docker group to later use
sudo usermod -aG docker gitlab-runner
– First of all create a repository in your Gitlab, or navigate to existing one.
We need to register this runner to our project.
Go to Settings > CI/CD expand Runners and click “New project runner”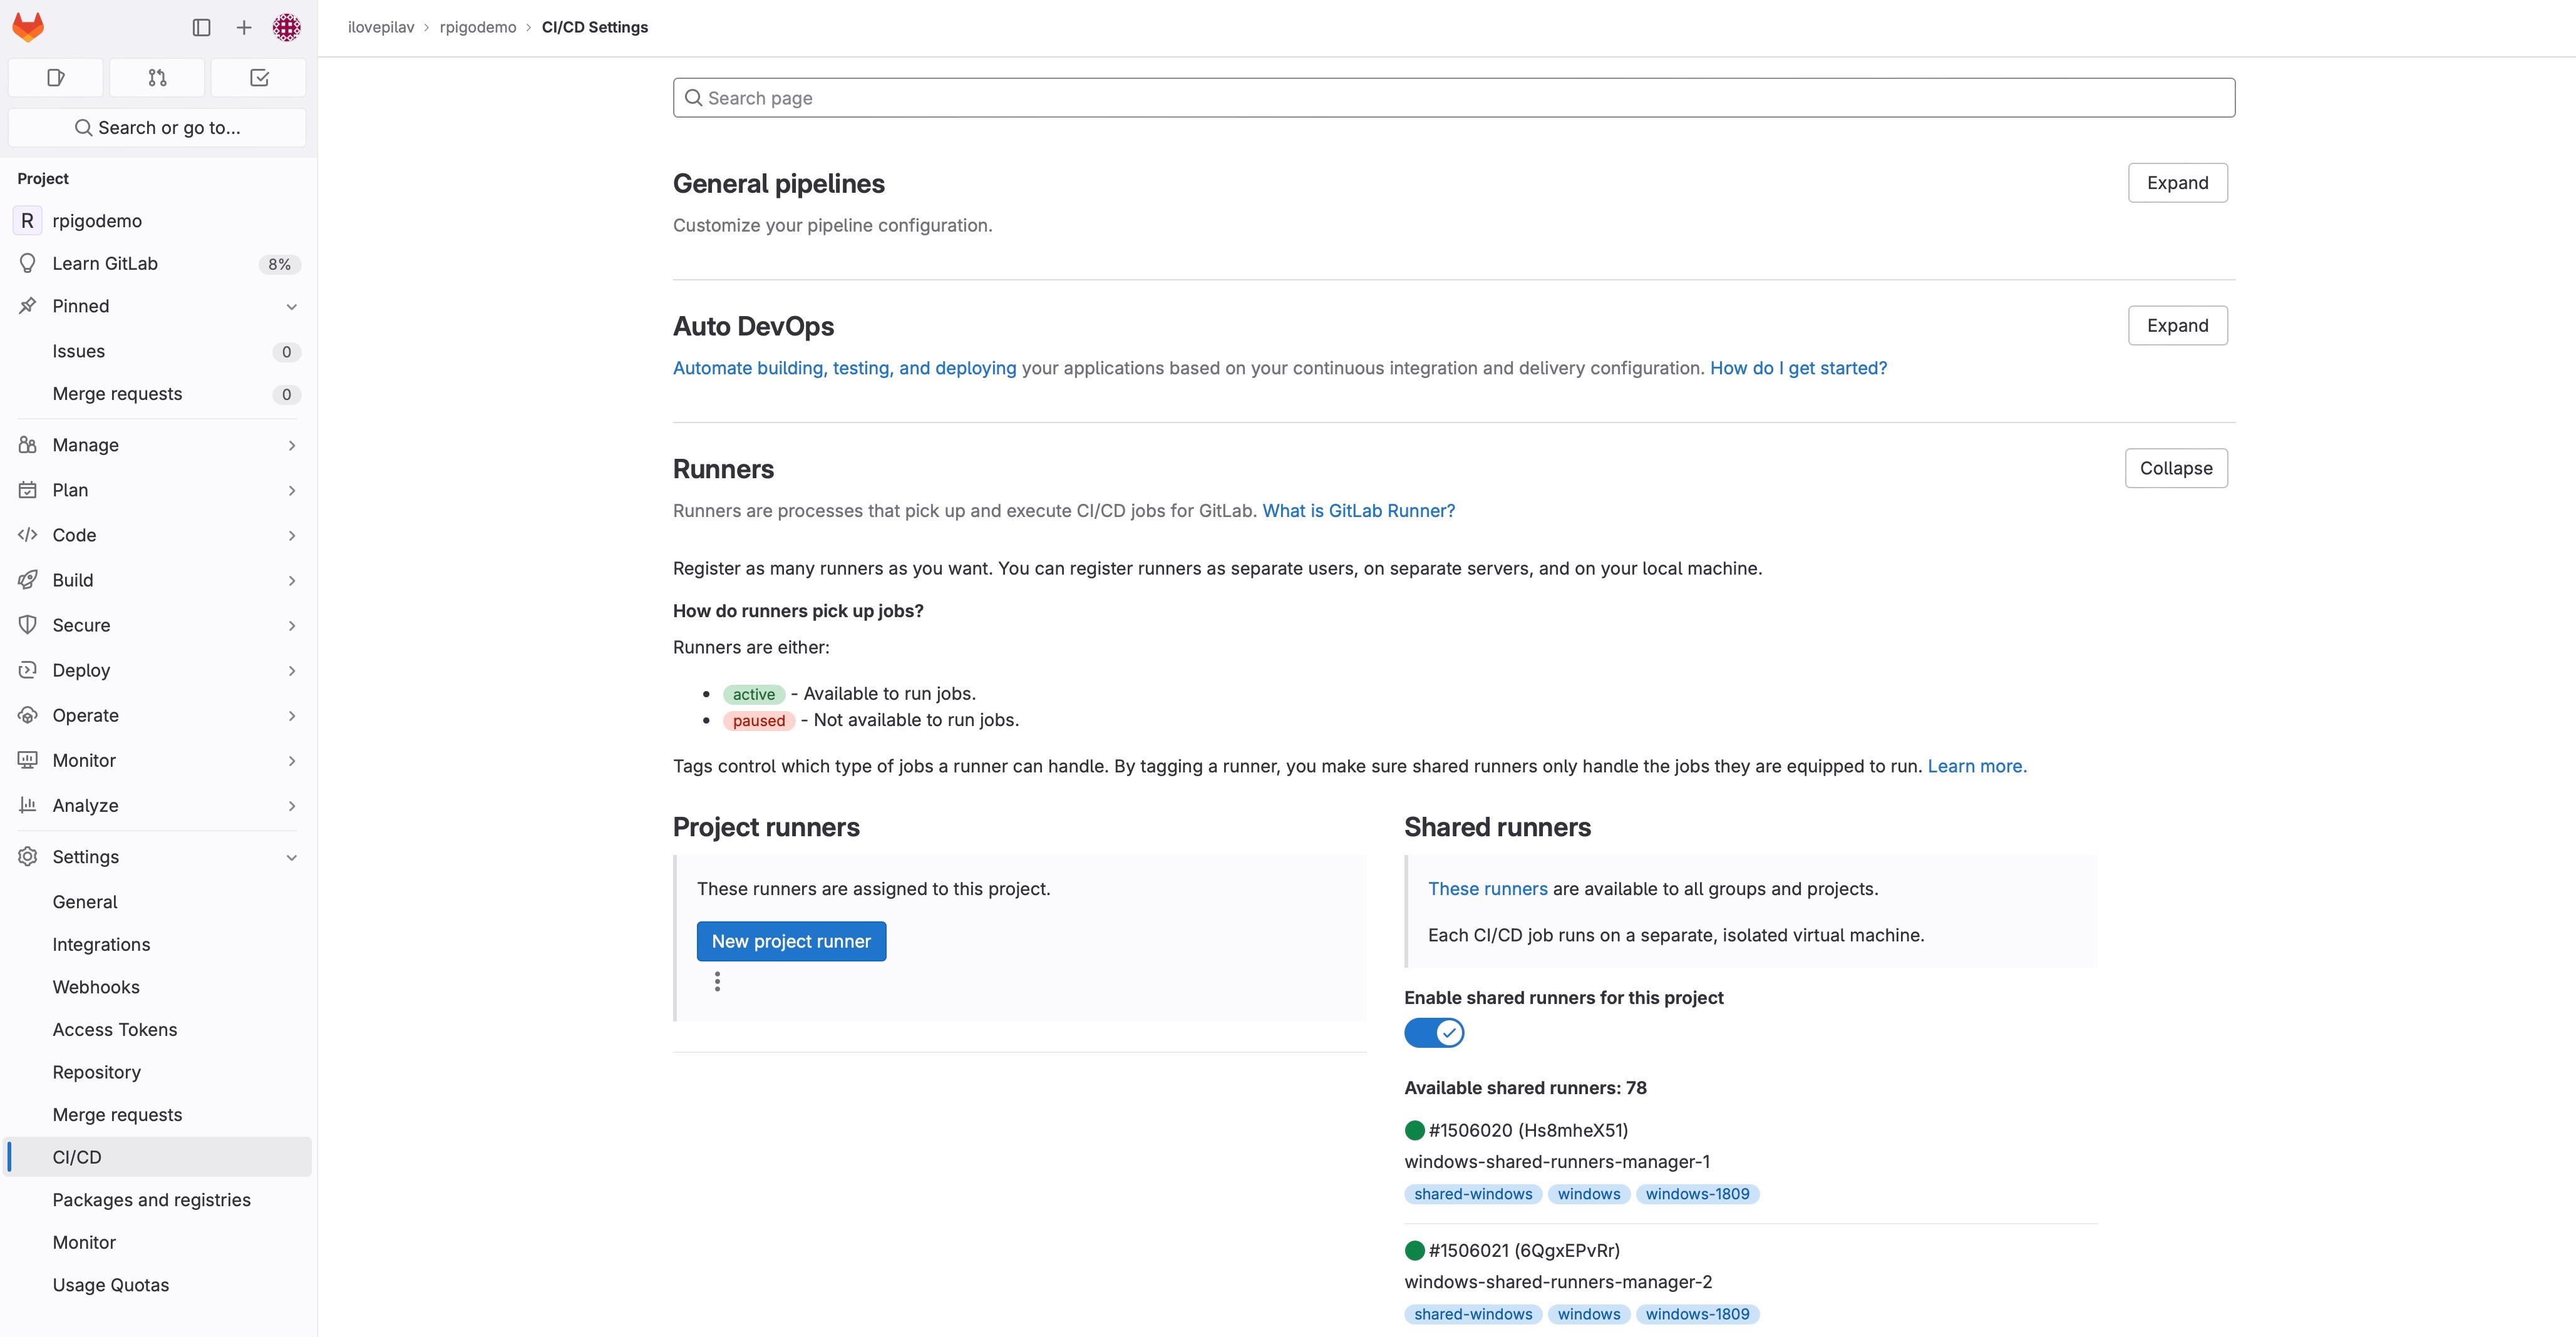 You will see this window
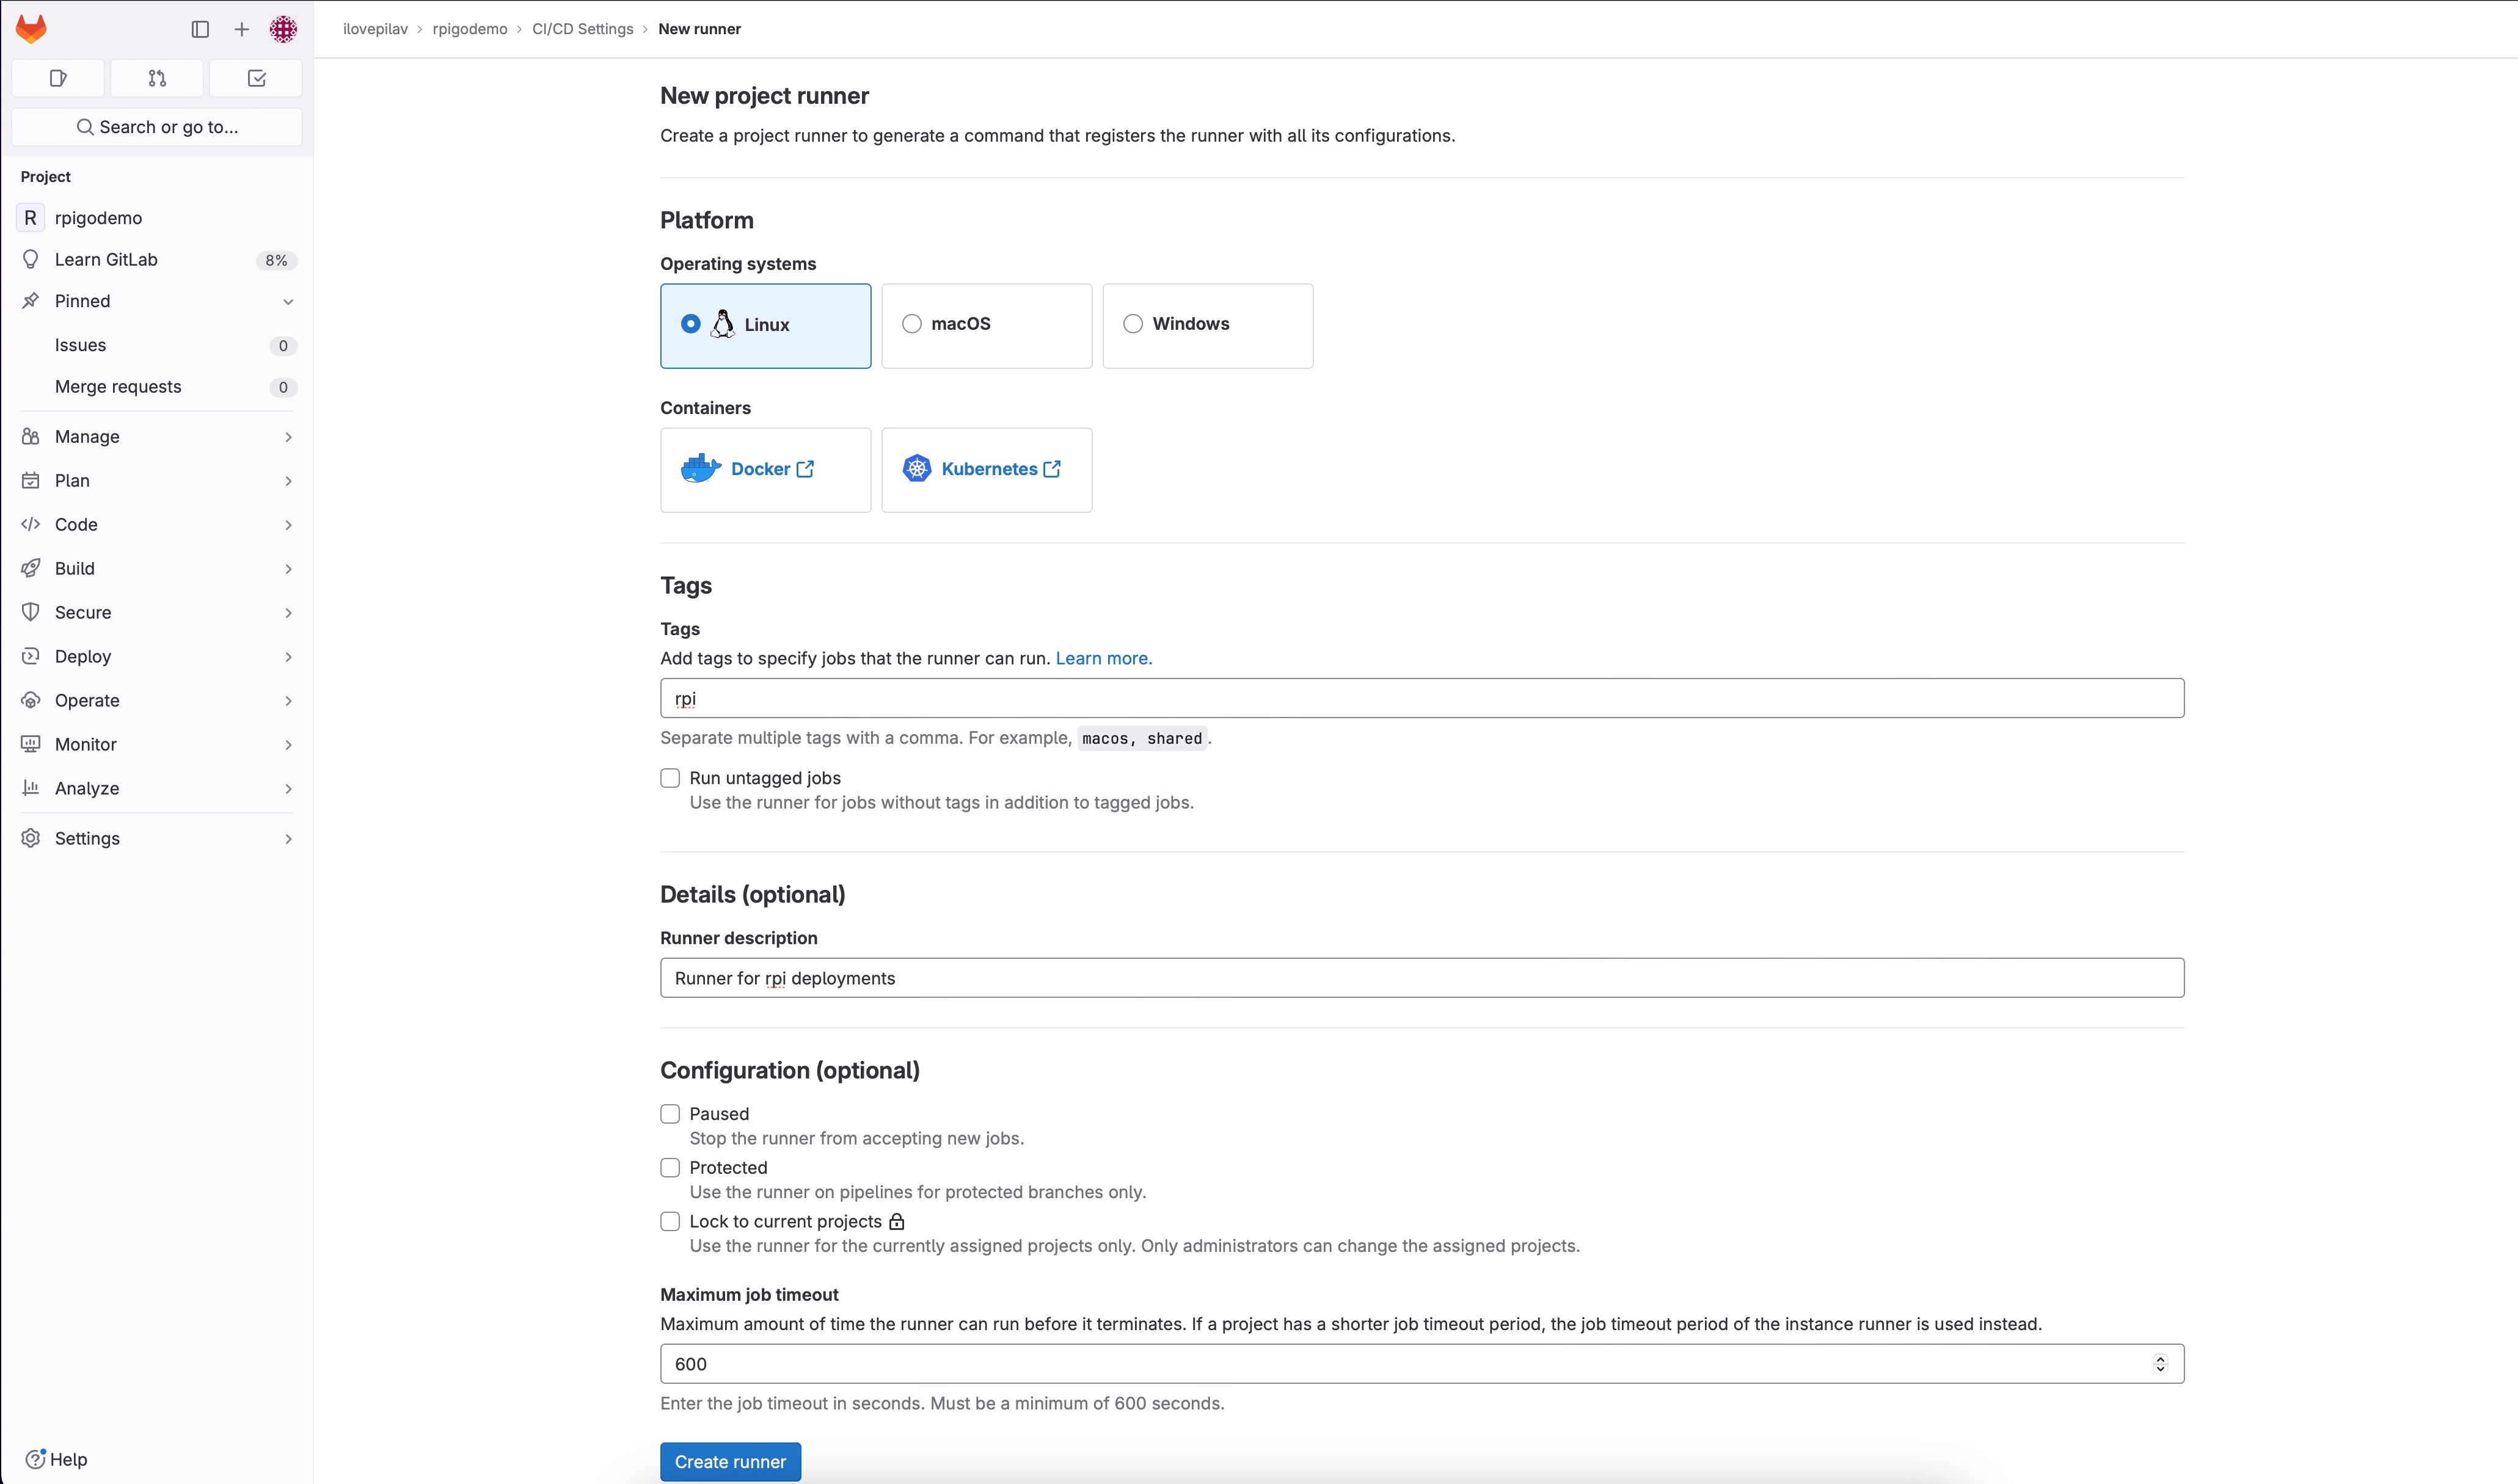
We will choose
– Platform – Linux
– Tags – rpi (important we’ll be using it in the pipeline)
– Runner description – (optional)
– Maximum job timeout – 600 (I picked the minimum)
And click “Create runner”
You will see this window

– Copy the command in the page (Step 1)
– And execute it using sudo privileges in RPI
(Runners need sudo privileges for creating/accessing files in your system)
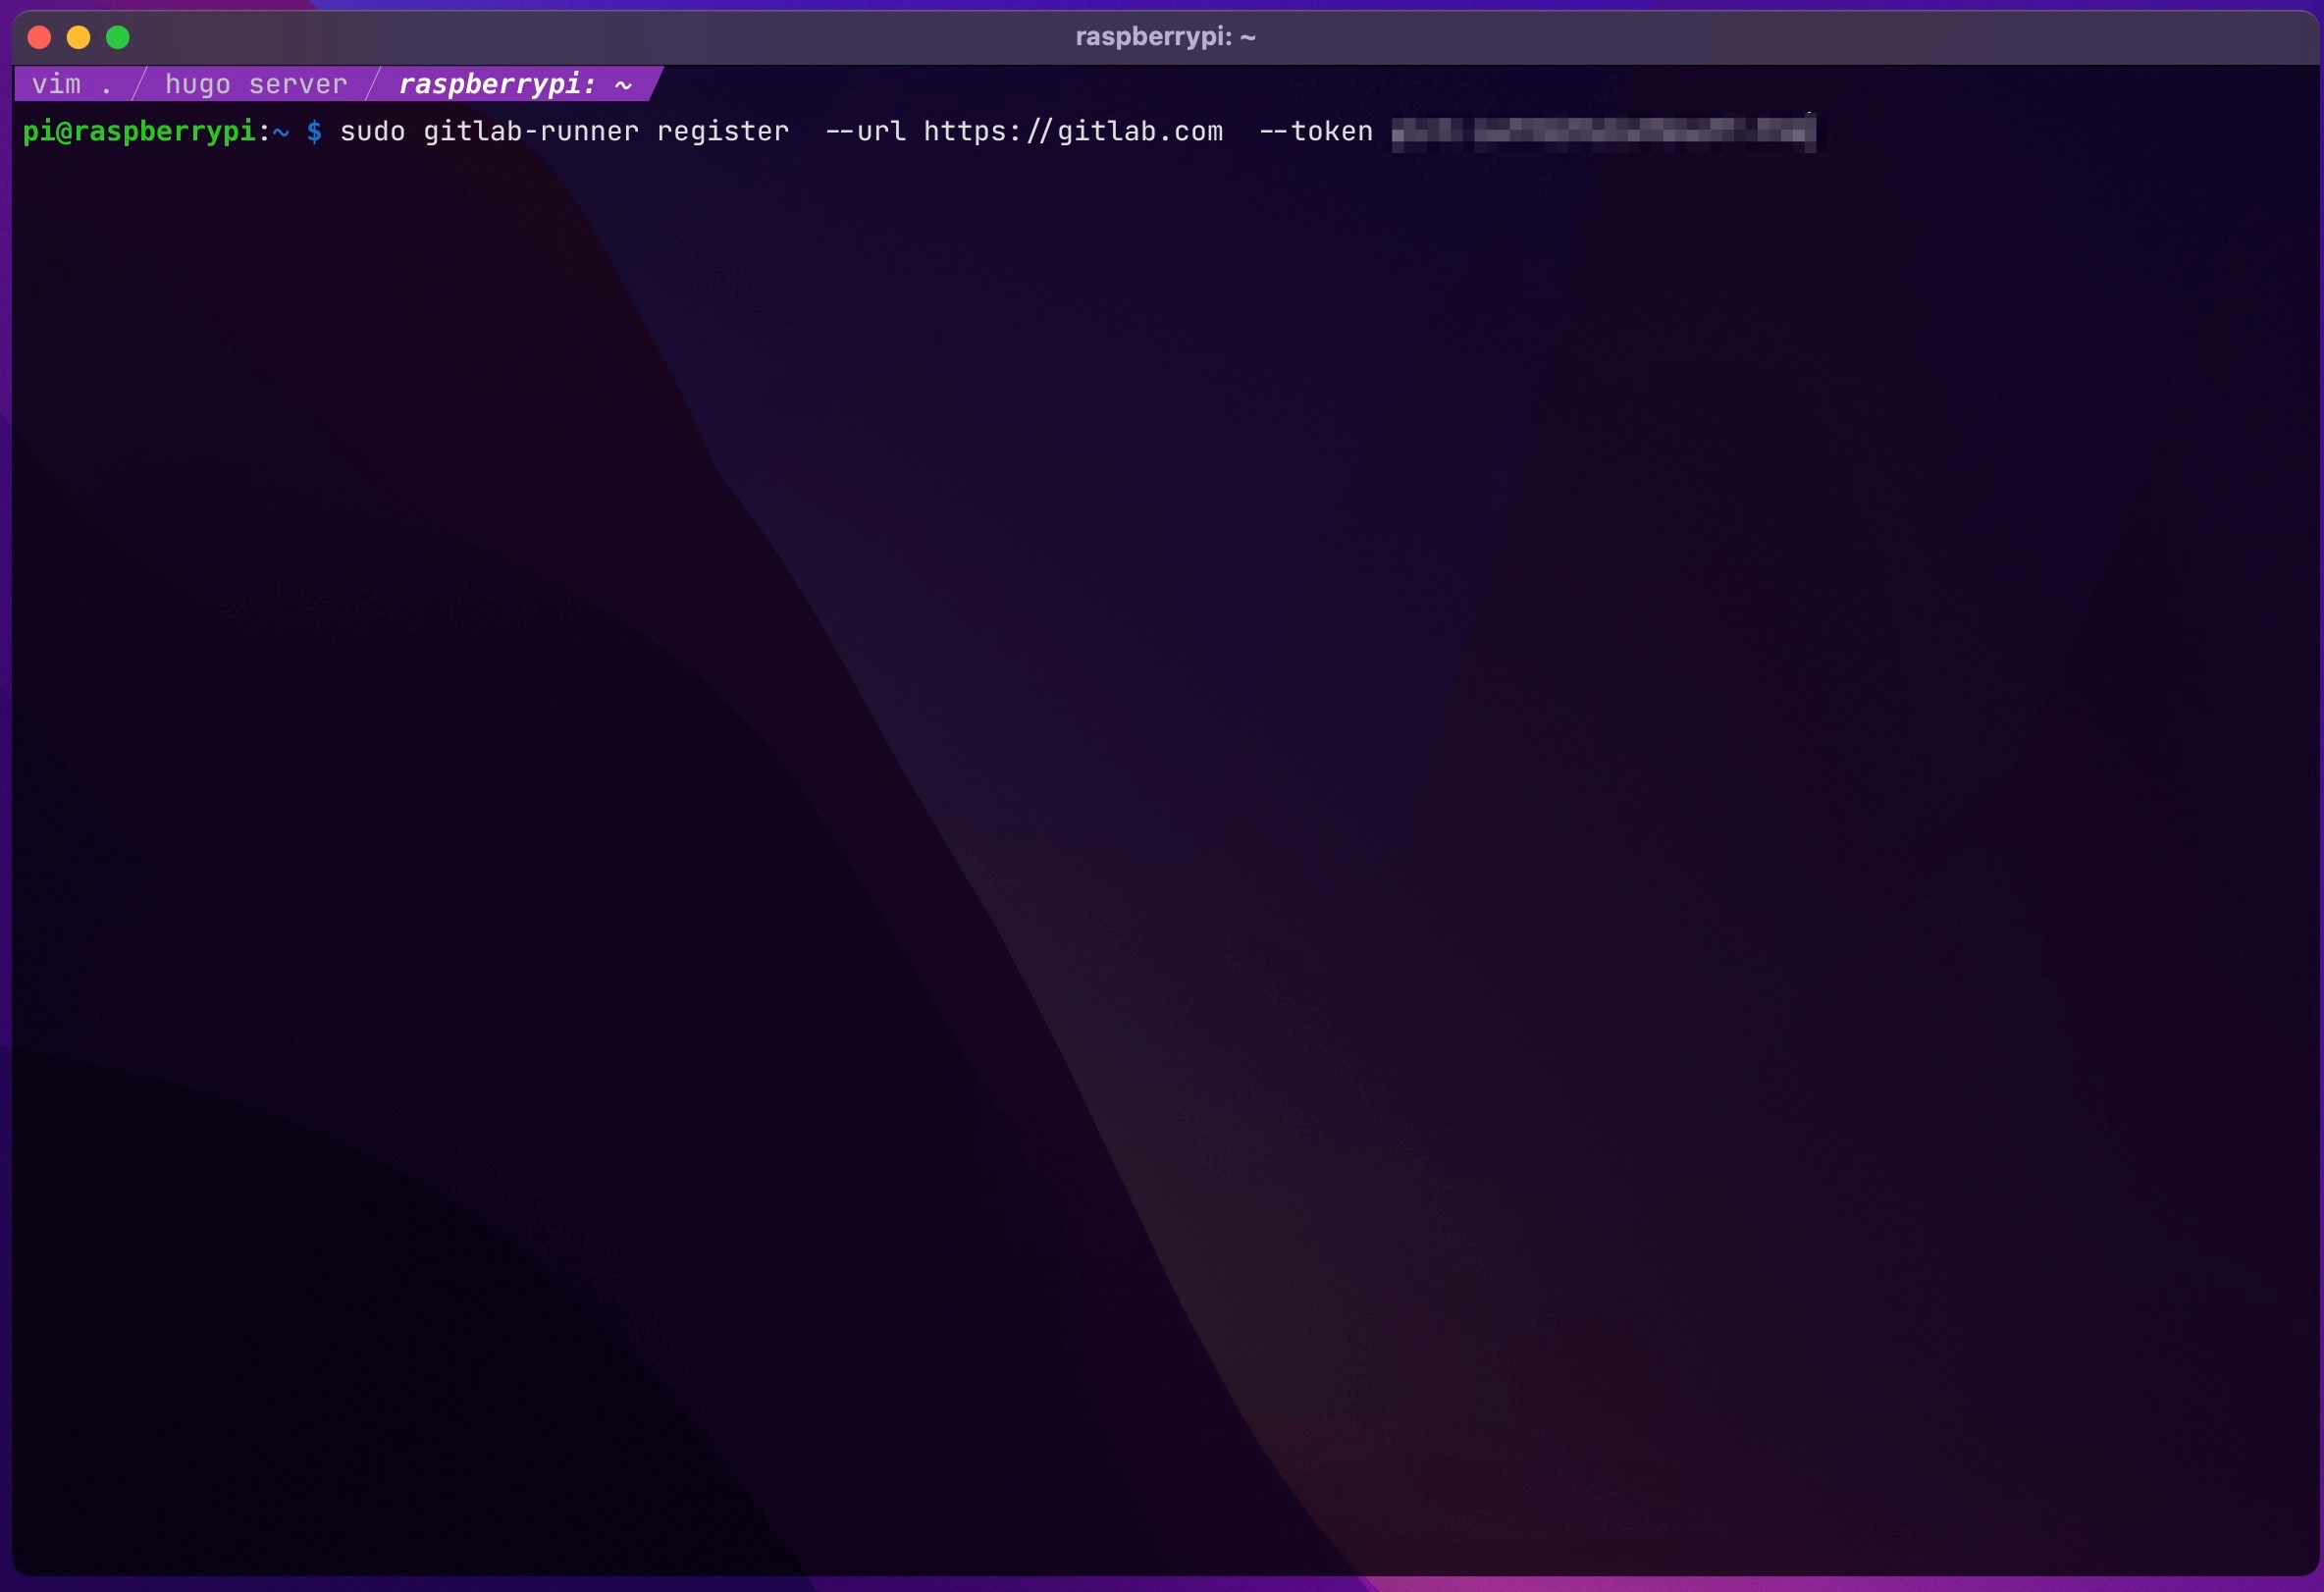
It will ask couple of questions like selecting executor etc.
We will deploy our apps as containers in docker so;
– I picked shell as executor, for naming I used rpi_root
– For all the other information just press enter for accepting defaults.
After finishing configuration go Settings > CI/CD and expand runners and yeah we can see our runner.
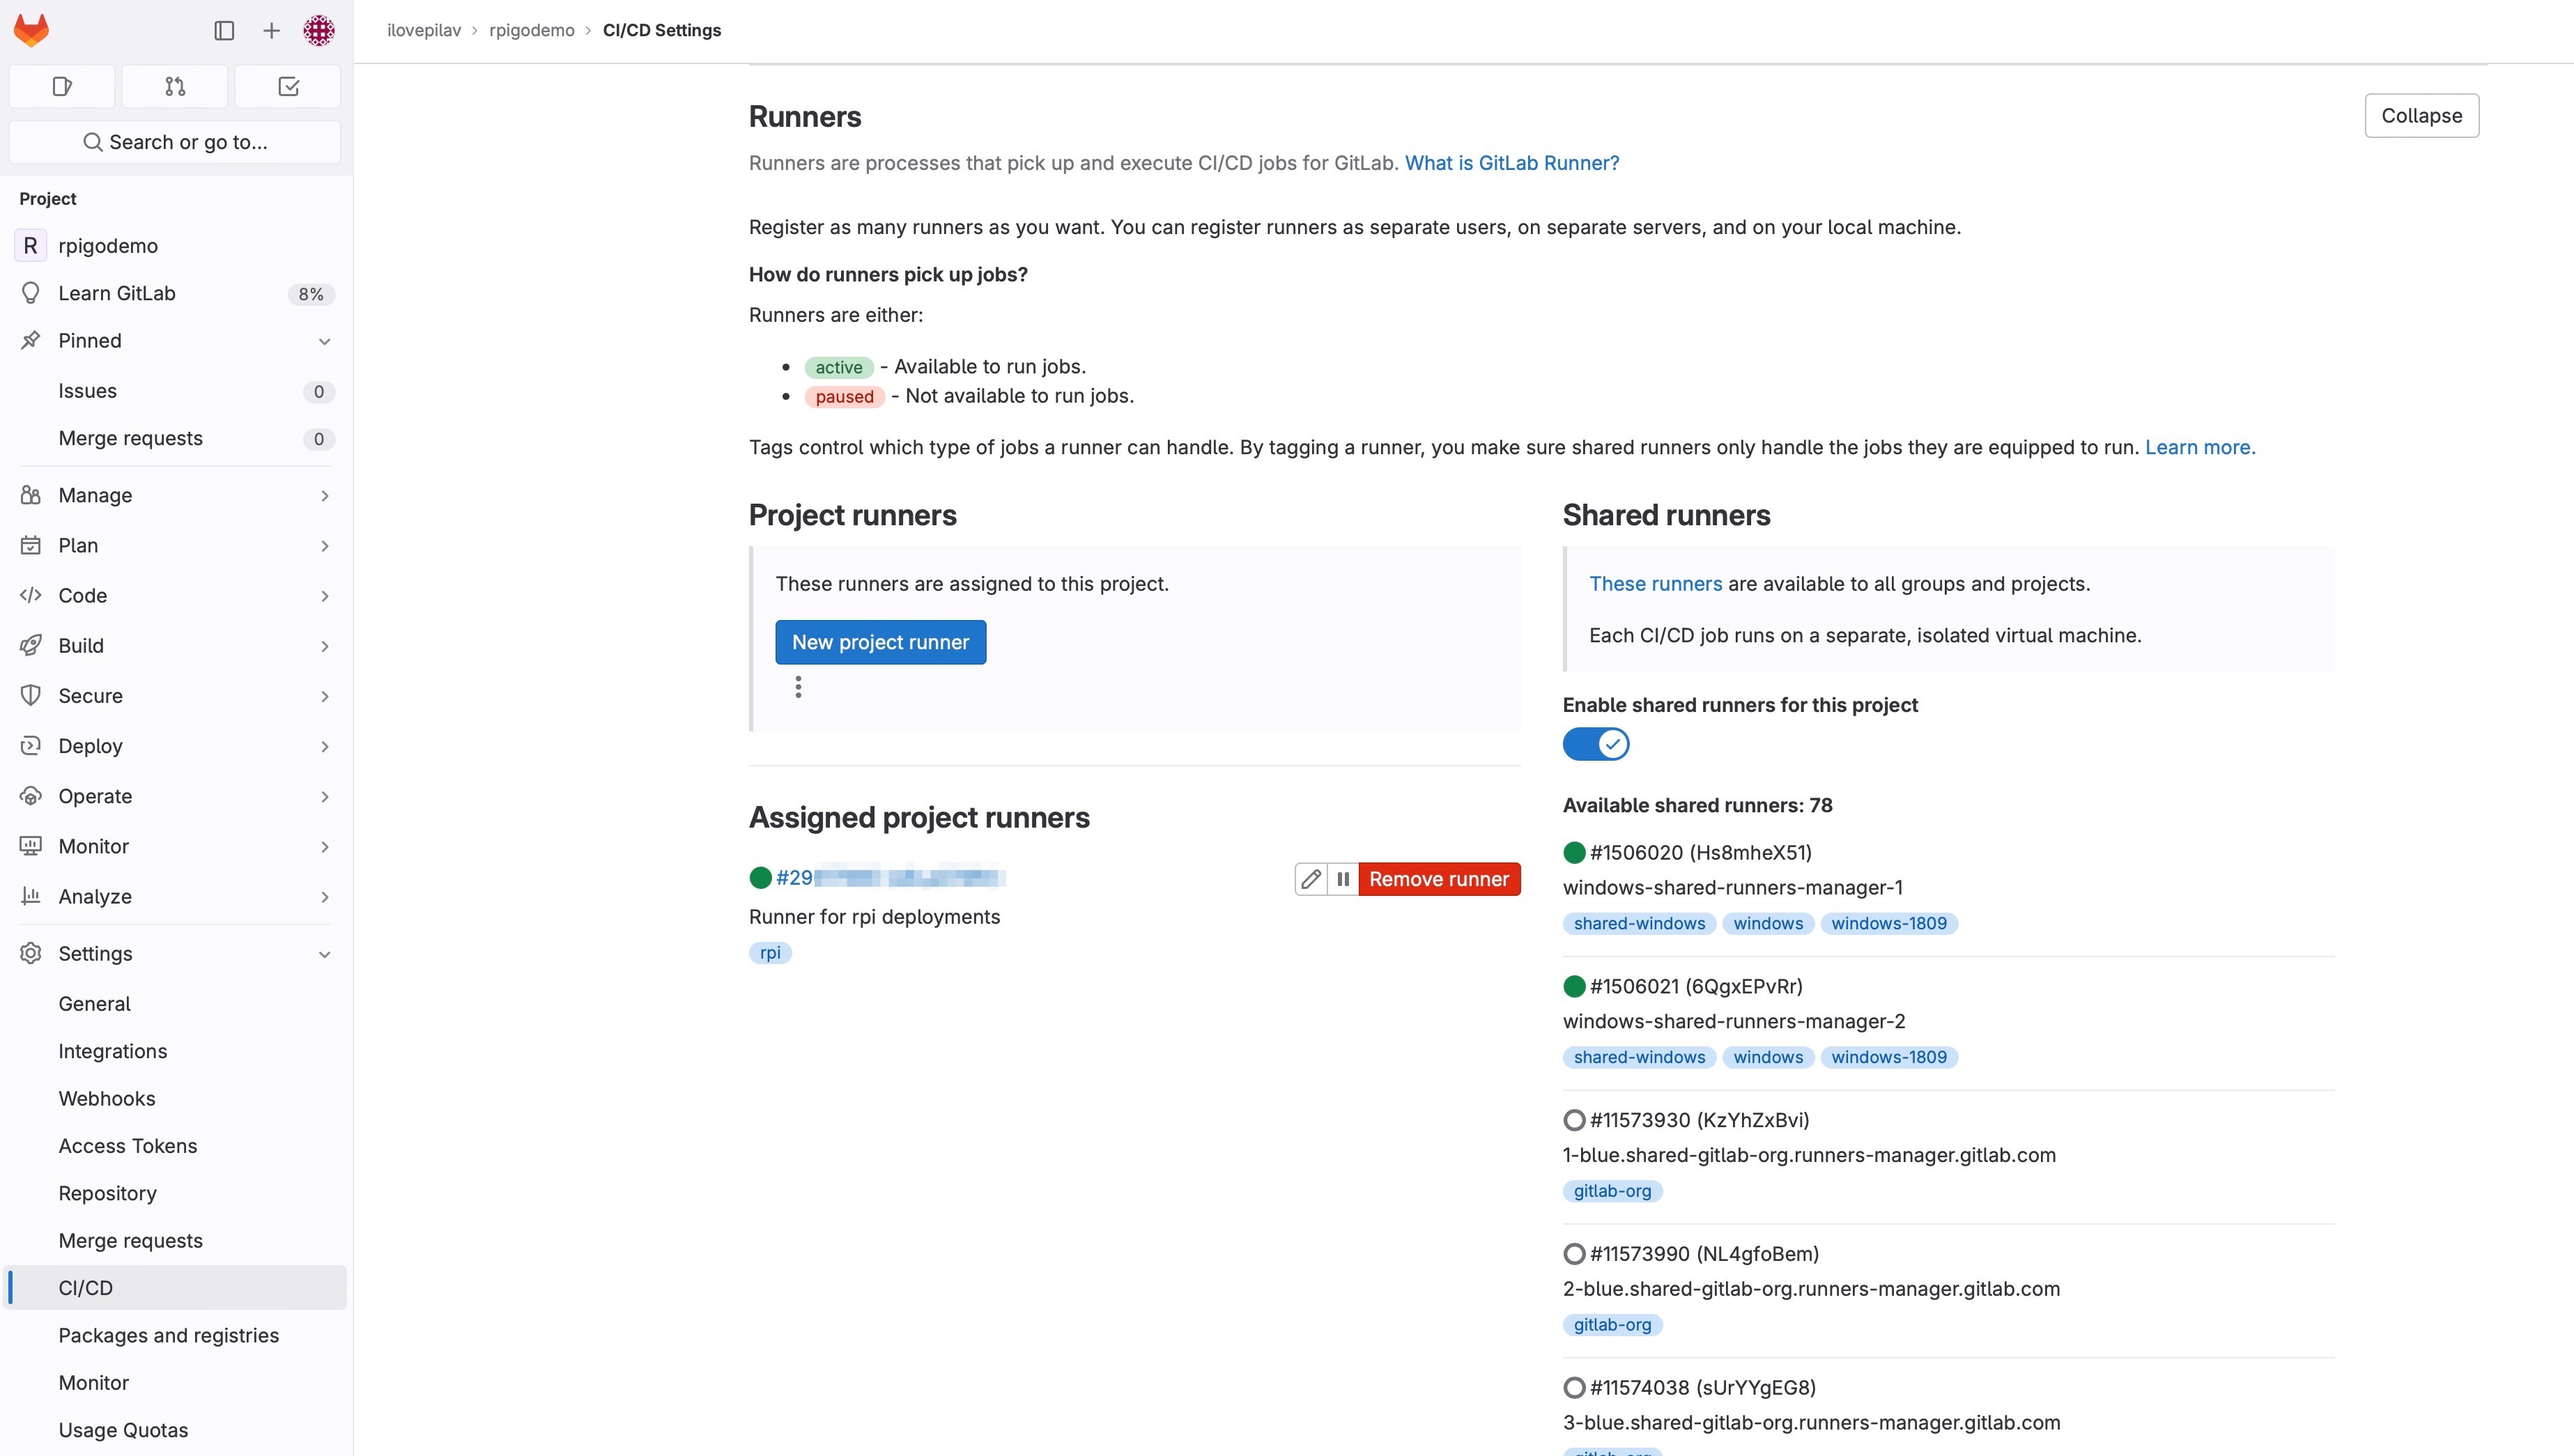
Github Self-hosted Runner
– Create a repository or navigate to an existing one.
– Navigate to Settings > Actions (left panel) > Runners
– Click “New self-hosted-runner”
You should see something similar.
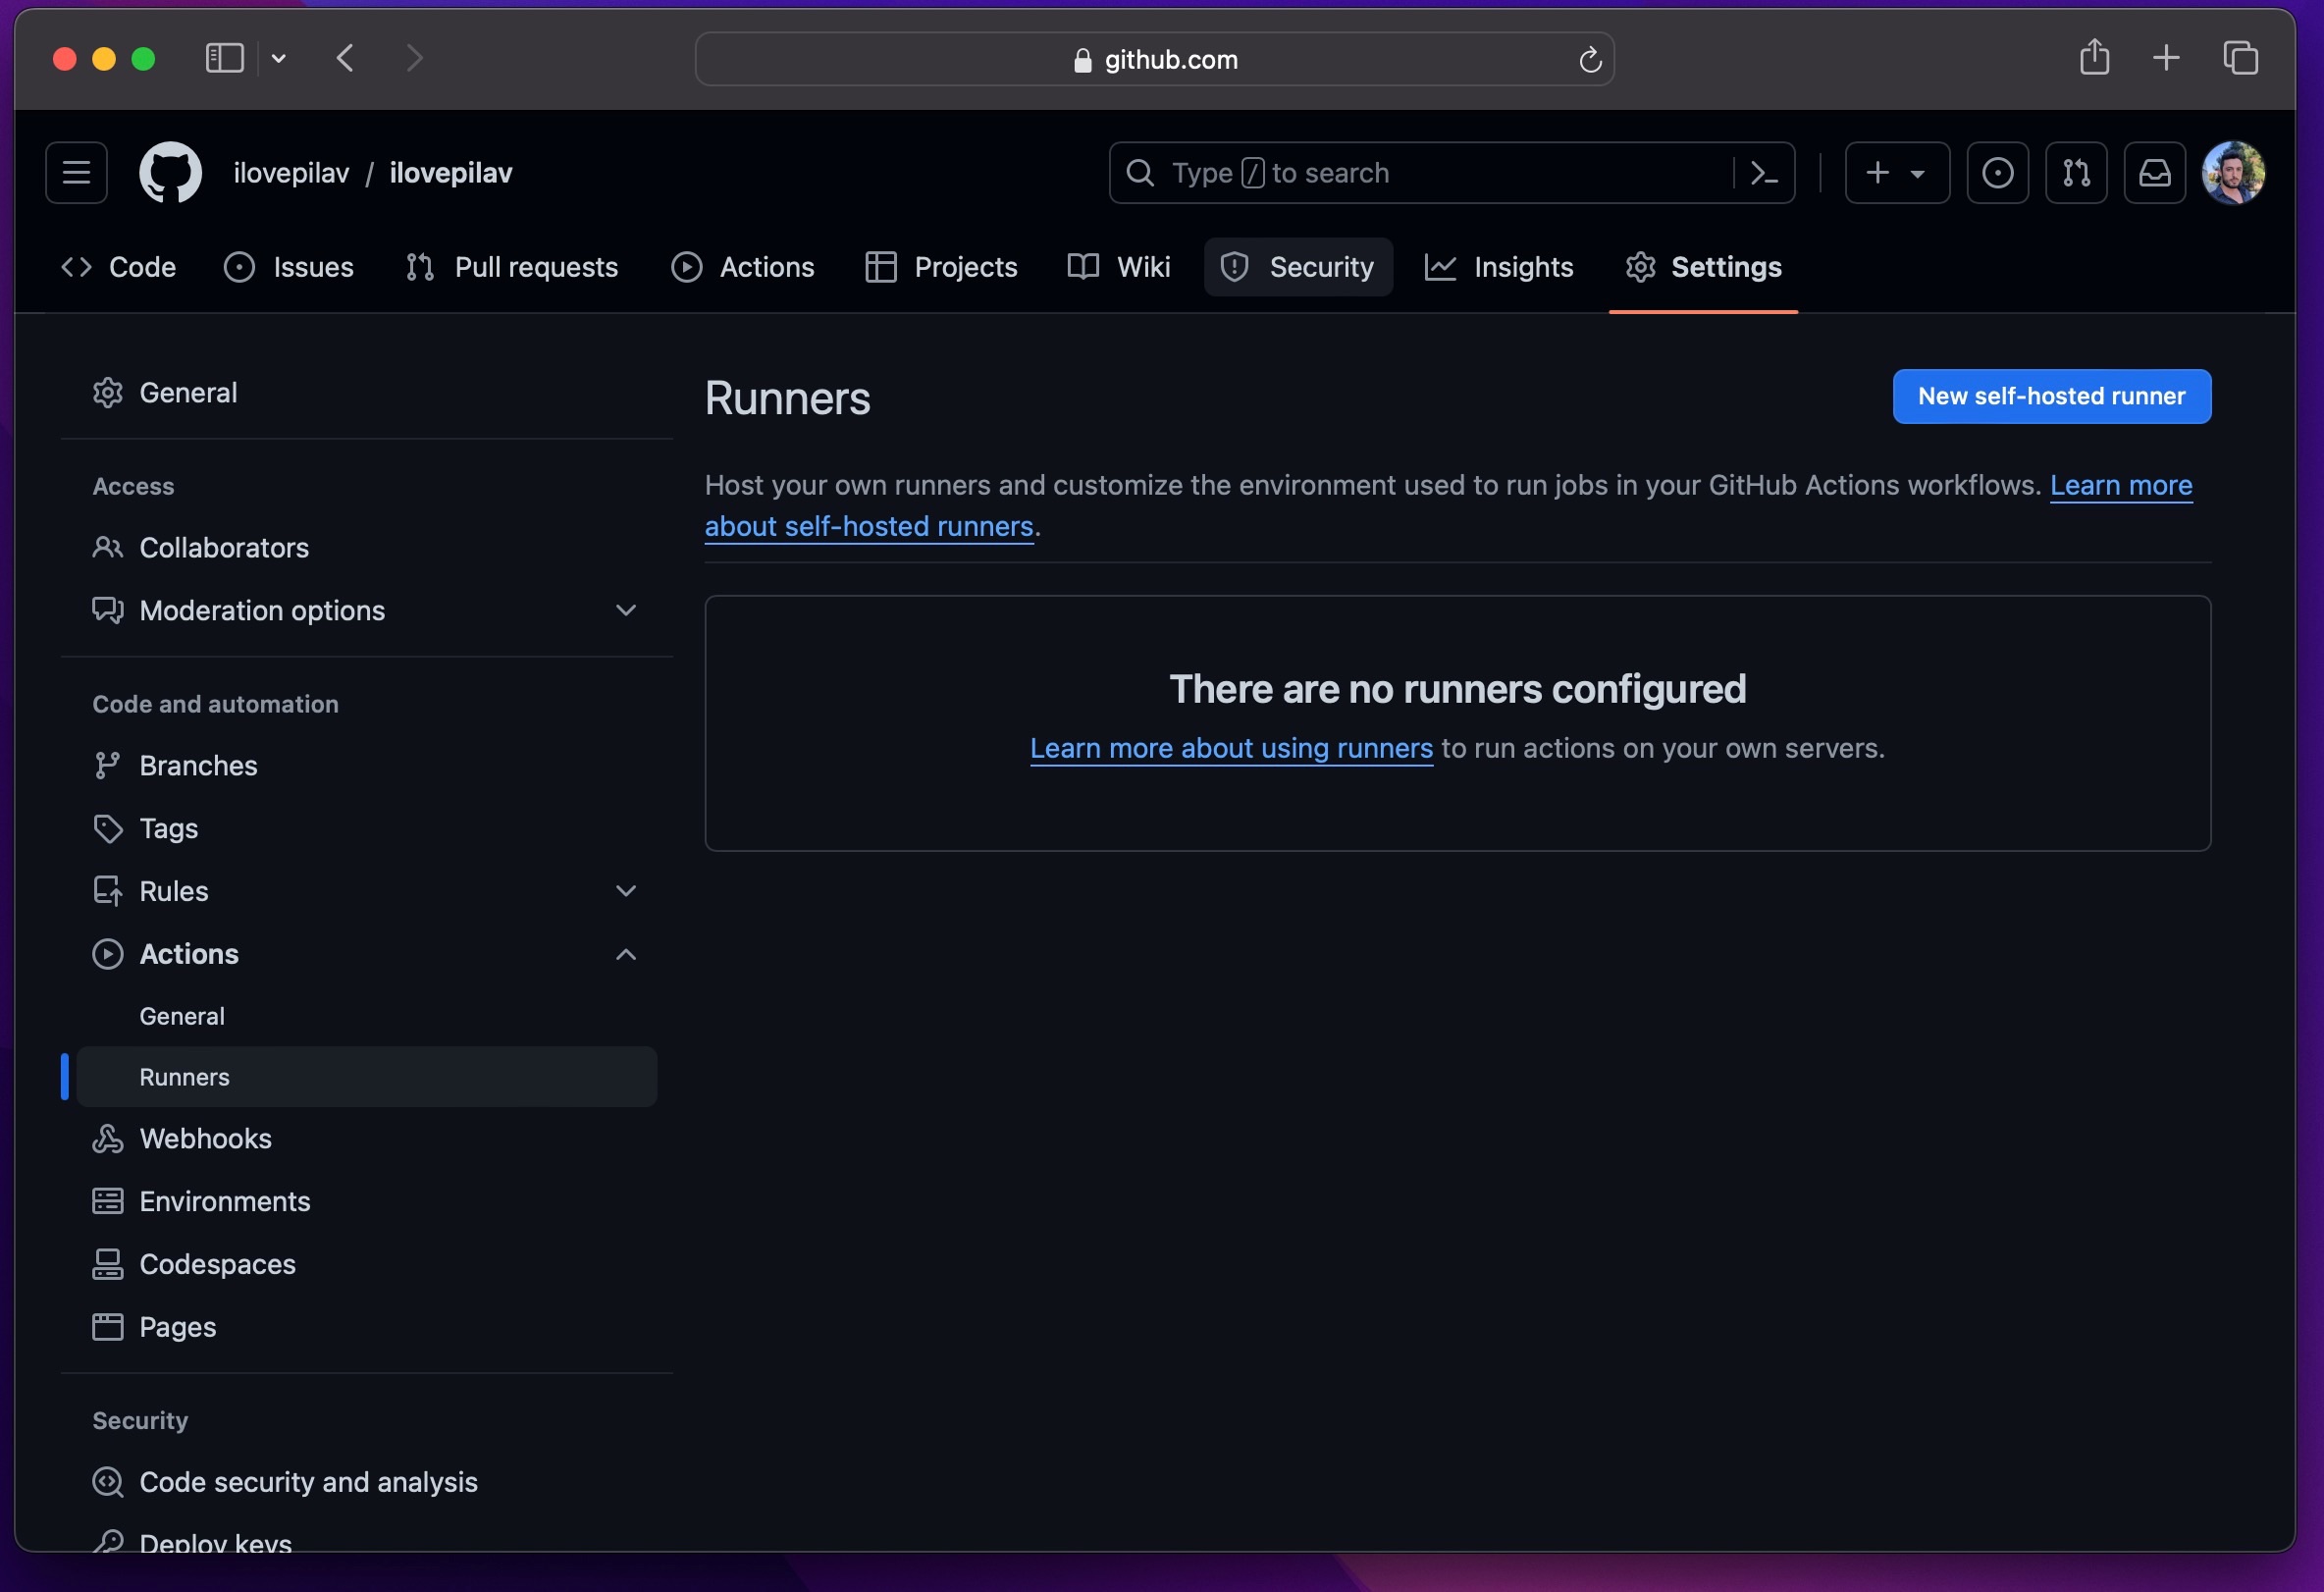
Complete the setup steps on your RPI.
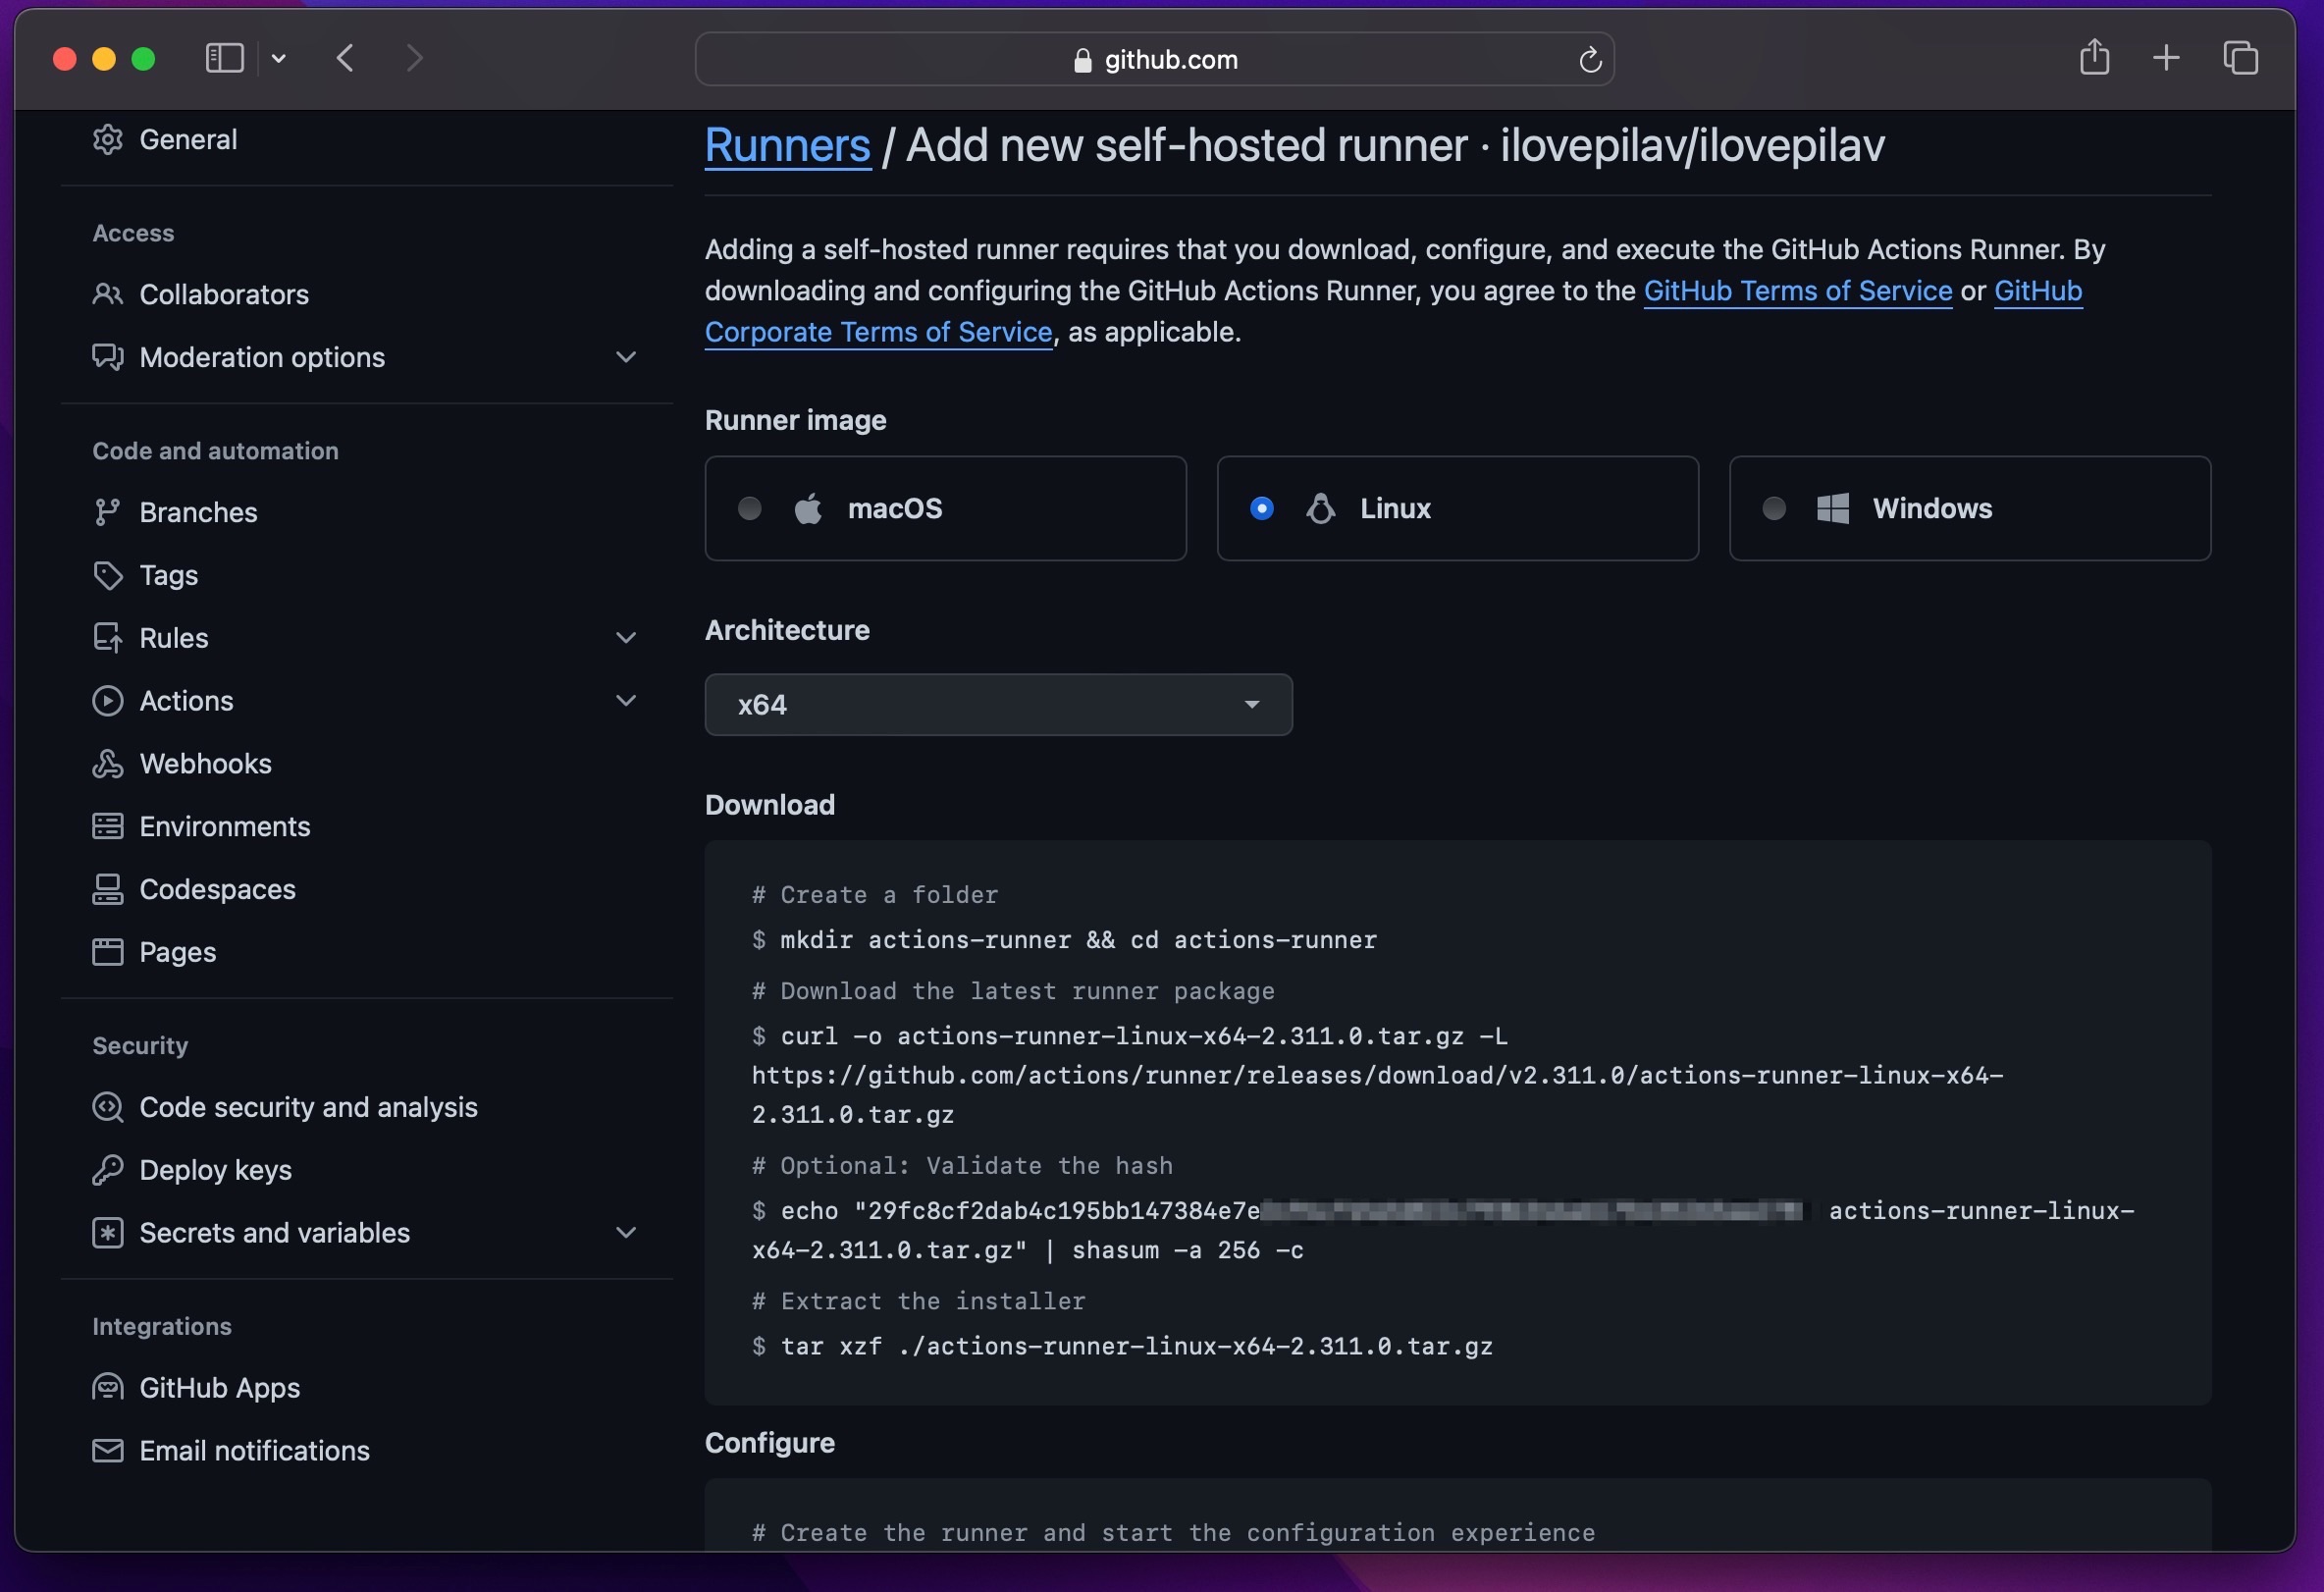
And if you want(you should) to run this program as service, close the program and execute this command in the “actions-runner” directory
sudo ./svc.sh install
Confirm the service is running by
systemctl status actions[PRESS TAB HERE]
You should see service is running
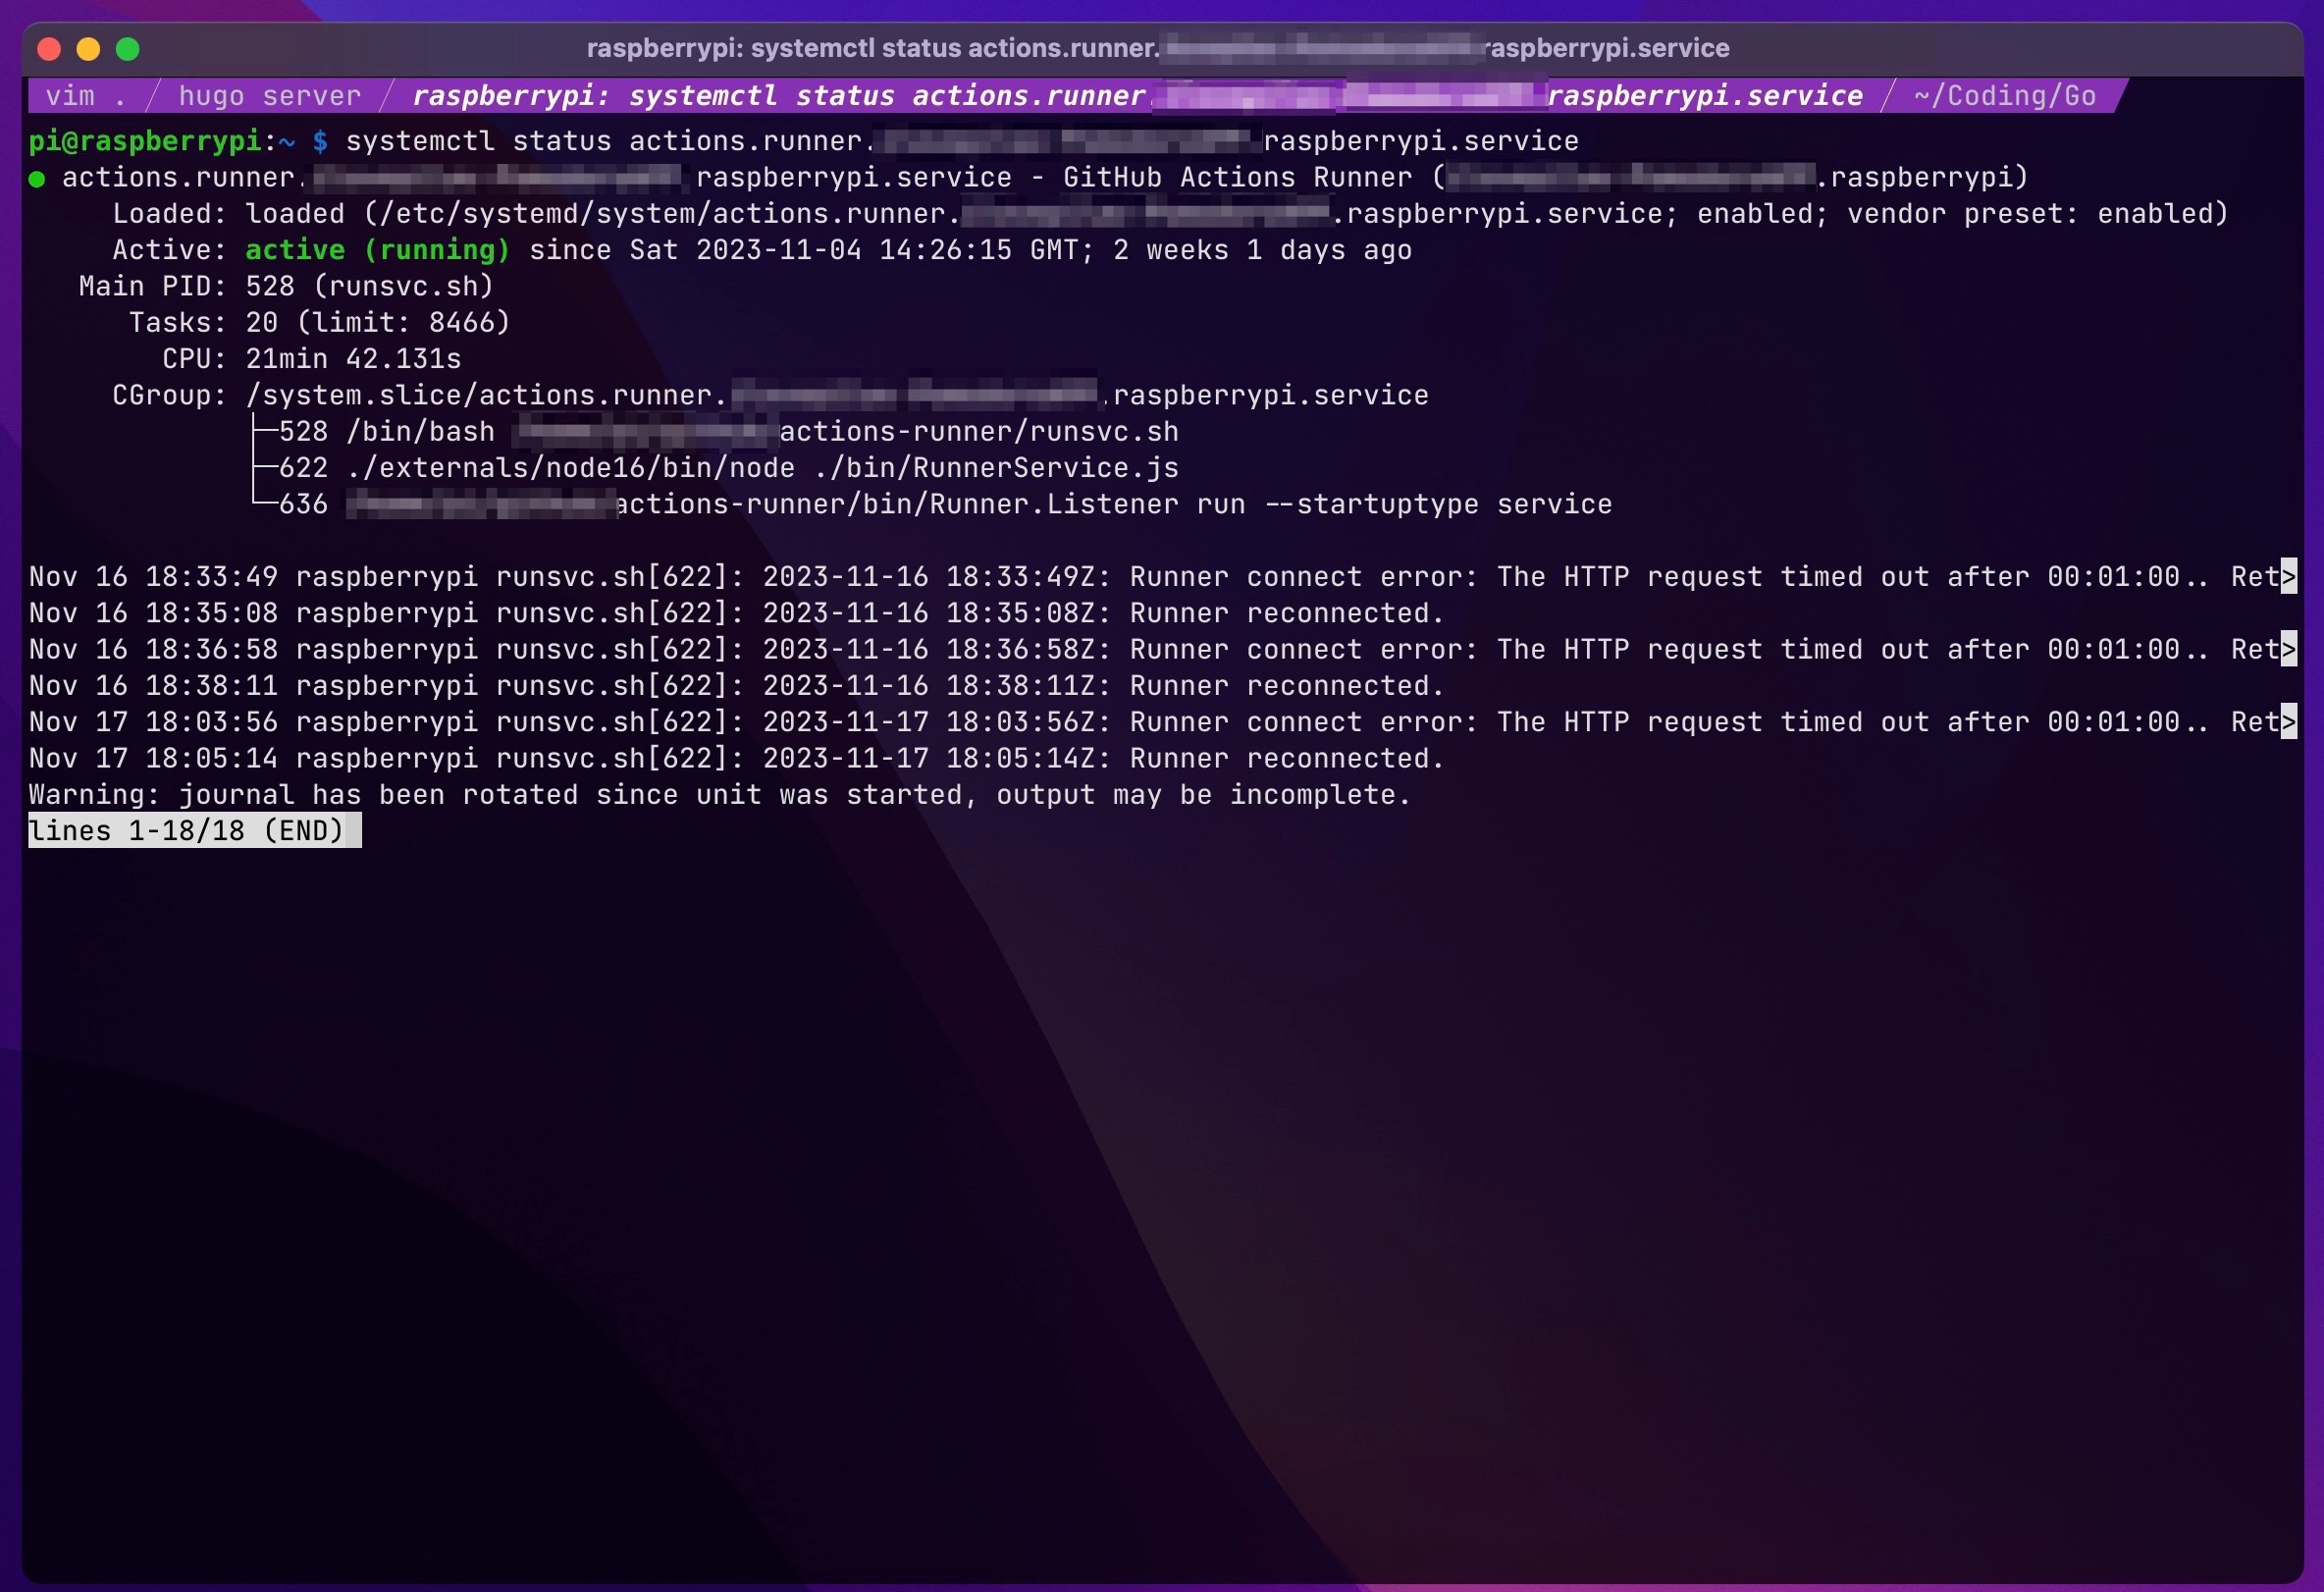
I’ve already configured.It was fairly easy, if you need help just check docs for more information.
Now you should see it in your runners page.
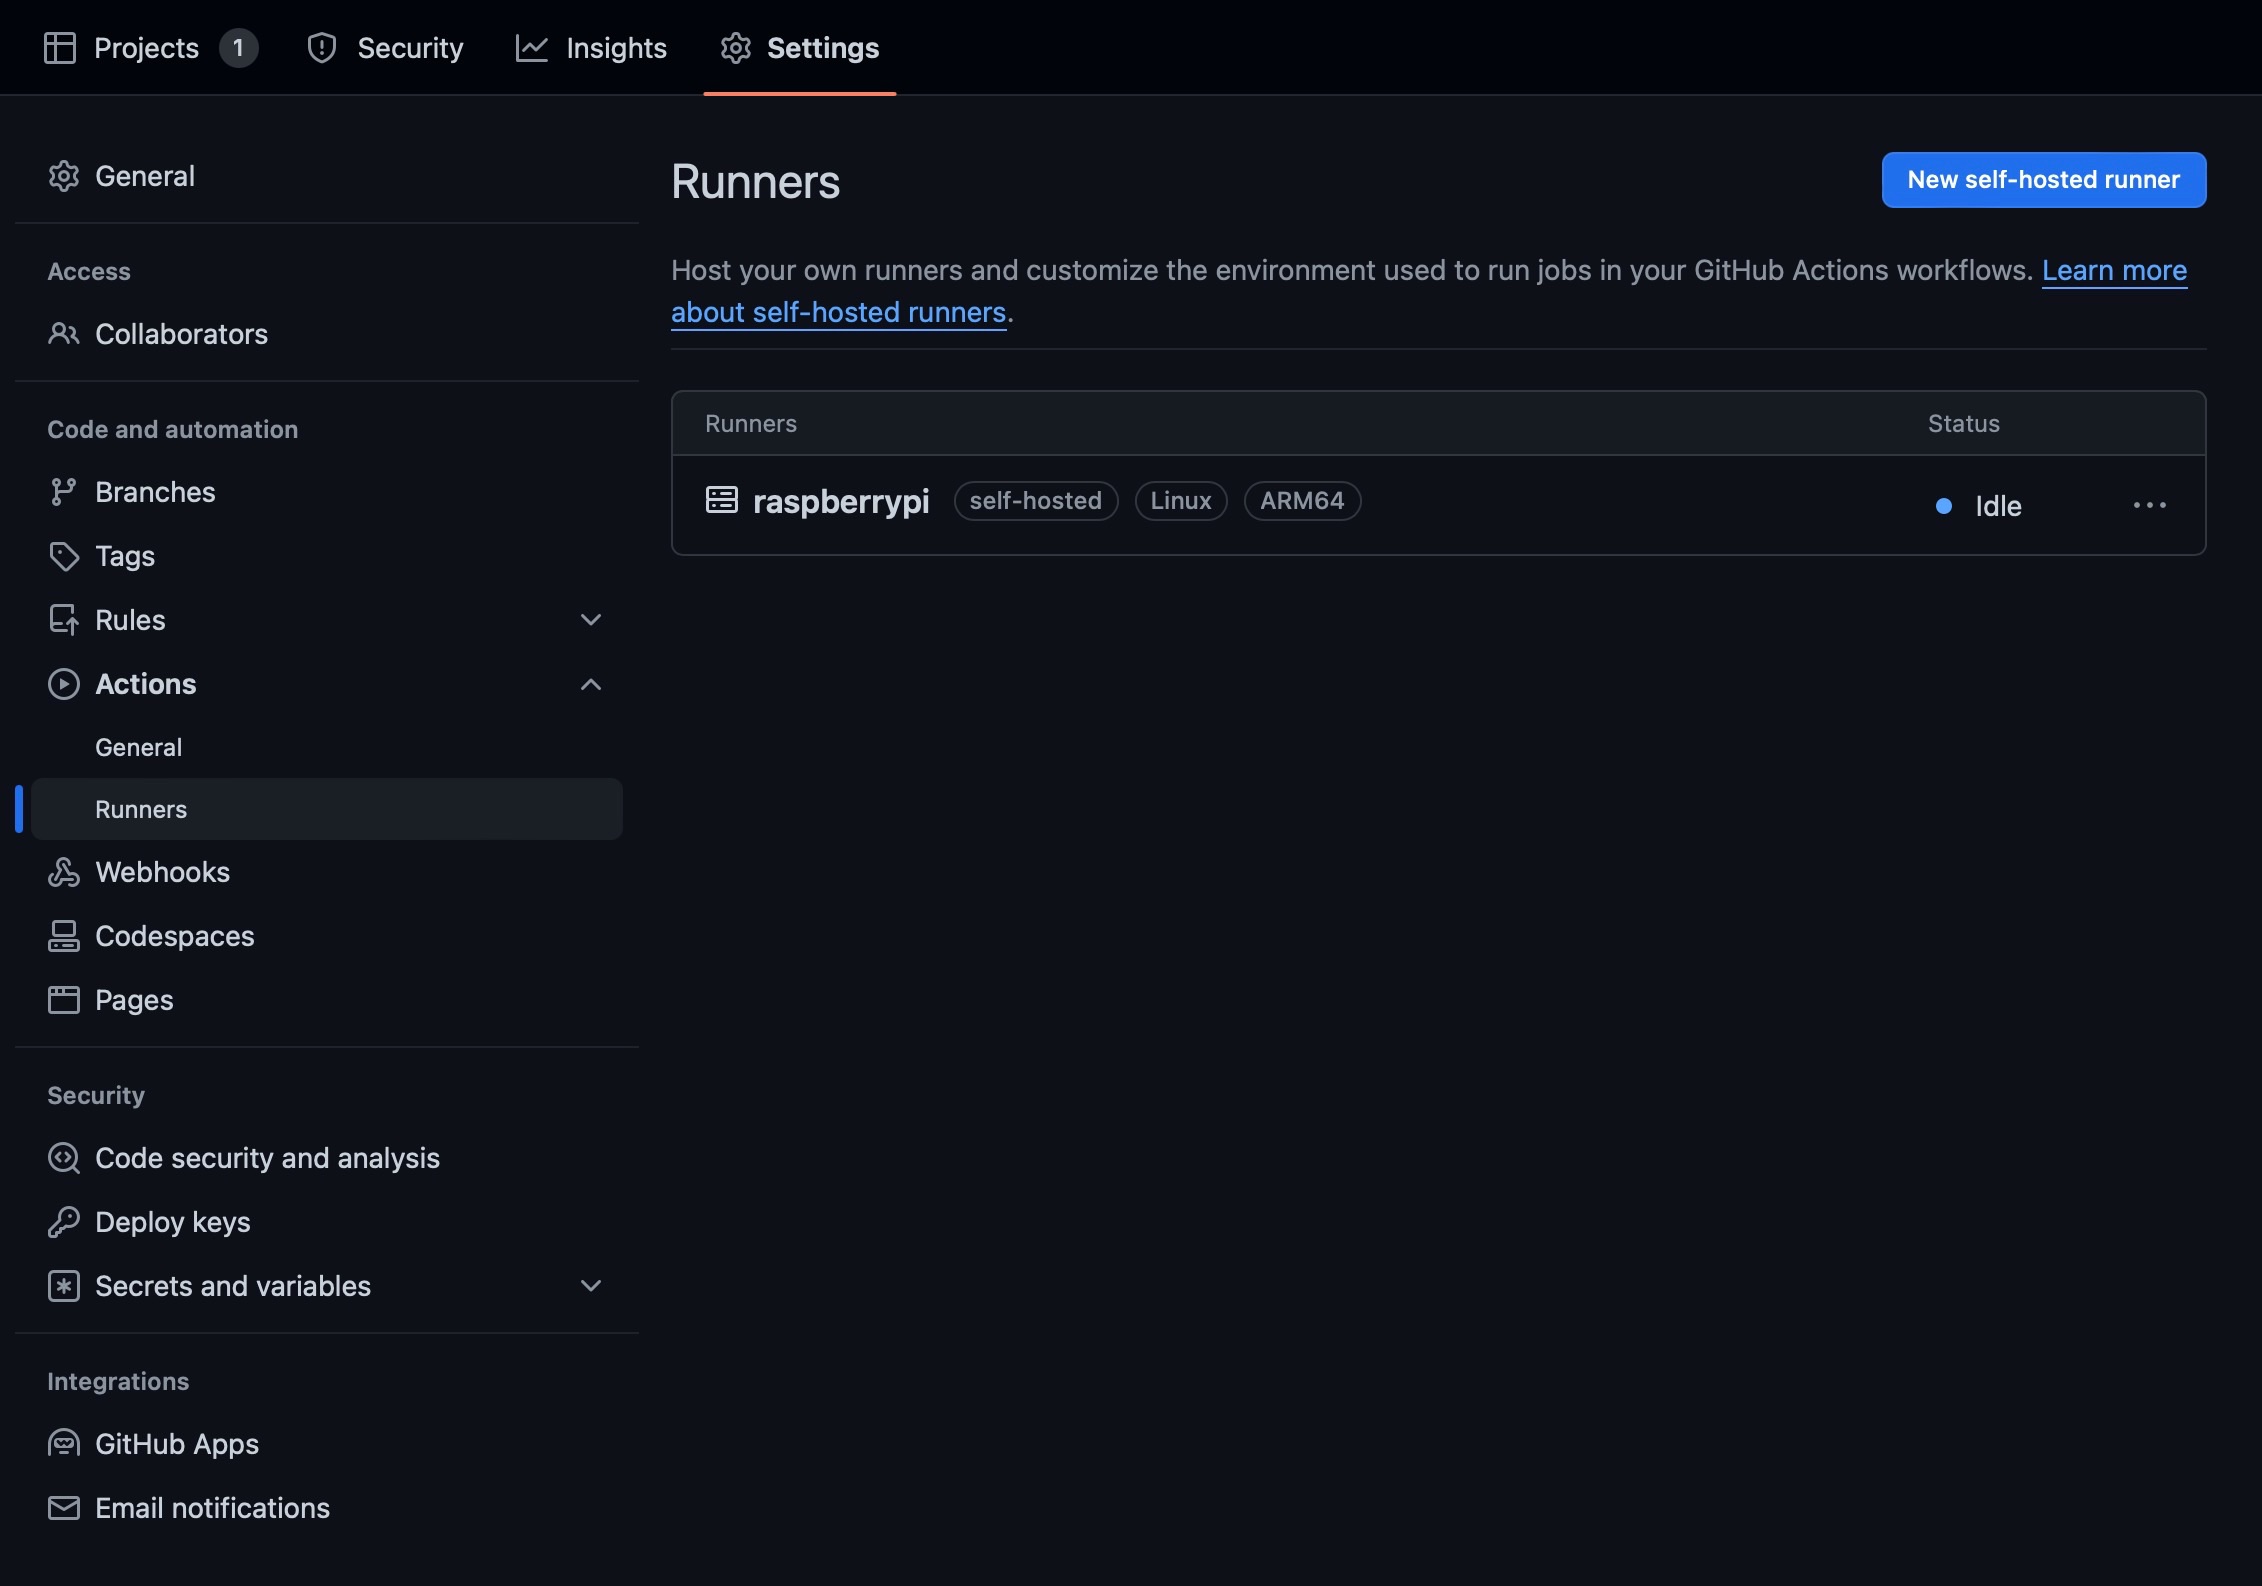
Now let’s test this runners with some code 🥳
Creating the App
I will create a simple Go web app with very simple test.
// main.go

package main

import (
	"fmt"
	"net/http"
)

func main() {
	http.HandleFunc("/", HelloServer)
	http.ListenAndServe(":8002", nil)
}

func HelloServer(w http.ResponseWriter, r *http.Request) {
	fmt.Fprint(w, "<h1>Hello, World!</h1>")
}
// main_test.go

package main

import "testing"

func TestExample(t *testing.T) {

}
Dockerfile
# Use a lightweight Alpine image with Golang support
FROM golang:1.21-alpine

# Set the working directory inside the container
WORKDIR /app

# Copy the local package files to the container's workspace
COPY . .

# Build the Go application
RUN go build -o rpigohello .

# Expose the port on which the application will run
EXPOSE 8002

# Specify the entry point for the container
ENTRYPOINT ["/app/rpigohello"]
Gitlab CI/CD Pipeline
Let’s create a gitlab pipeline.
# .gitlab-ci.yml

image: golang:latest

stages:
  - build
  - test
  - deploy

build:
  stage: build
  script:
    - go build

test:
  stage: test
  script:
    - go test -v

deploy:
  stage: deploy
  only:
    - main  # Deploy only on changes to master branch
  script:
    - | # For avoiding error when there's no container yet
      if docker ps -a --format '{{.Names}}' | grep -q '^rpigohello$'; then
        echo "Container rpigohello found, removing..."
        docker rm -f rpigohello
      else
        echo "Container rpigohello not found."
      fi
    - docker build -t "rpigohello" .
    - docker run -d --restart always --network tunnel --name rpigohello rpigohello
    - docker image prune -f --filter "until=240h" # clean 10days+ old images
    - docker container prune -f --filter "until=240h" # clean 10days+ old containers
  tags:
    - rpi  # Use runners tagged with "rpi"
Github Actions Pipeline
Github actions pipelines are very similar. Only difference is we have to pass “runs: self-hosted” in our pipeline instead of using tags like in the Gitlab, to deploy our RPI.
I’m leaving the YAML file codes here.
You can create them in Actions tab, or you can upload them in .github/workflows directory in your repo.
We will build and test in github’s runners.
# .github/workflows/build-and-test.yml

name: Build and Test

on:
  push:
    branches: [ "main" ]
  pull_request:
    branches: [ "main" ]

jobs:

  build:
    runs-on: ubuntu-latest
    steps:
    - uses: actions/checkout@v3

    - name: Set up Go
      uses: actions/setup-go@v4
      with:
        go-version: '1.21'

    - name: Build
      run: go build -v ./...

    - name: Test
      run: go test -v ./...
And deploy in self-hosted runner (RPI).
# .github/workflows/rpi-deploy.yml

name: Publish to RPI with Docker

on:
  workflow_run:
    workflows: ["Build and Test"]
    types:
      - completed

jobs:
  build-and-run:
    runs-on: self-hosted

    steps:
    - name: Checkout code
      uses: actions/checkout@v3

    # Check if the container exists before stopping and removing it
    - name: Check if container exists
      run: |
        CONTAINER_EXISTS=$(docker ps -a --format "{{.Names}}" | grep -w rpigohello)
        if [ -n "$CONTAINER_EXISTS" ]; then
          echo "Container rpigohello exists, stopping and removing..."
          docker rm -f rpigohello
        else
          echo "Container rpigohello does not exist."
        fi

    - name: Build the Docker image
      run: docker build -t "rpigohello" .

    - name: Run Docker Container
      run: docker run -d --restart always --network tunnel --name rpigohello rpigohello

    - name: Remove more than 10 days old images
      run: docker image prune -f --filter "until=240h"

    - name: Remove more than 10 days old containers
      run: docker container prune -f --filter "until=240h"
Initial push
Let’s push our code 😇
It will take a while to finish the pipeline and then
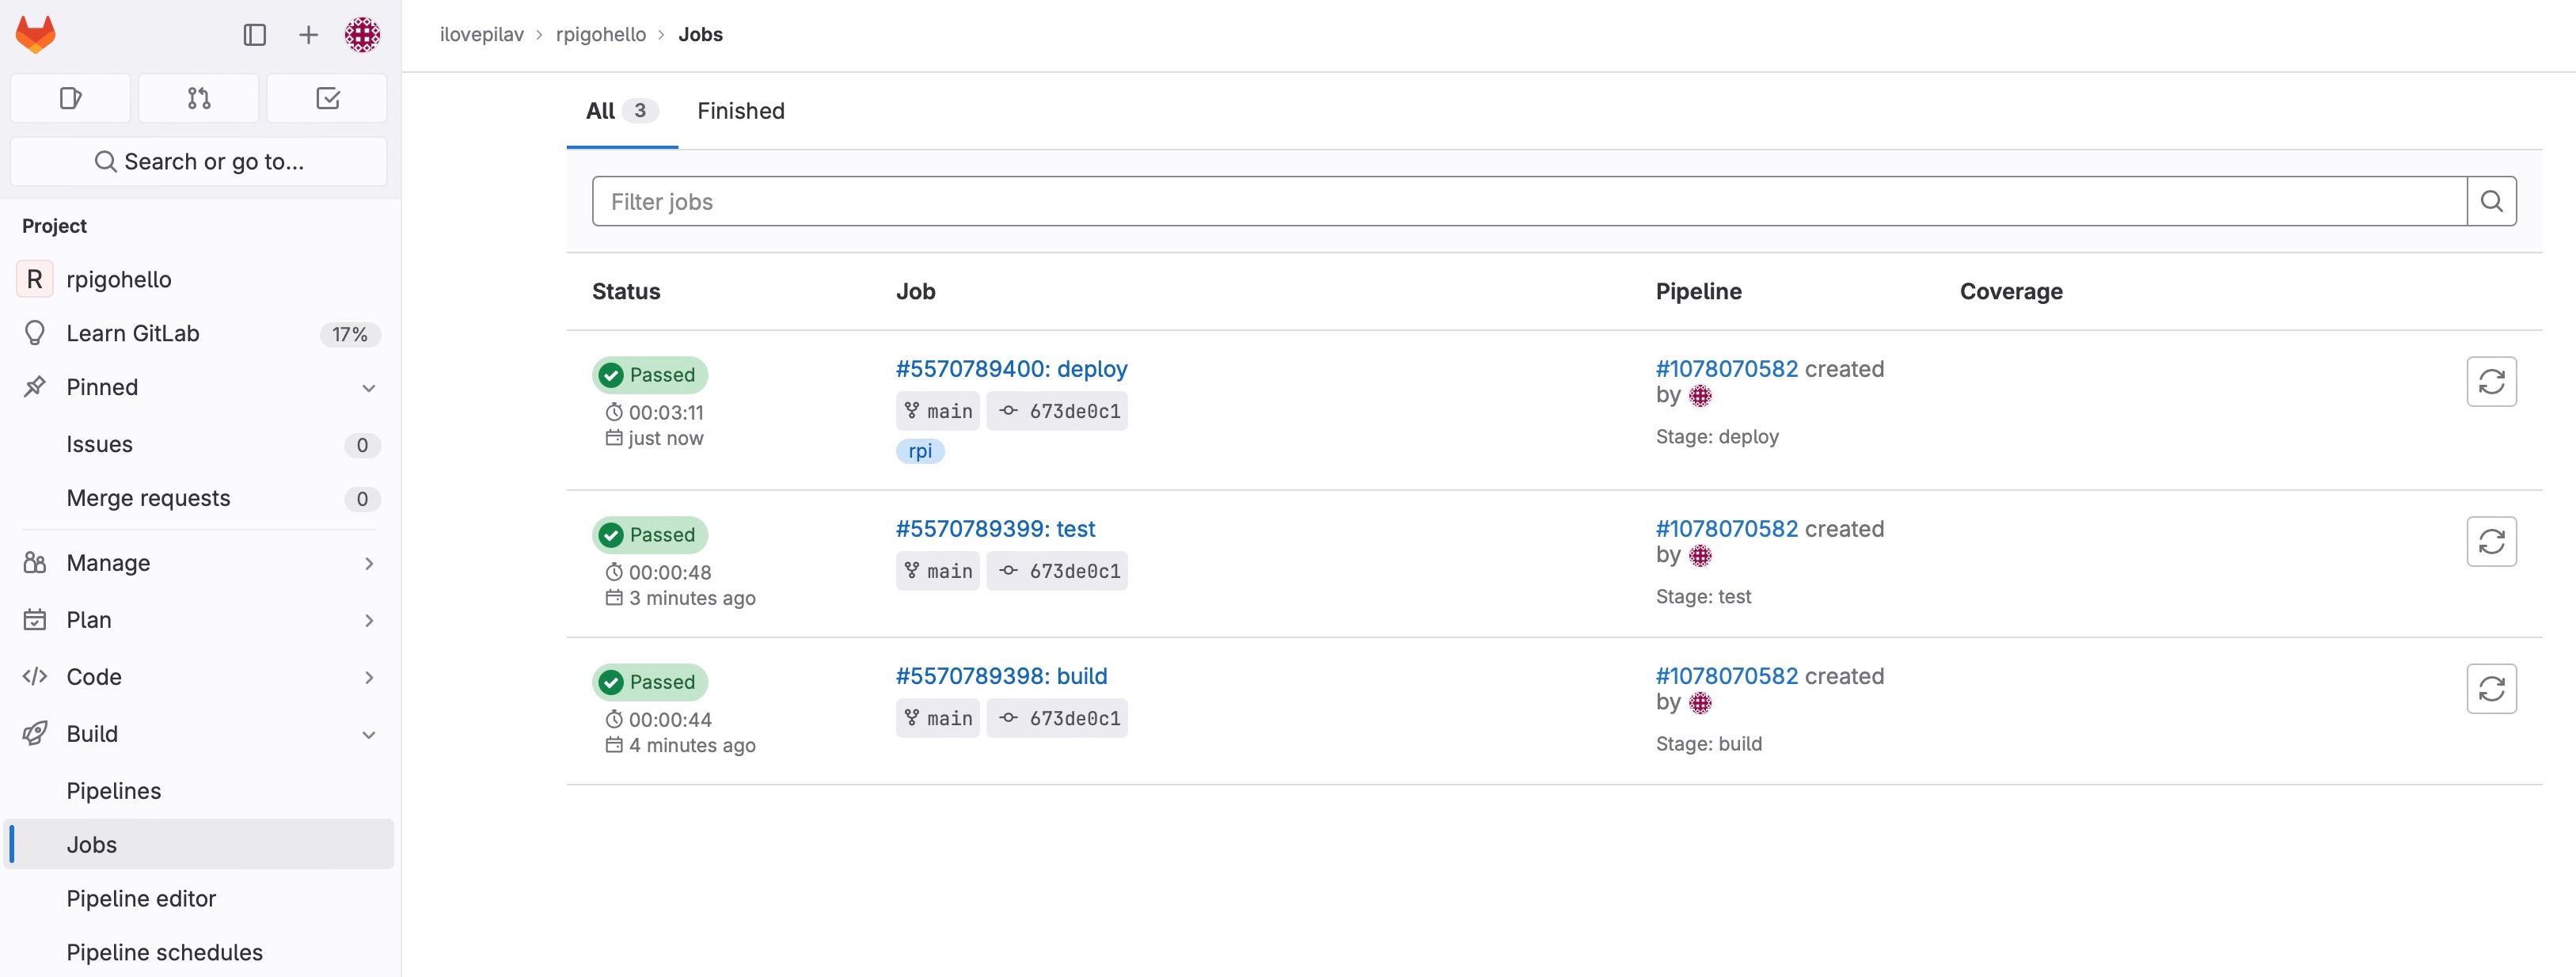
Let’s confirm it with docker ps
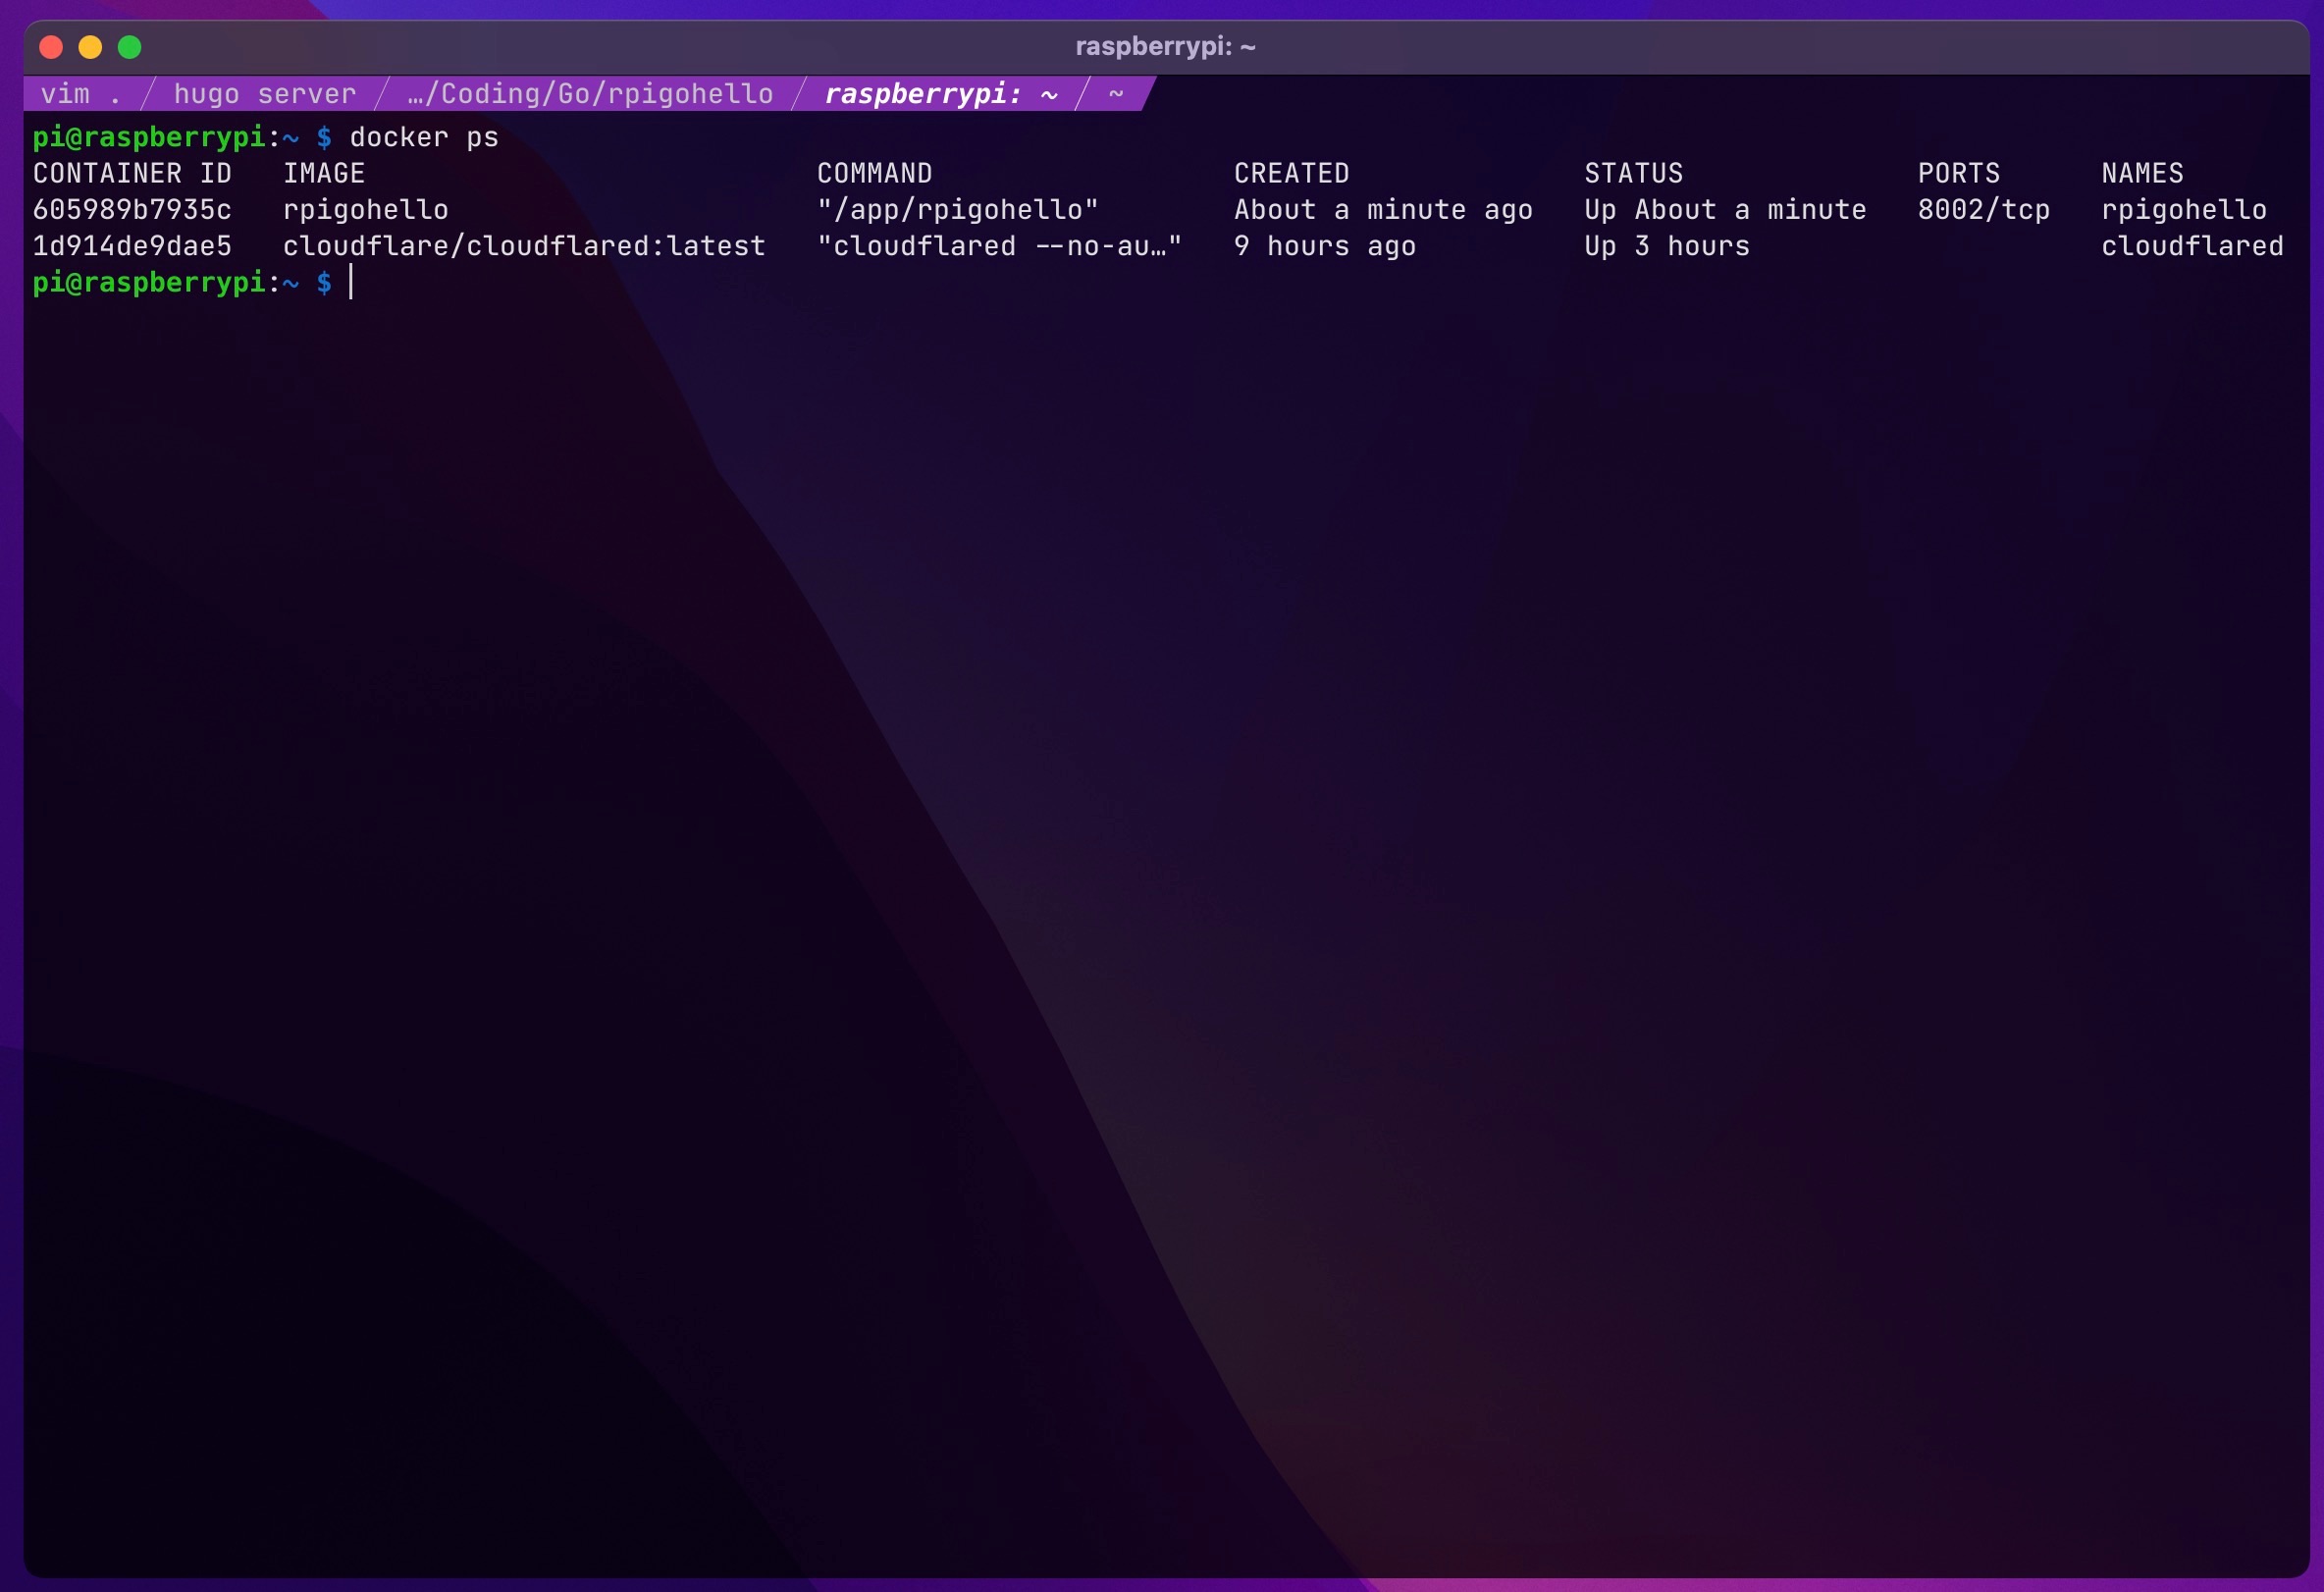
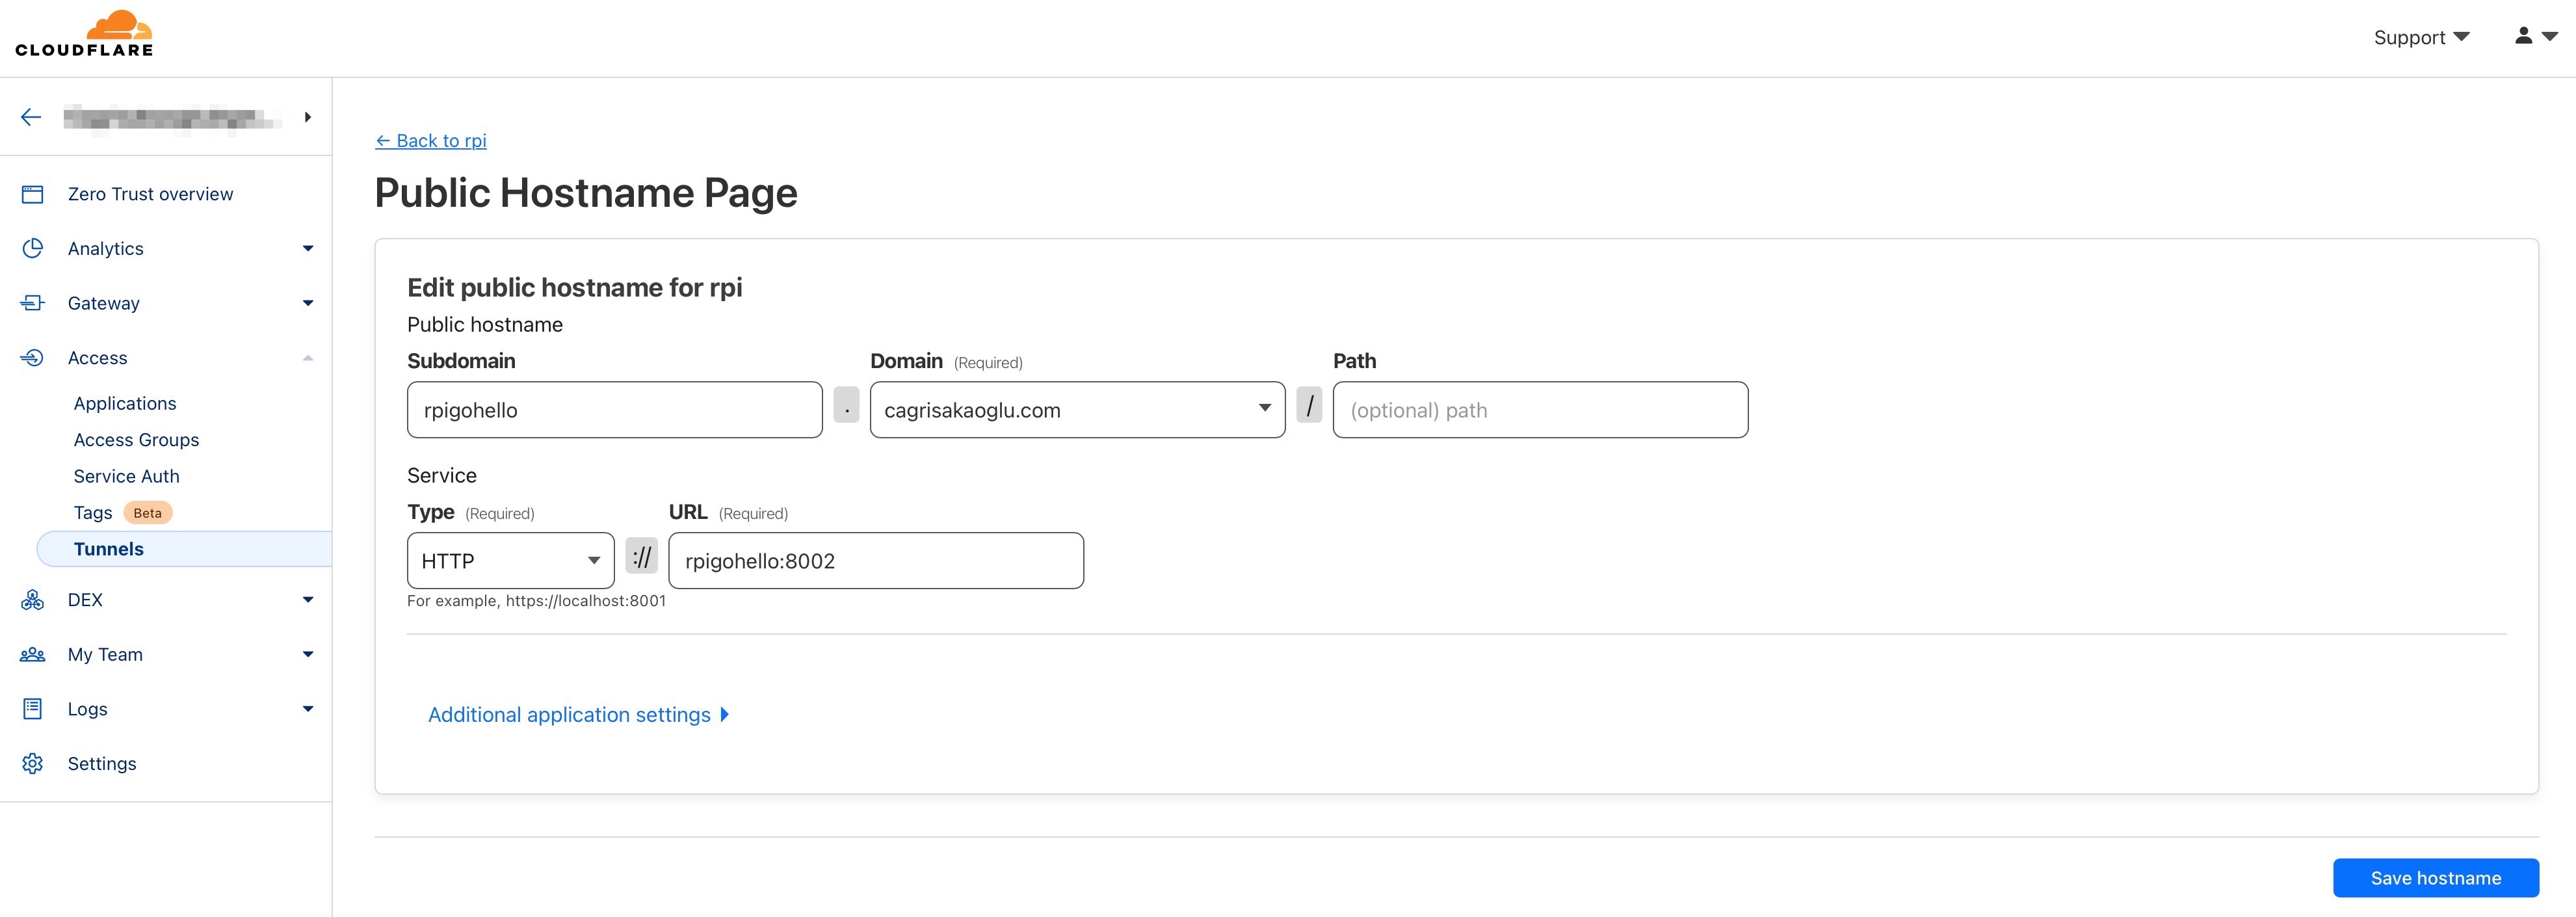
Okay we have one thing left, it is setting new route for our app in cloudflare We used port 8002, and rpigohello for the of our container, let’s create it.
And try to navigate new route.
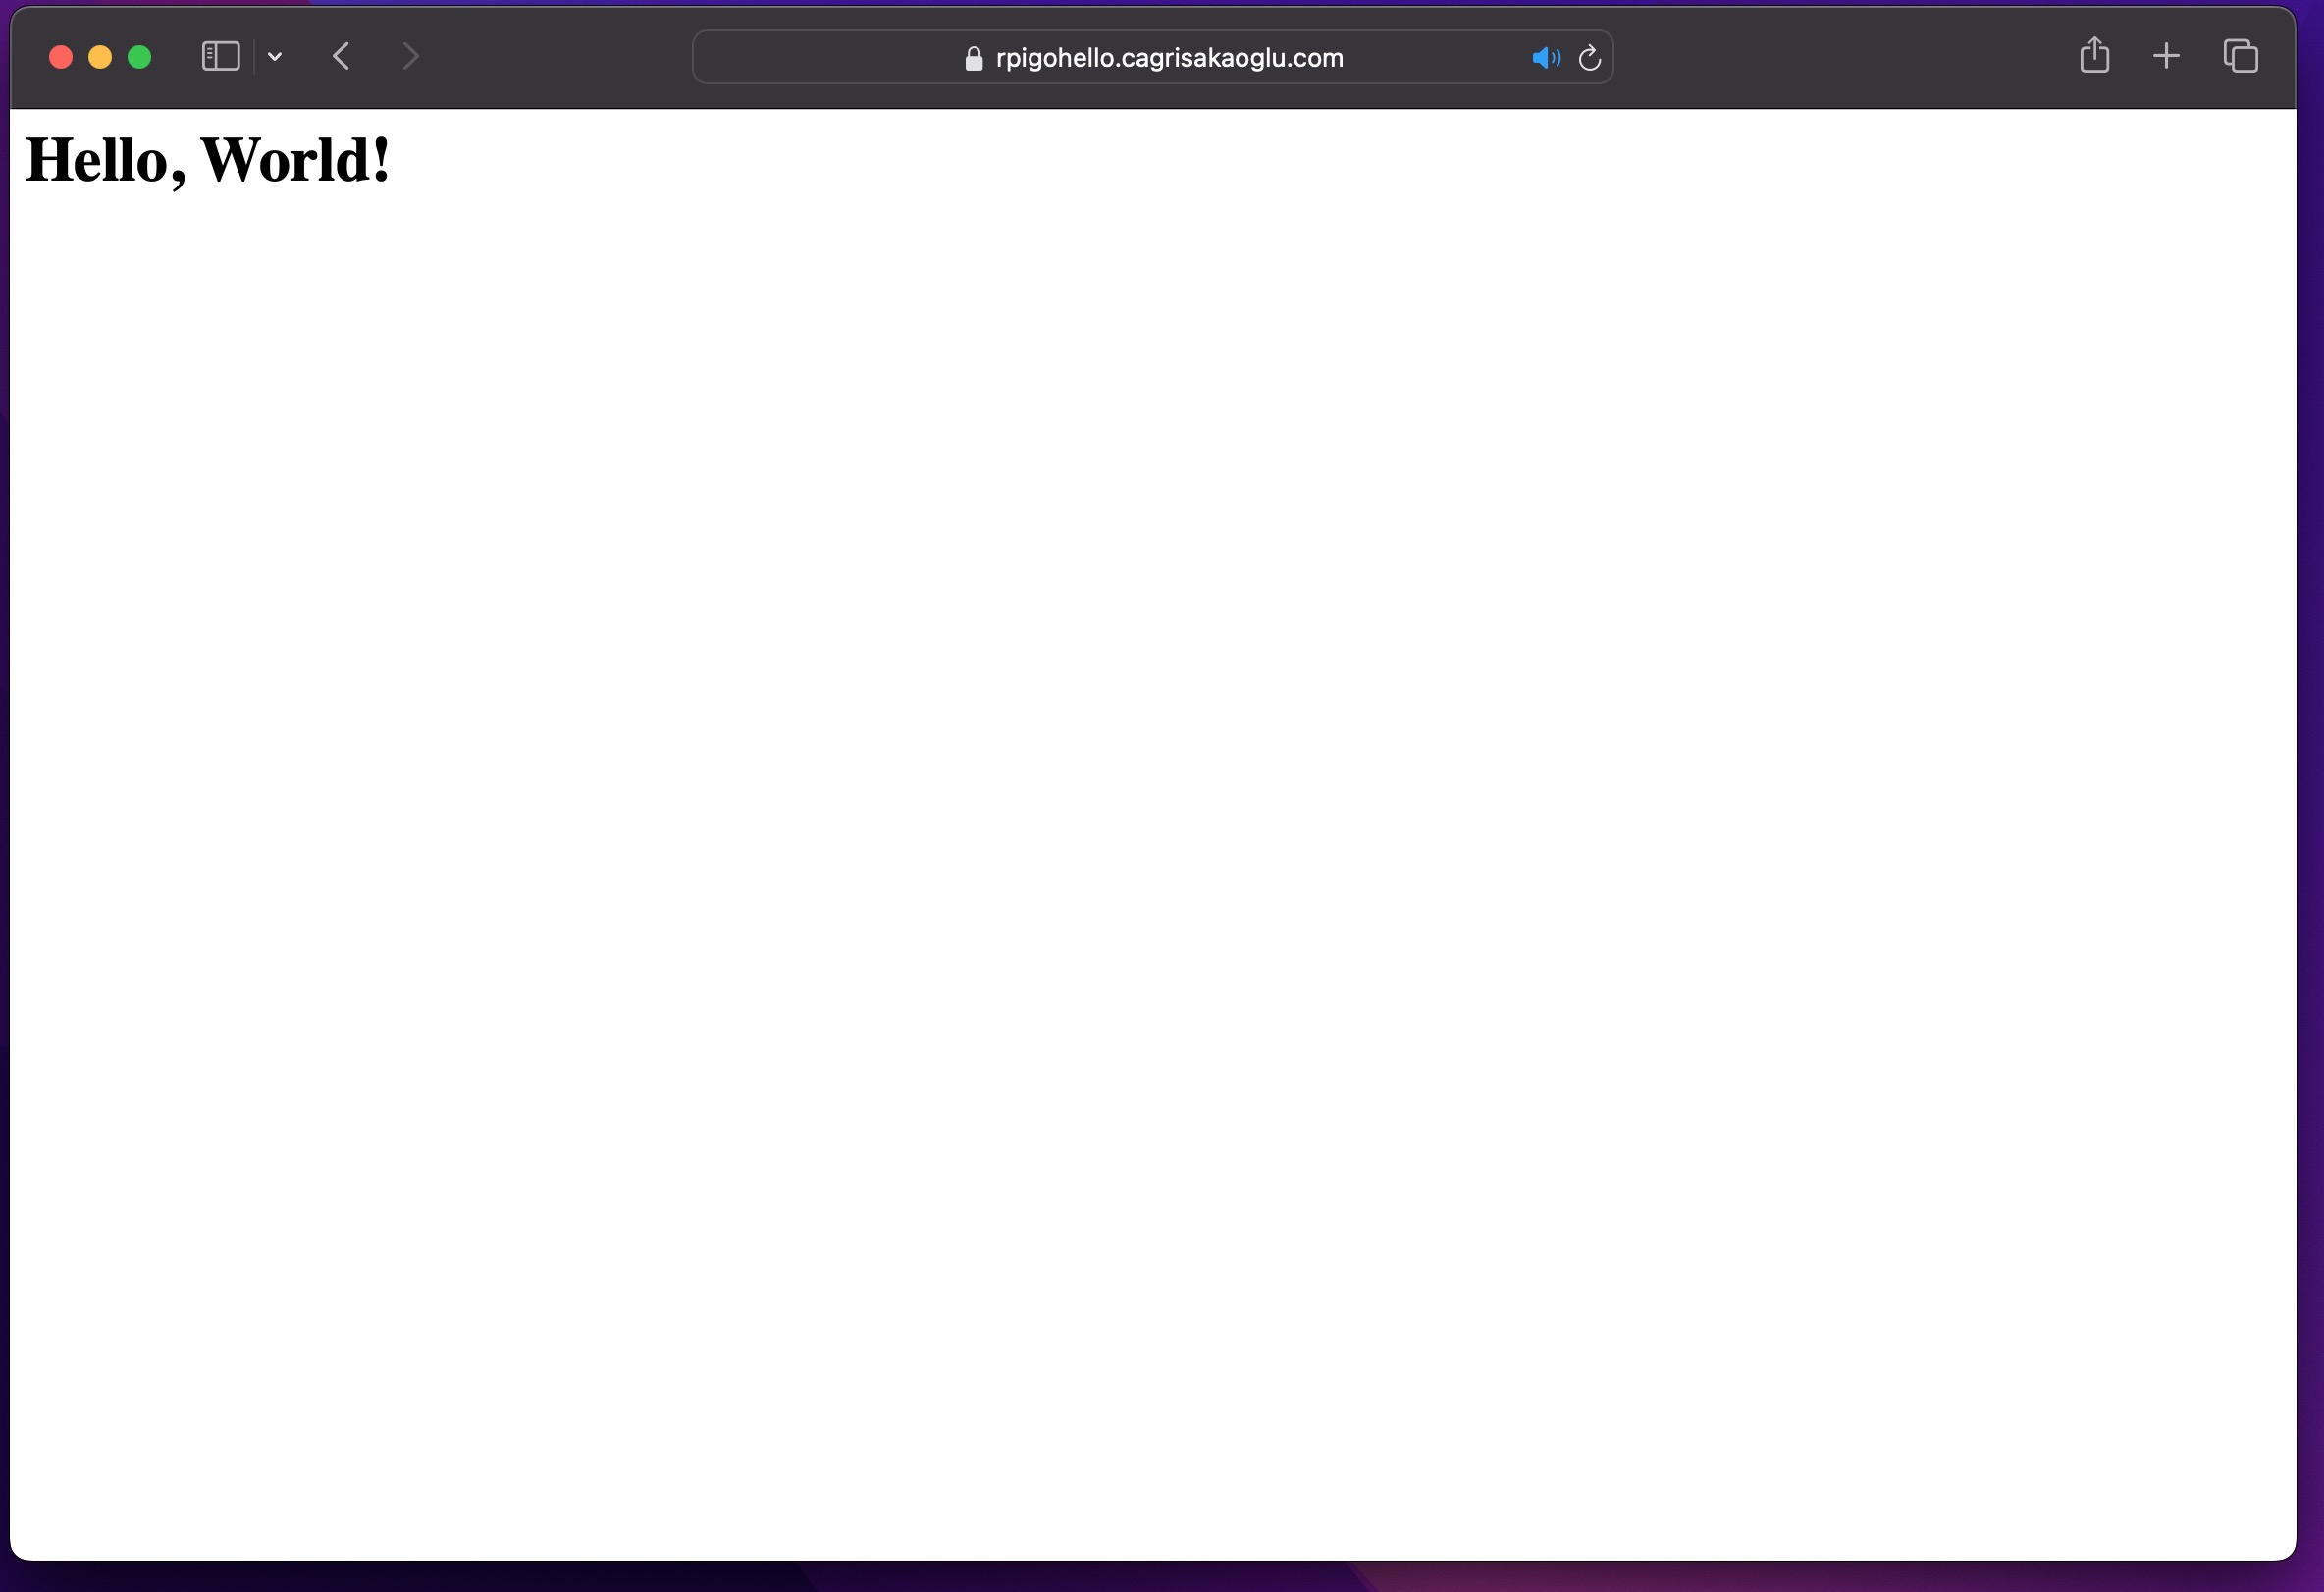
Yeah it worked! 🎉
New commit
Make a small change in the code and push it to github/gitlab
// main.go

package main

import (
	"fmt"
	"net/http"
)

func main() {
	http.HandleFunc("/", HelloServer)
	http.ListenAndServe(":8002", nil)
}

func HelloServer(w http.ResponseWriter, r *http.Request) {
	fmt.Fprint(w, "<h1>RPI says Hello!</h1>")
}
Pipeline triggered and finished
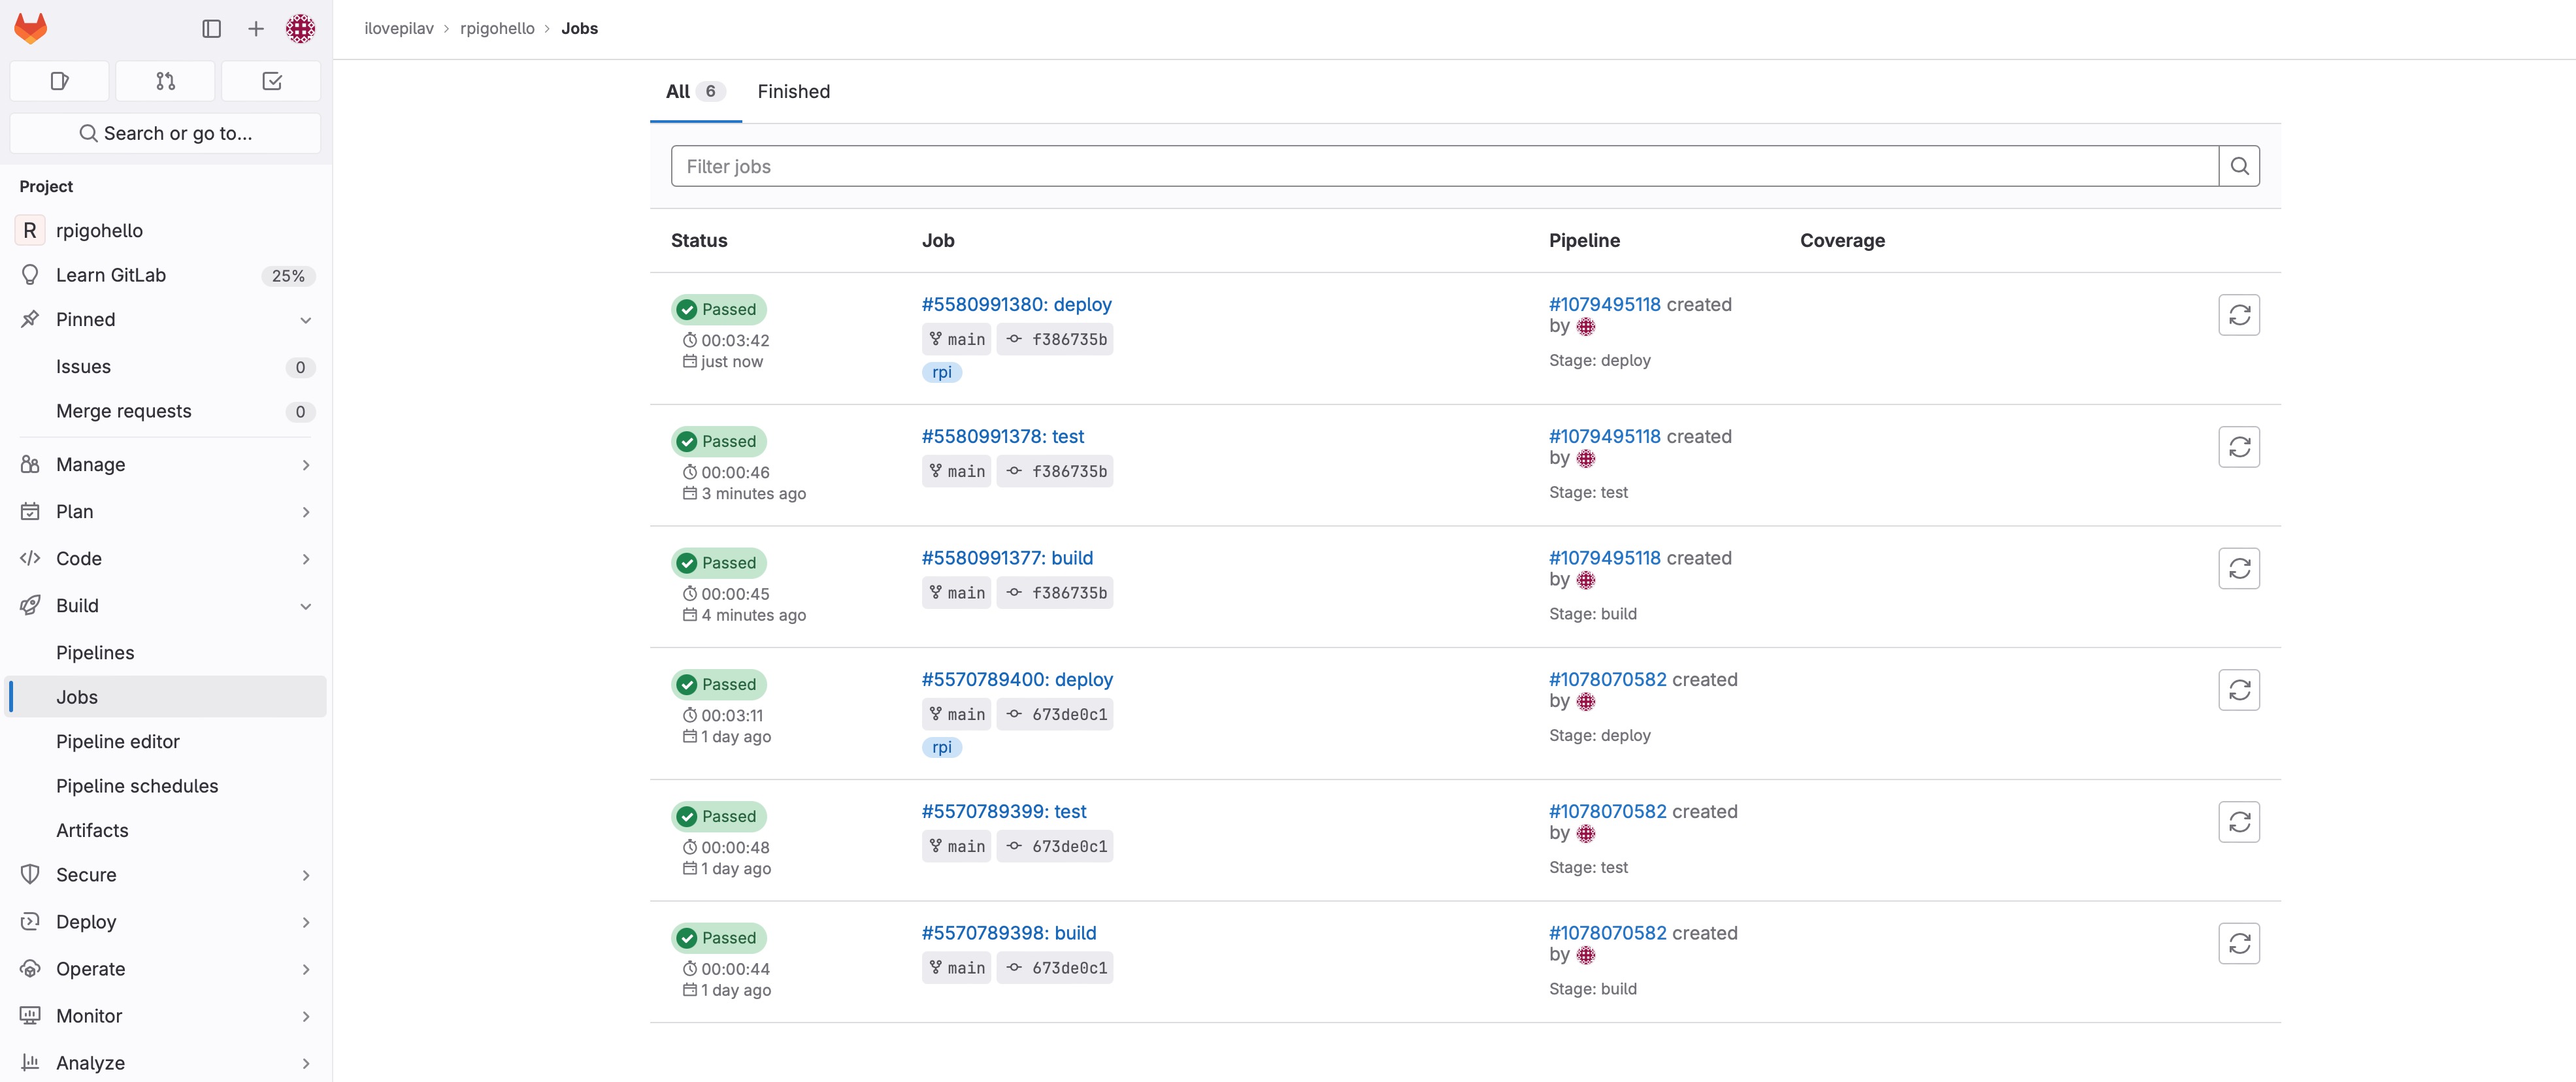
Let’s check the website
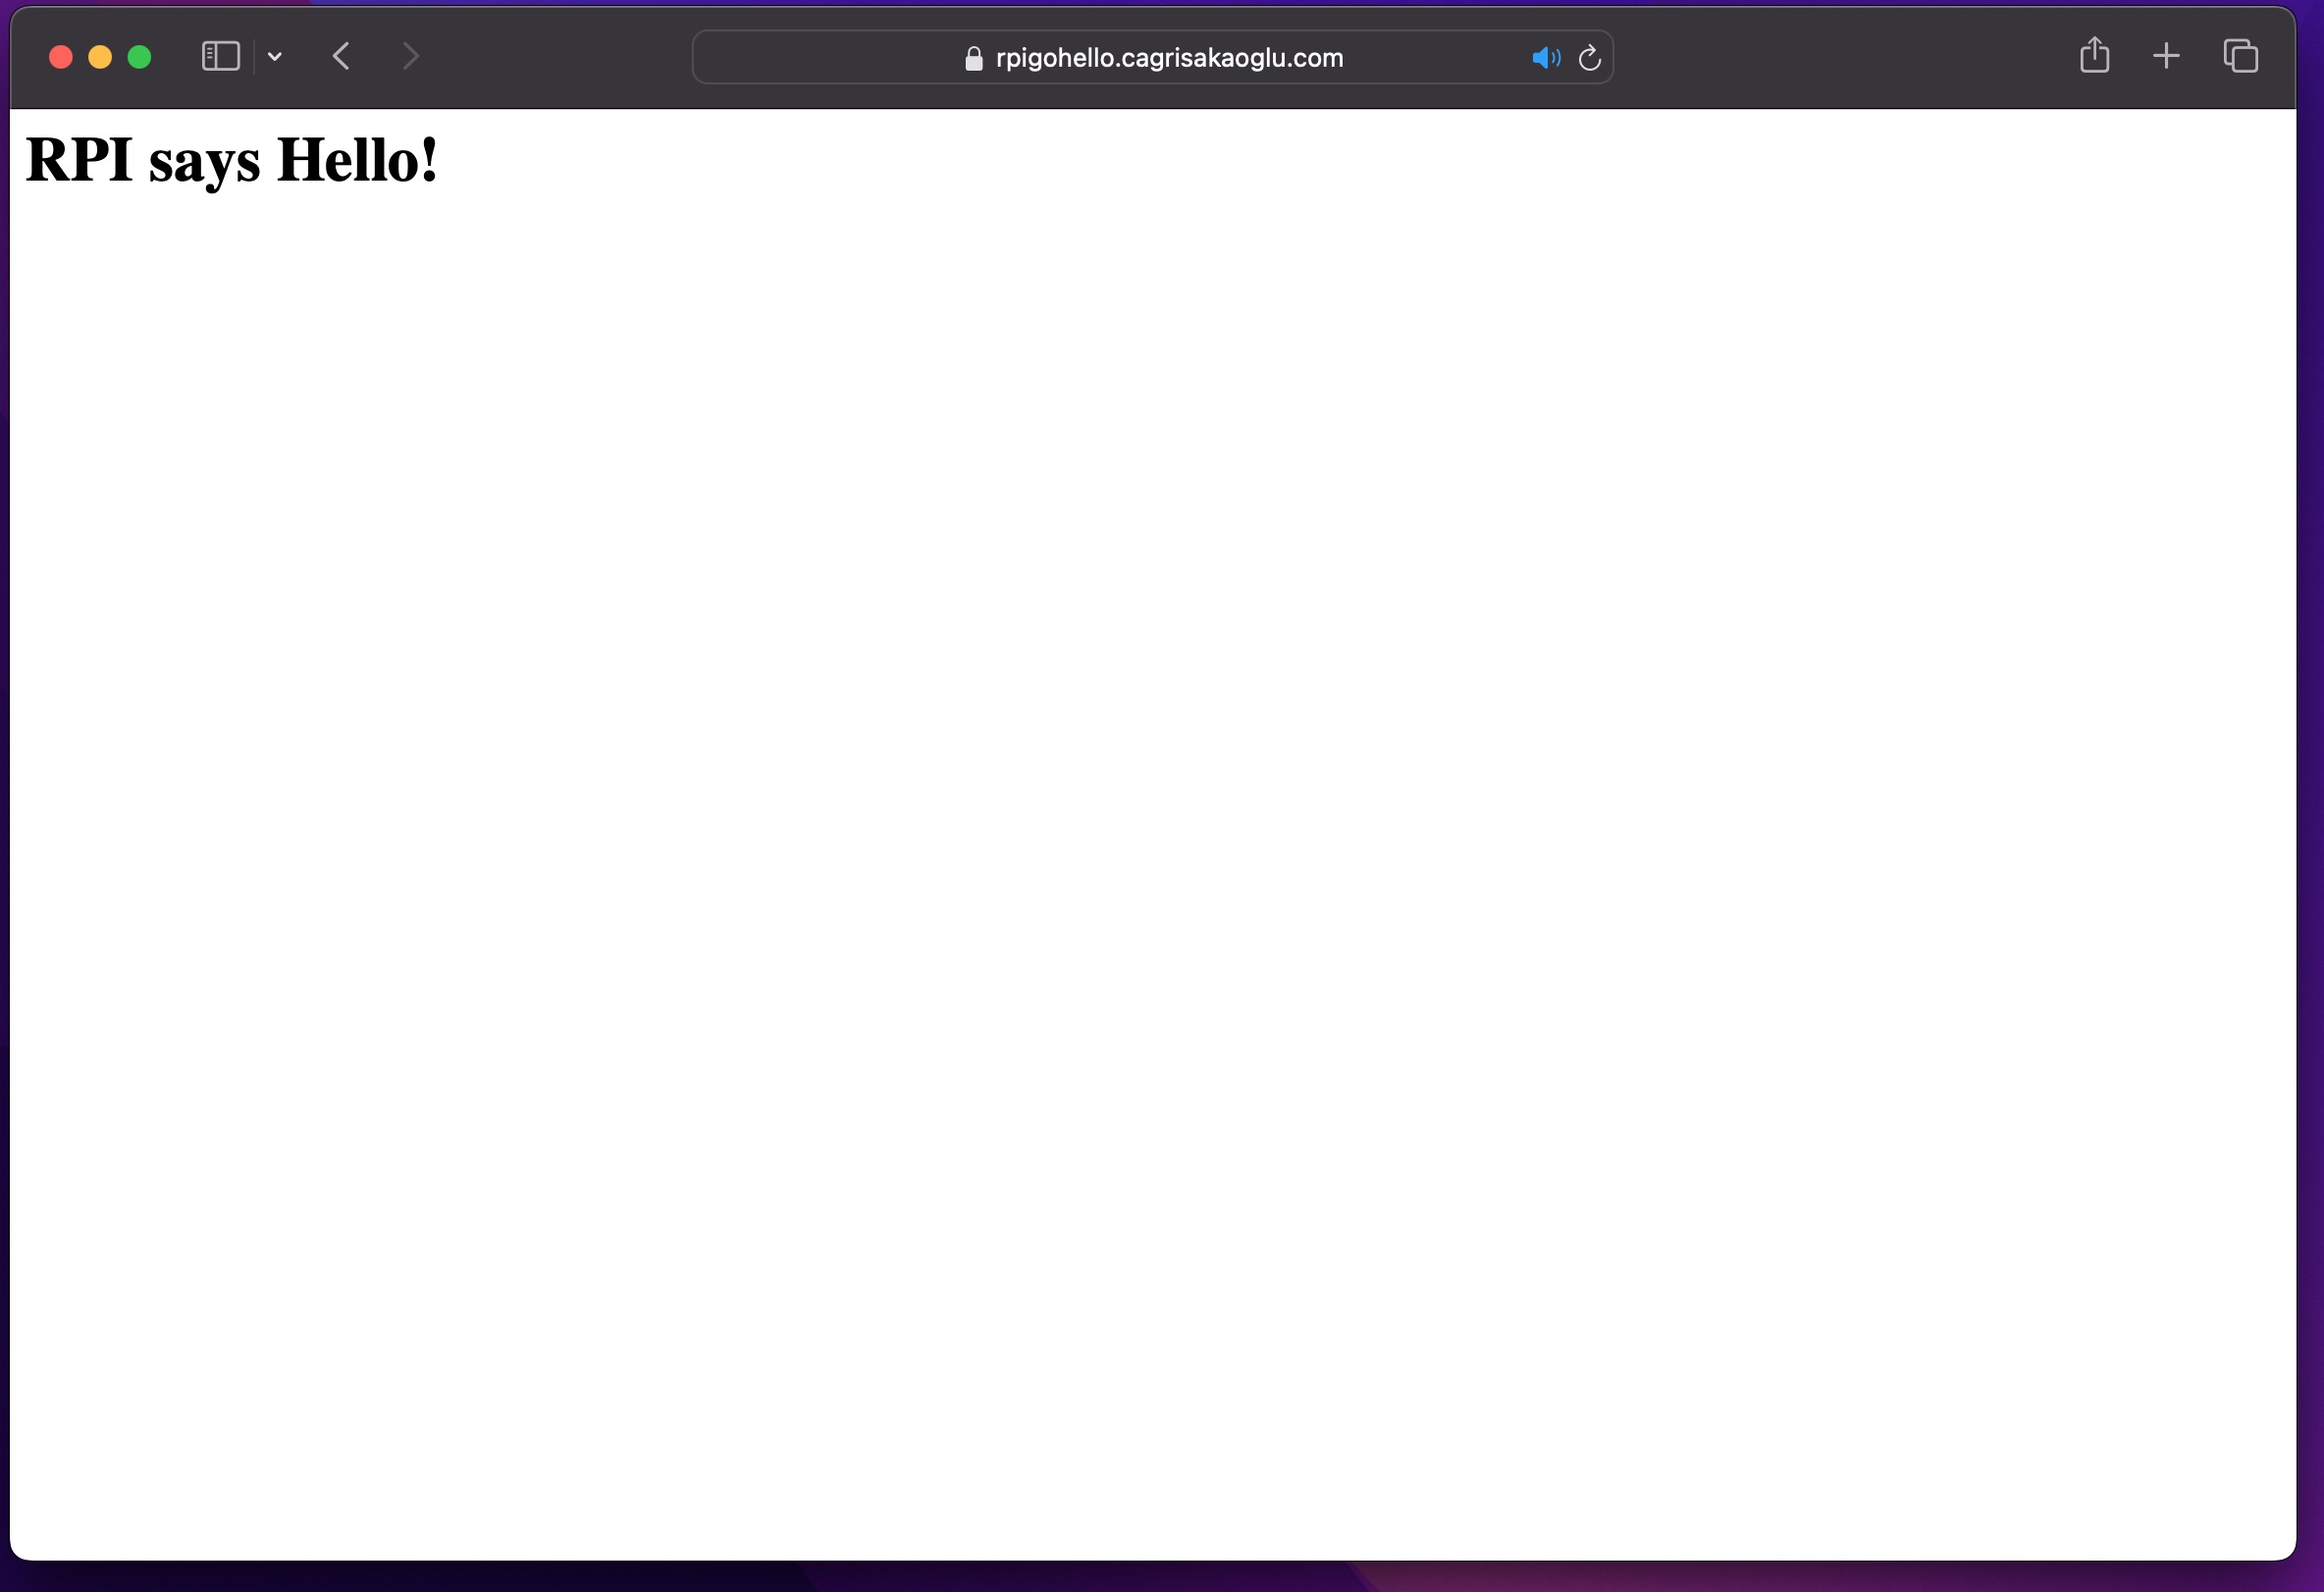
Yes, it updated. 🥳
Final words
Thank you reading this far. You can configure your pipelines as you wish, sky is the limit here. I hope this blog post will give you a brief understanding the concept and an idea of a starting point for your self-hosting journey. You can find the repos below.
Happy debugging 👻 and stay hard!